Clone repository
Before you continue, you must clone the mips-examples repository.
Use the git command
From the terminal, navigate to a directory where you want the cloned directory
to be created and execute the following command.
git clone https://github.com/os-assignments/mips-examples.git
Now you should see something similar to this written to the terminal.
Cloning into 'mips-examples'...
remote: Counting objects: 9, done.
remote: Compressing objects: 100% (7/7), done.
remote: Total 9 (delta 0), reused 9 (delta 0), pack-reused 0
Unpacking objects: 100% (9/9), done.
Checking connectivity... done.
Use the tree command
To get an overview of the cloned repository, use the tree command.
Now you should see a tree view of all files and directories in the
mips-examples directory.
mips-examples/
├── README.md
├── arrays.s
├── basics.s
├── hello.s
└── jump_and_branches.s

0 directories, 5 files
You are now ready to continue with the Introduction to MARS tutorial.
Introduction to Mars
This is a short guide on how to launch and use Mars.
Mars is installed both on the department Windows system and the department Linux system.
Mars will run on any system (including Windows) as long as you
have Java installed. If you prefer, you may download
and install Mars on your private computer.
Run Mars from the department Windows system
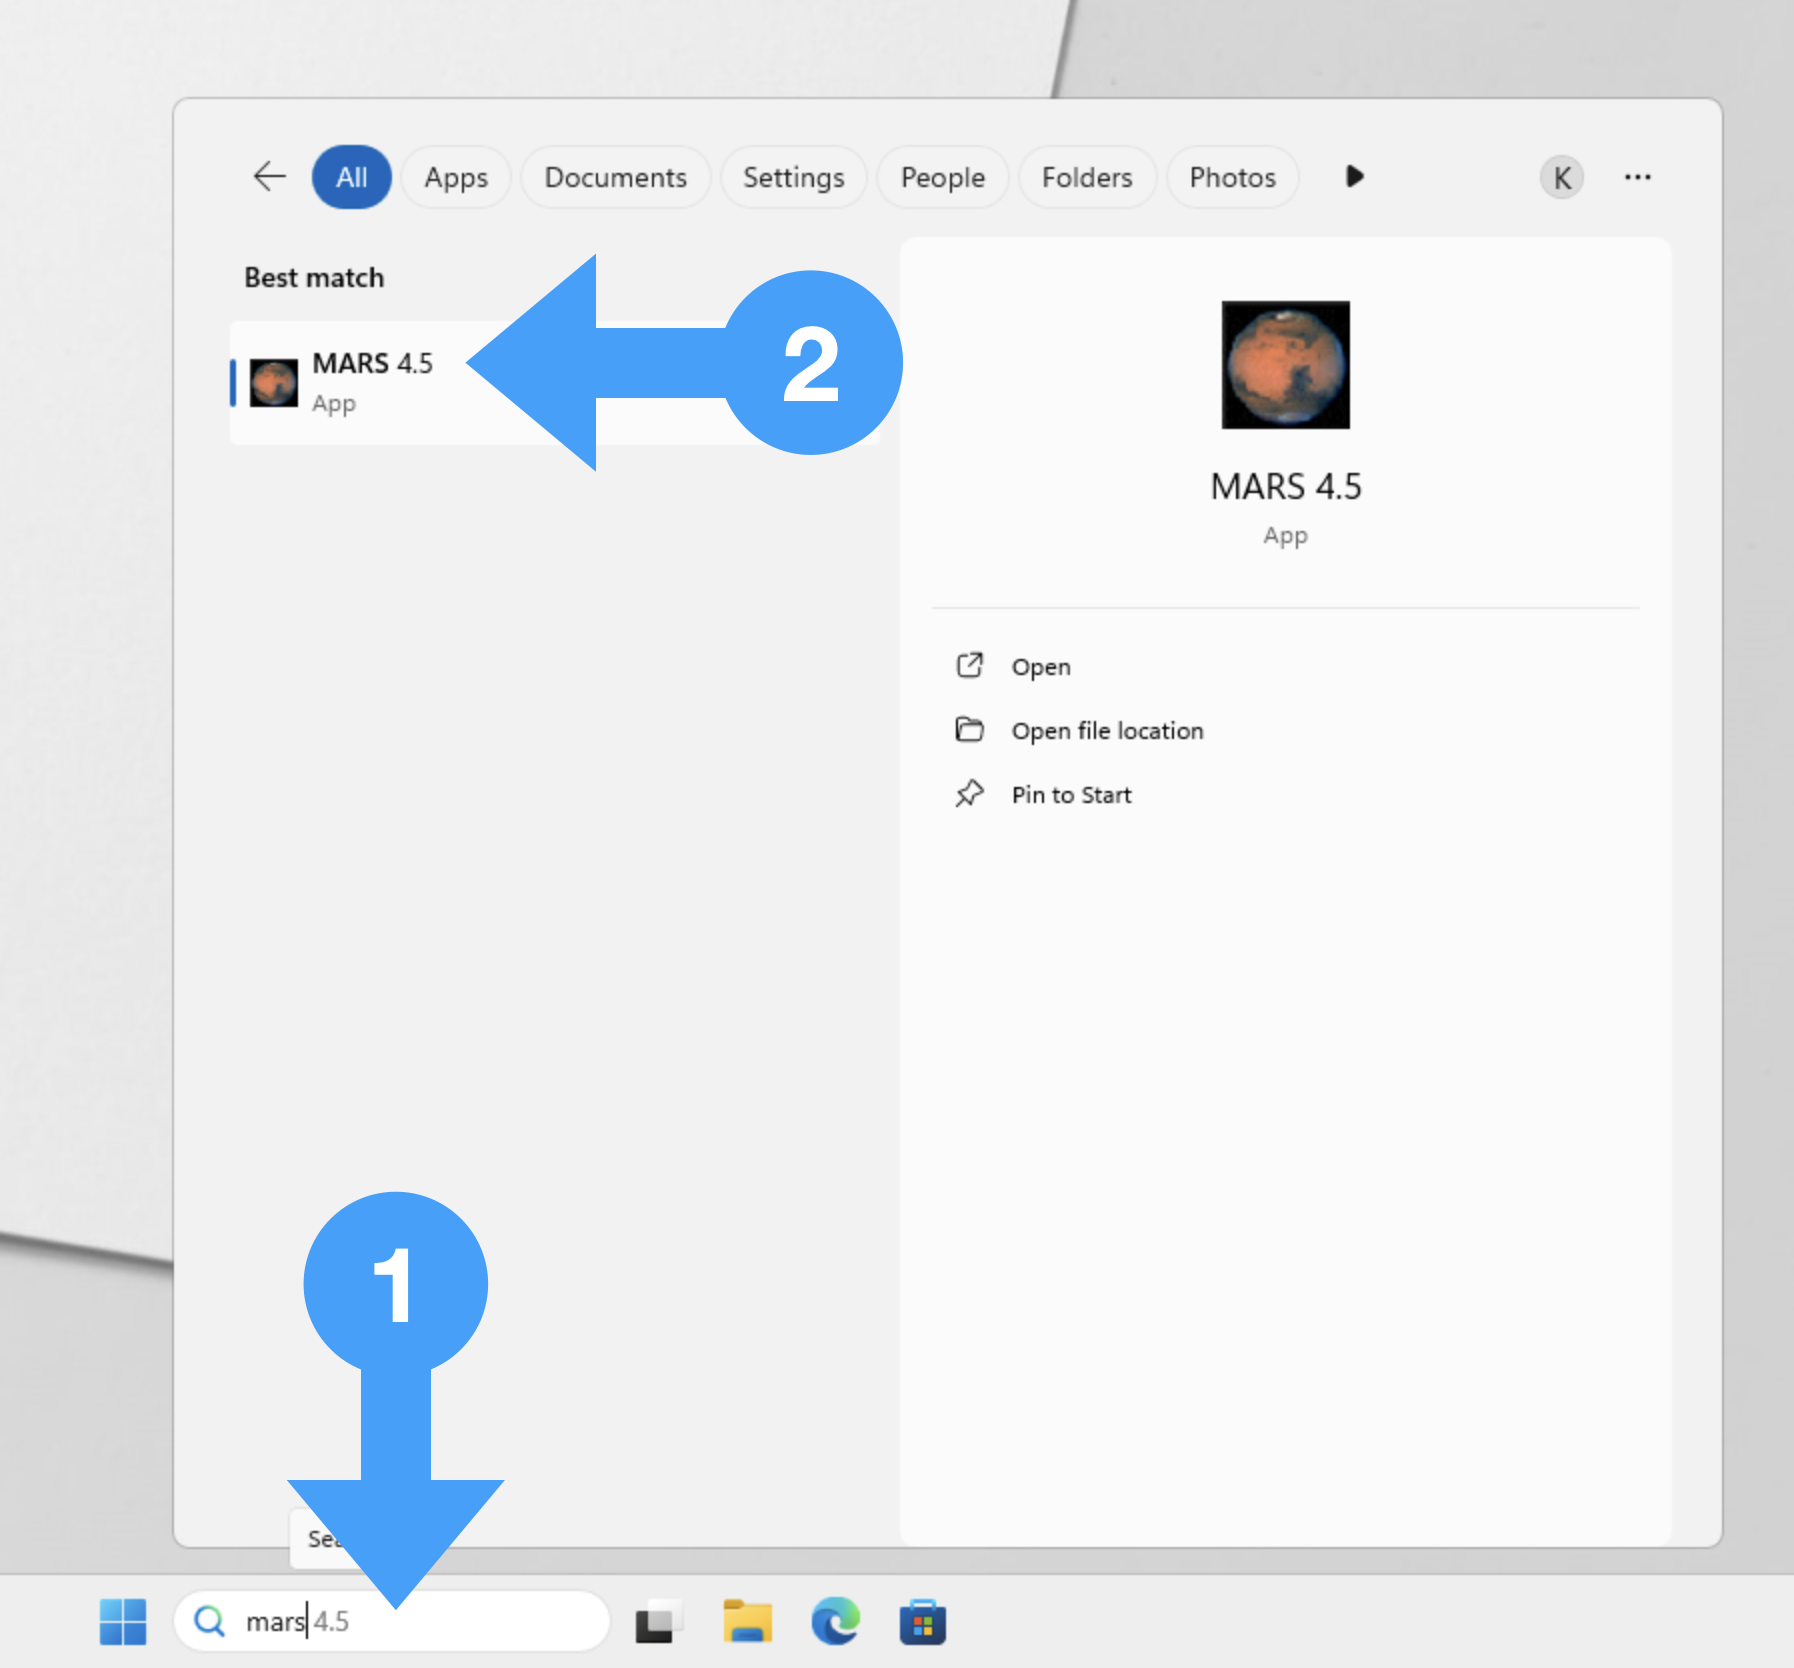
Log in in to Windows. Search for Mars in the taskbar (1) and click on Mars (2).

Run Mars from the department Linux system
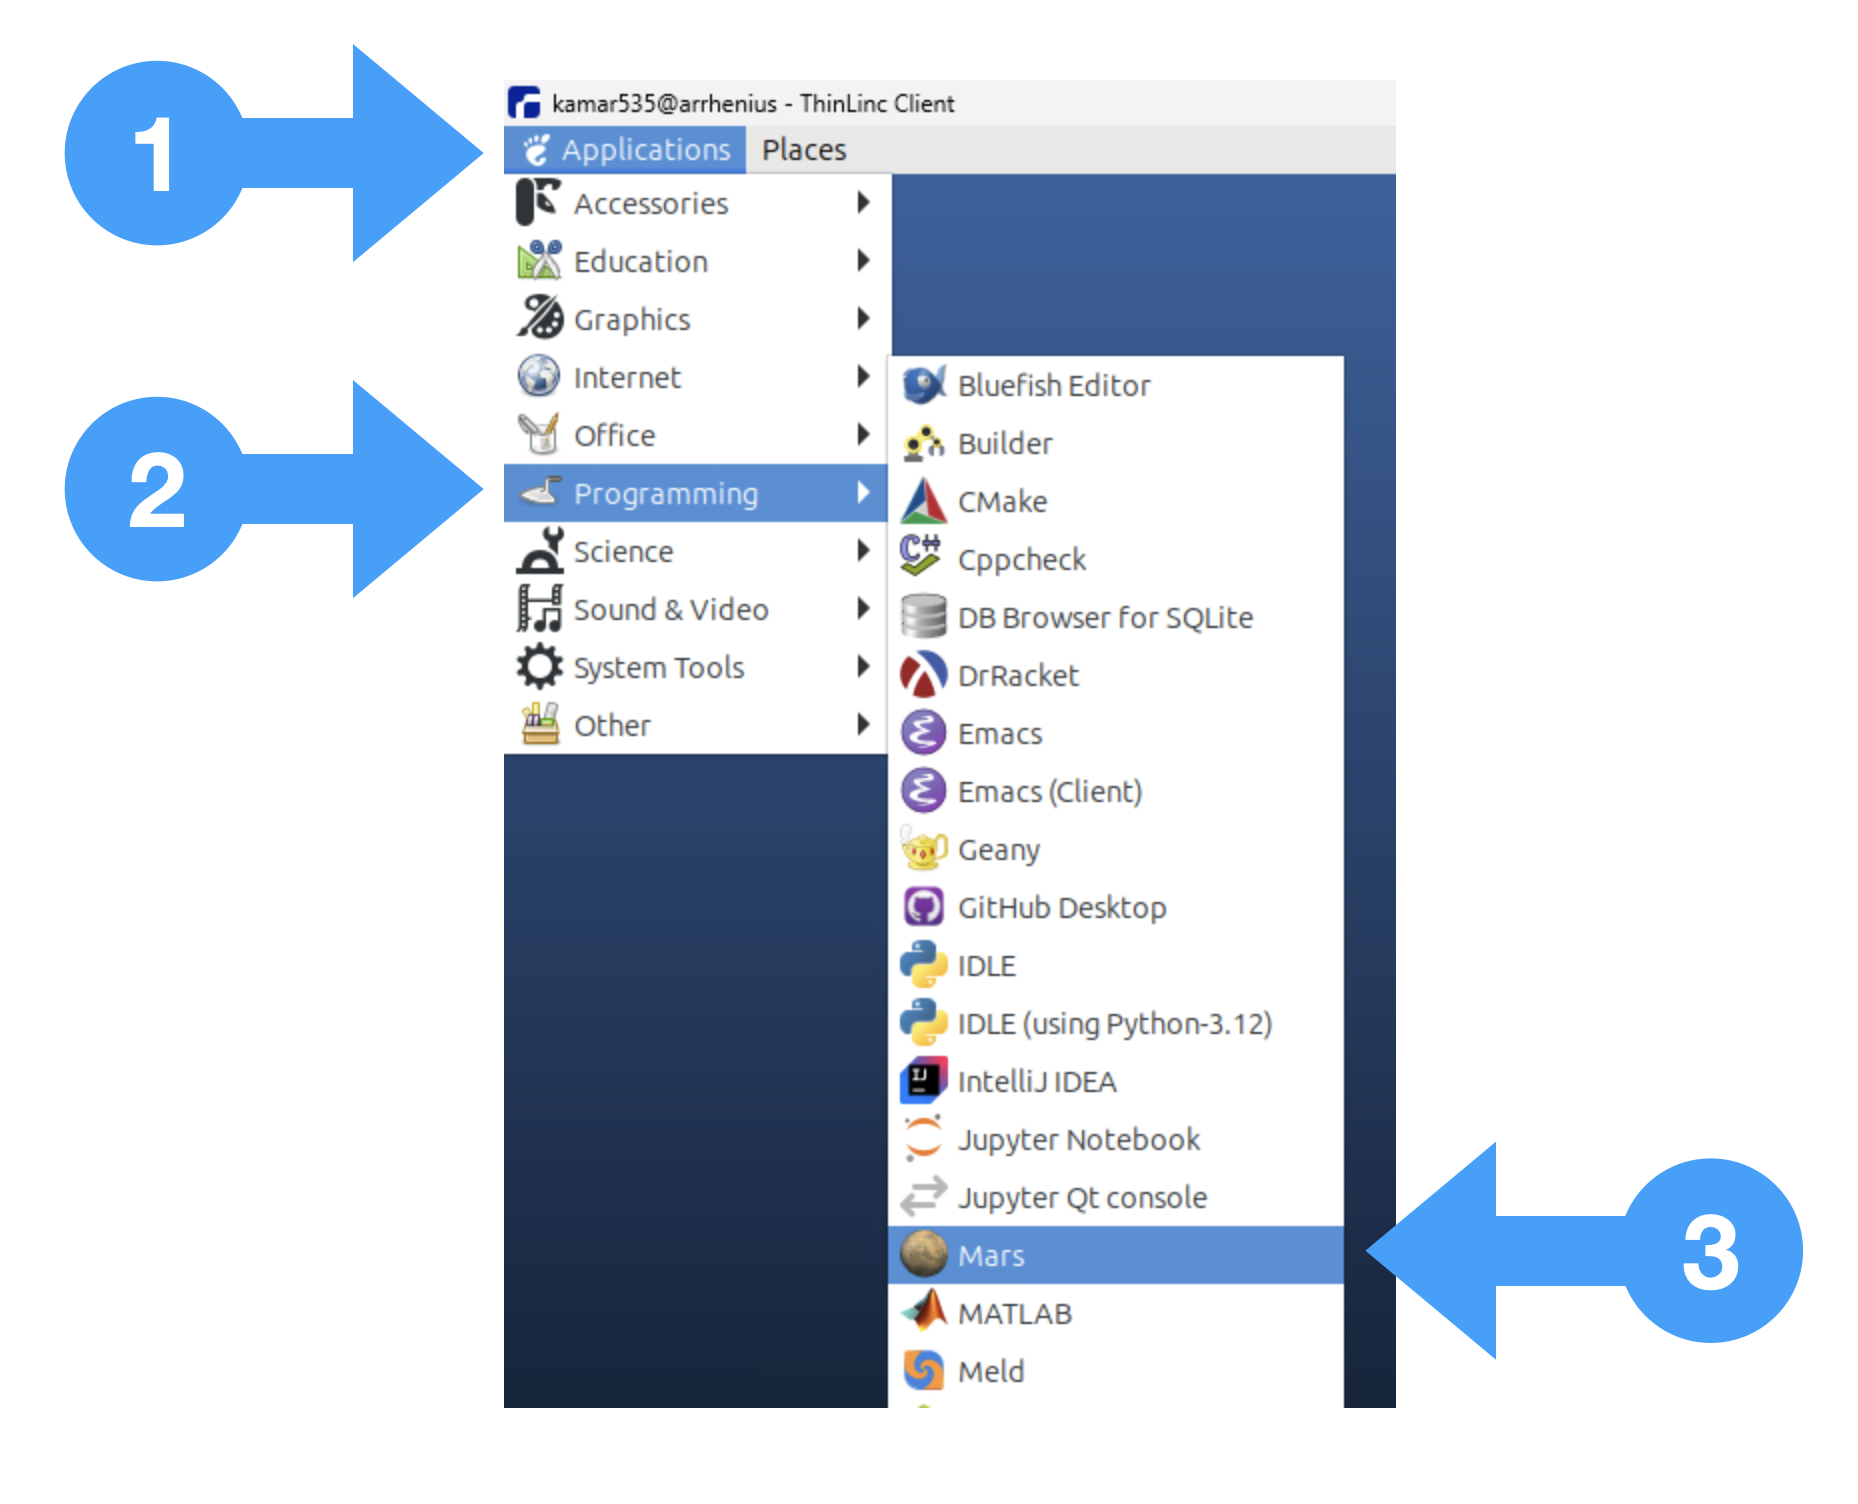
Log in to the department Linux system. From the Applications menu (1), select Programming (2) and then Mars (3).

Hello Mars
When you successfully start Mars you should see something similar to this.
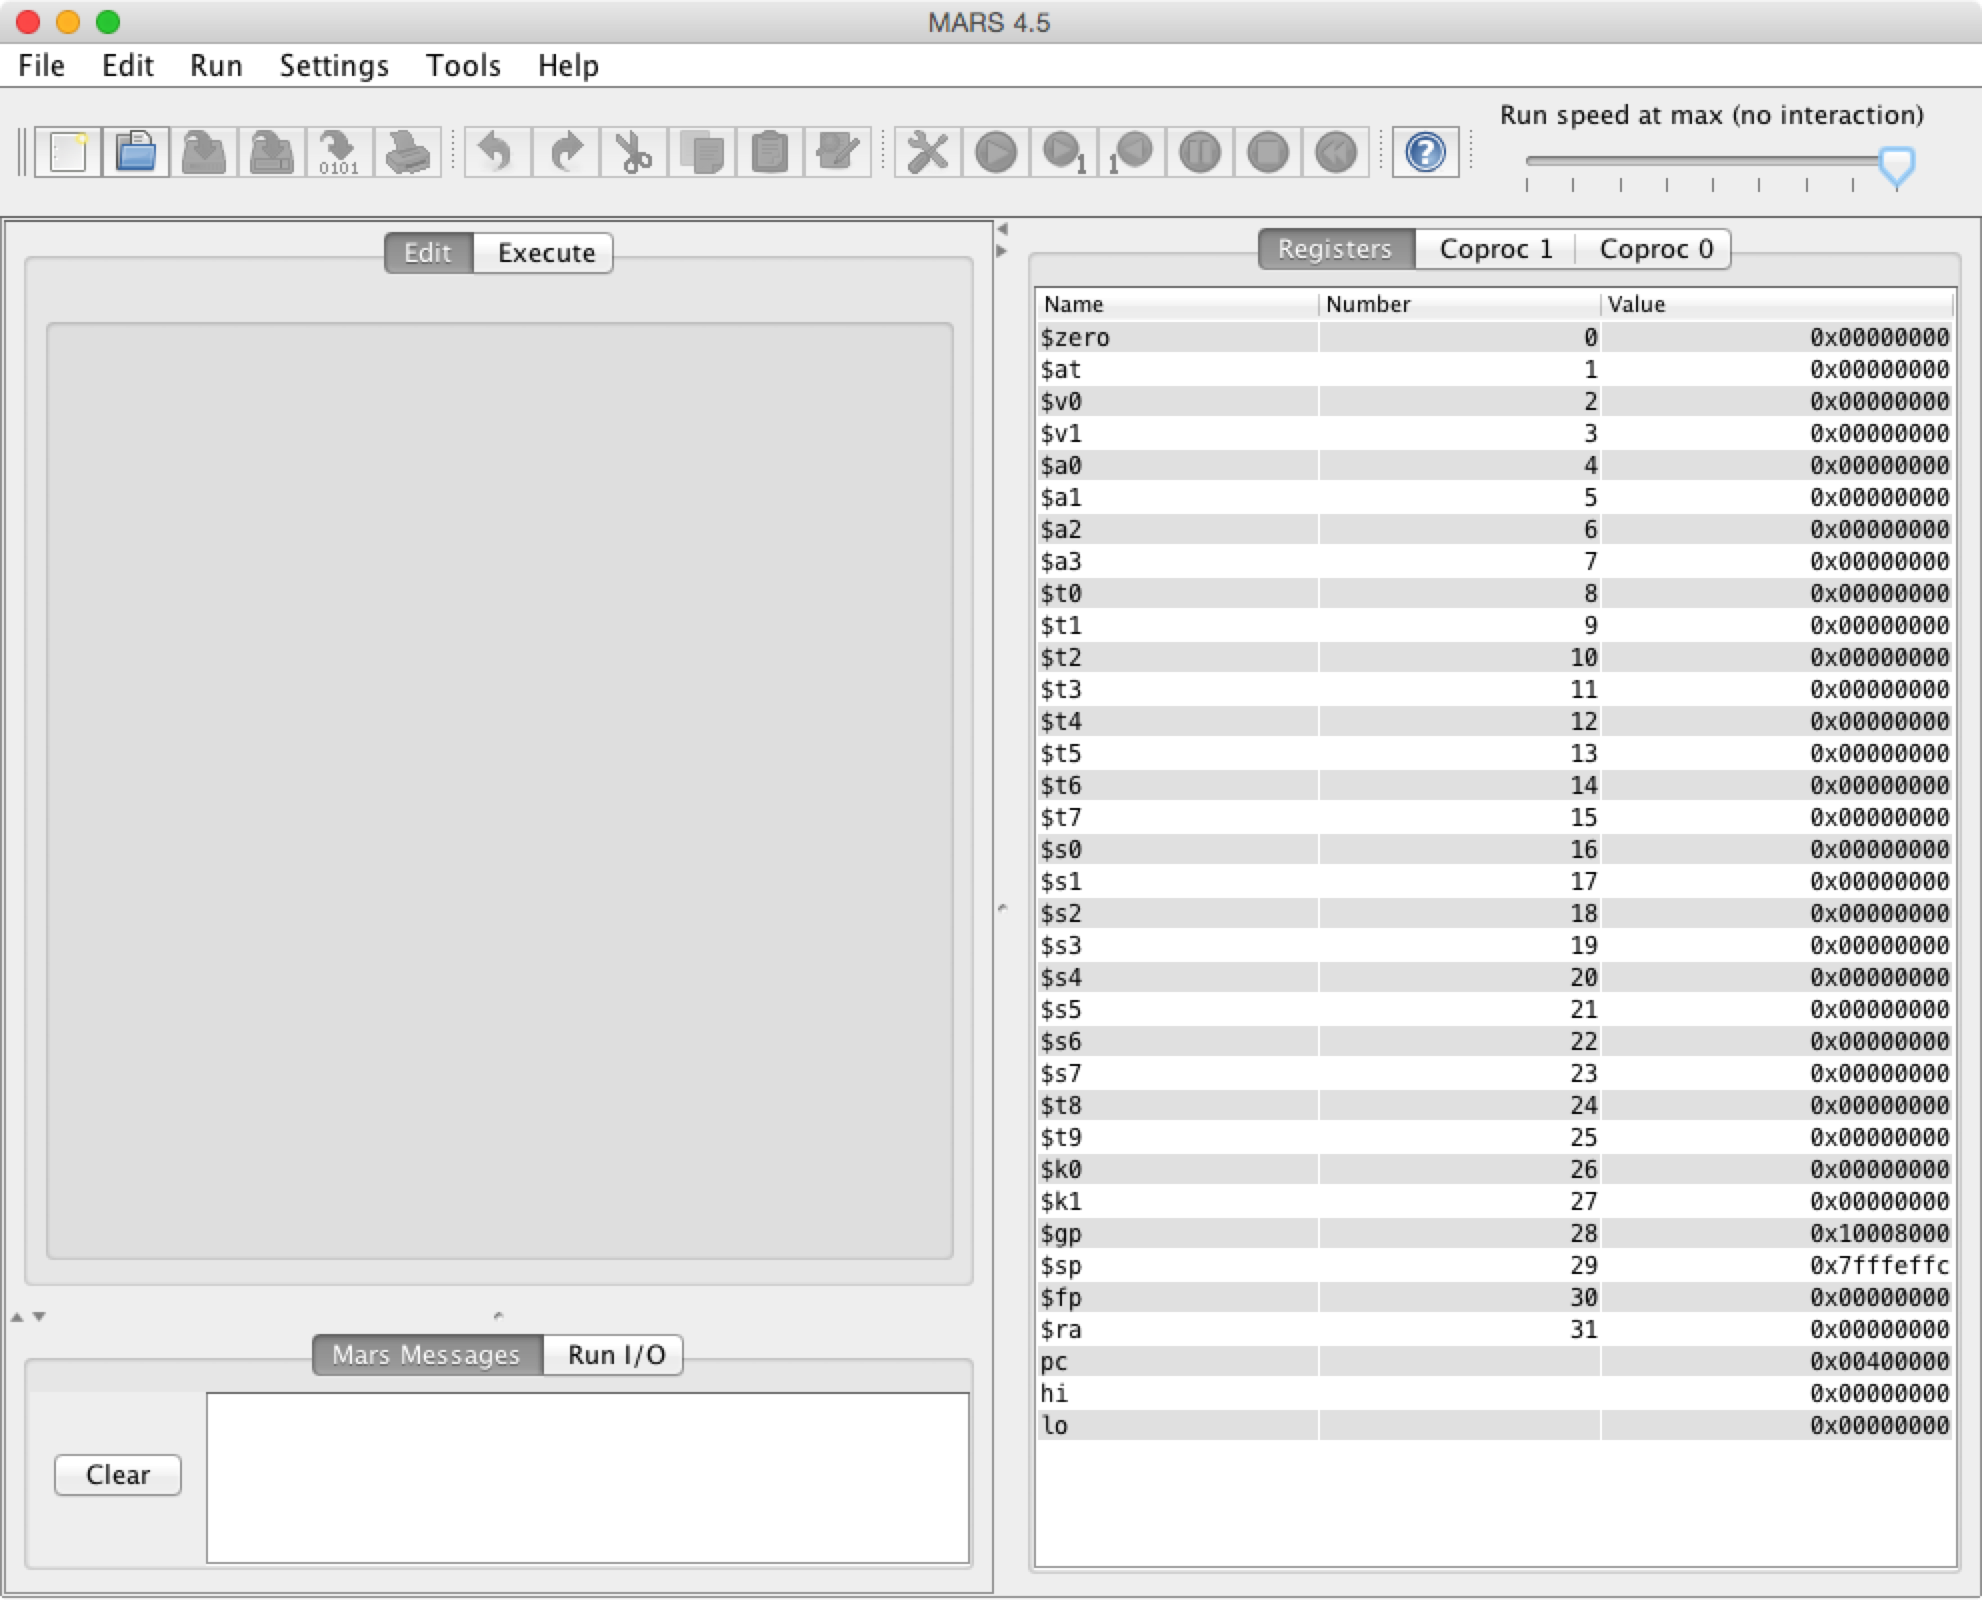

IDE overview
Mars is an Integrated Development Environment (IDE) for Mips Assembly
Language Programming.
At the top you find the top level menu: File, Edit, Run, Settings, Tools and
Help.
Under the top level menu a collection of icons show some of the most commonly
used tools and operations. The most important of these controls are described in
the below table.
| Control | Description |
|---|

 | Load a file. |

 | Assemble the program in the Edit tab. |

 | Save the current file. |

 | Run the assembled program to completion (or breakpoint). |

 | Execute a single instruction (single-step). |

 | Undo the last instruction (single-step backwards). |

 | Adjust the execution speed. |
Edit and Execute
In the middle left you find two tabs: Edit and Execute.
- The Edit tab will be used to edit assembly code.
- The Execute tab shows the Text Segment (machine instructions) and
Data Segment during execution.
Registers
To the right you find the registers pane. Here the contents of all registers are
shown. There are three register tabs:
- General purpose registers.
- Coprocessor 0 registers.
- Coprocessor 1 registers.
Mars Messages and Run I/O
In the lower left corner there are two tabs: Mars Messages and Run I/O.
The Mars Messages tab is used for displaying assembly or runtime errors and
informational messages. You can click on assembly error messages to highlight
and set focus on the corresponding line of code in the editor.
The Run I/O tab is used at runtime for displaying console output and
entering console input as program execution progresses.
The mips-examples repository
Before you continue you should already have cloned the
mips-examples repository.
Load hello.s into Mars
Among the examples programs in the misp-exmples repository you find hello.s.
Open the file hello.s in the Mars simulator by selecting Open from the File menu.
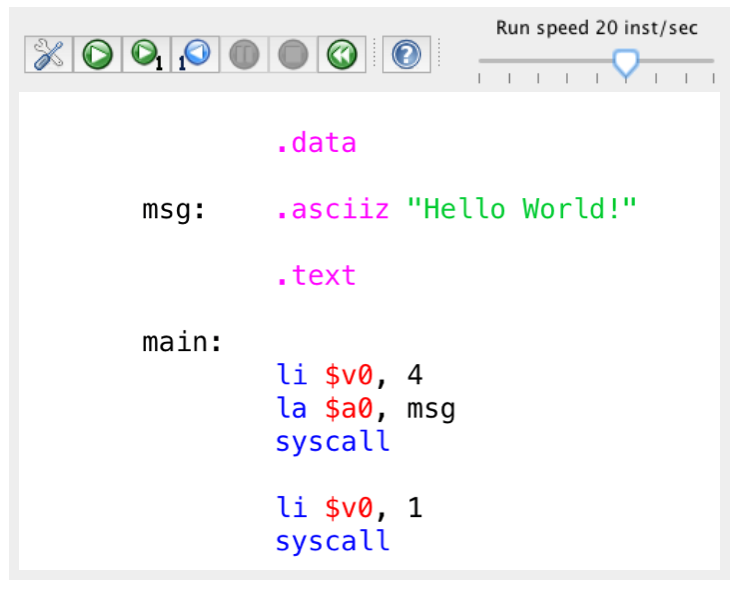
You should now see something similar to this.
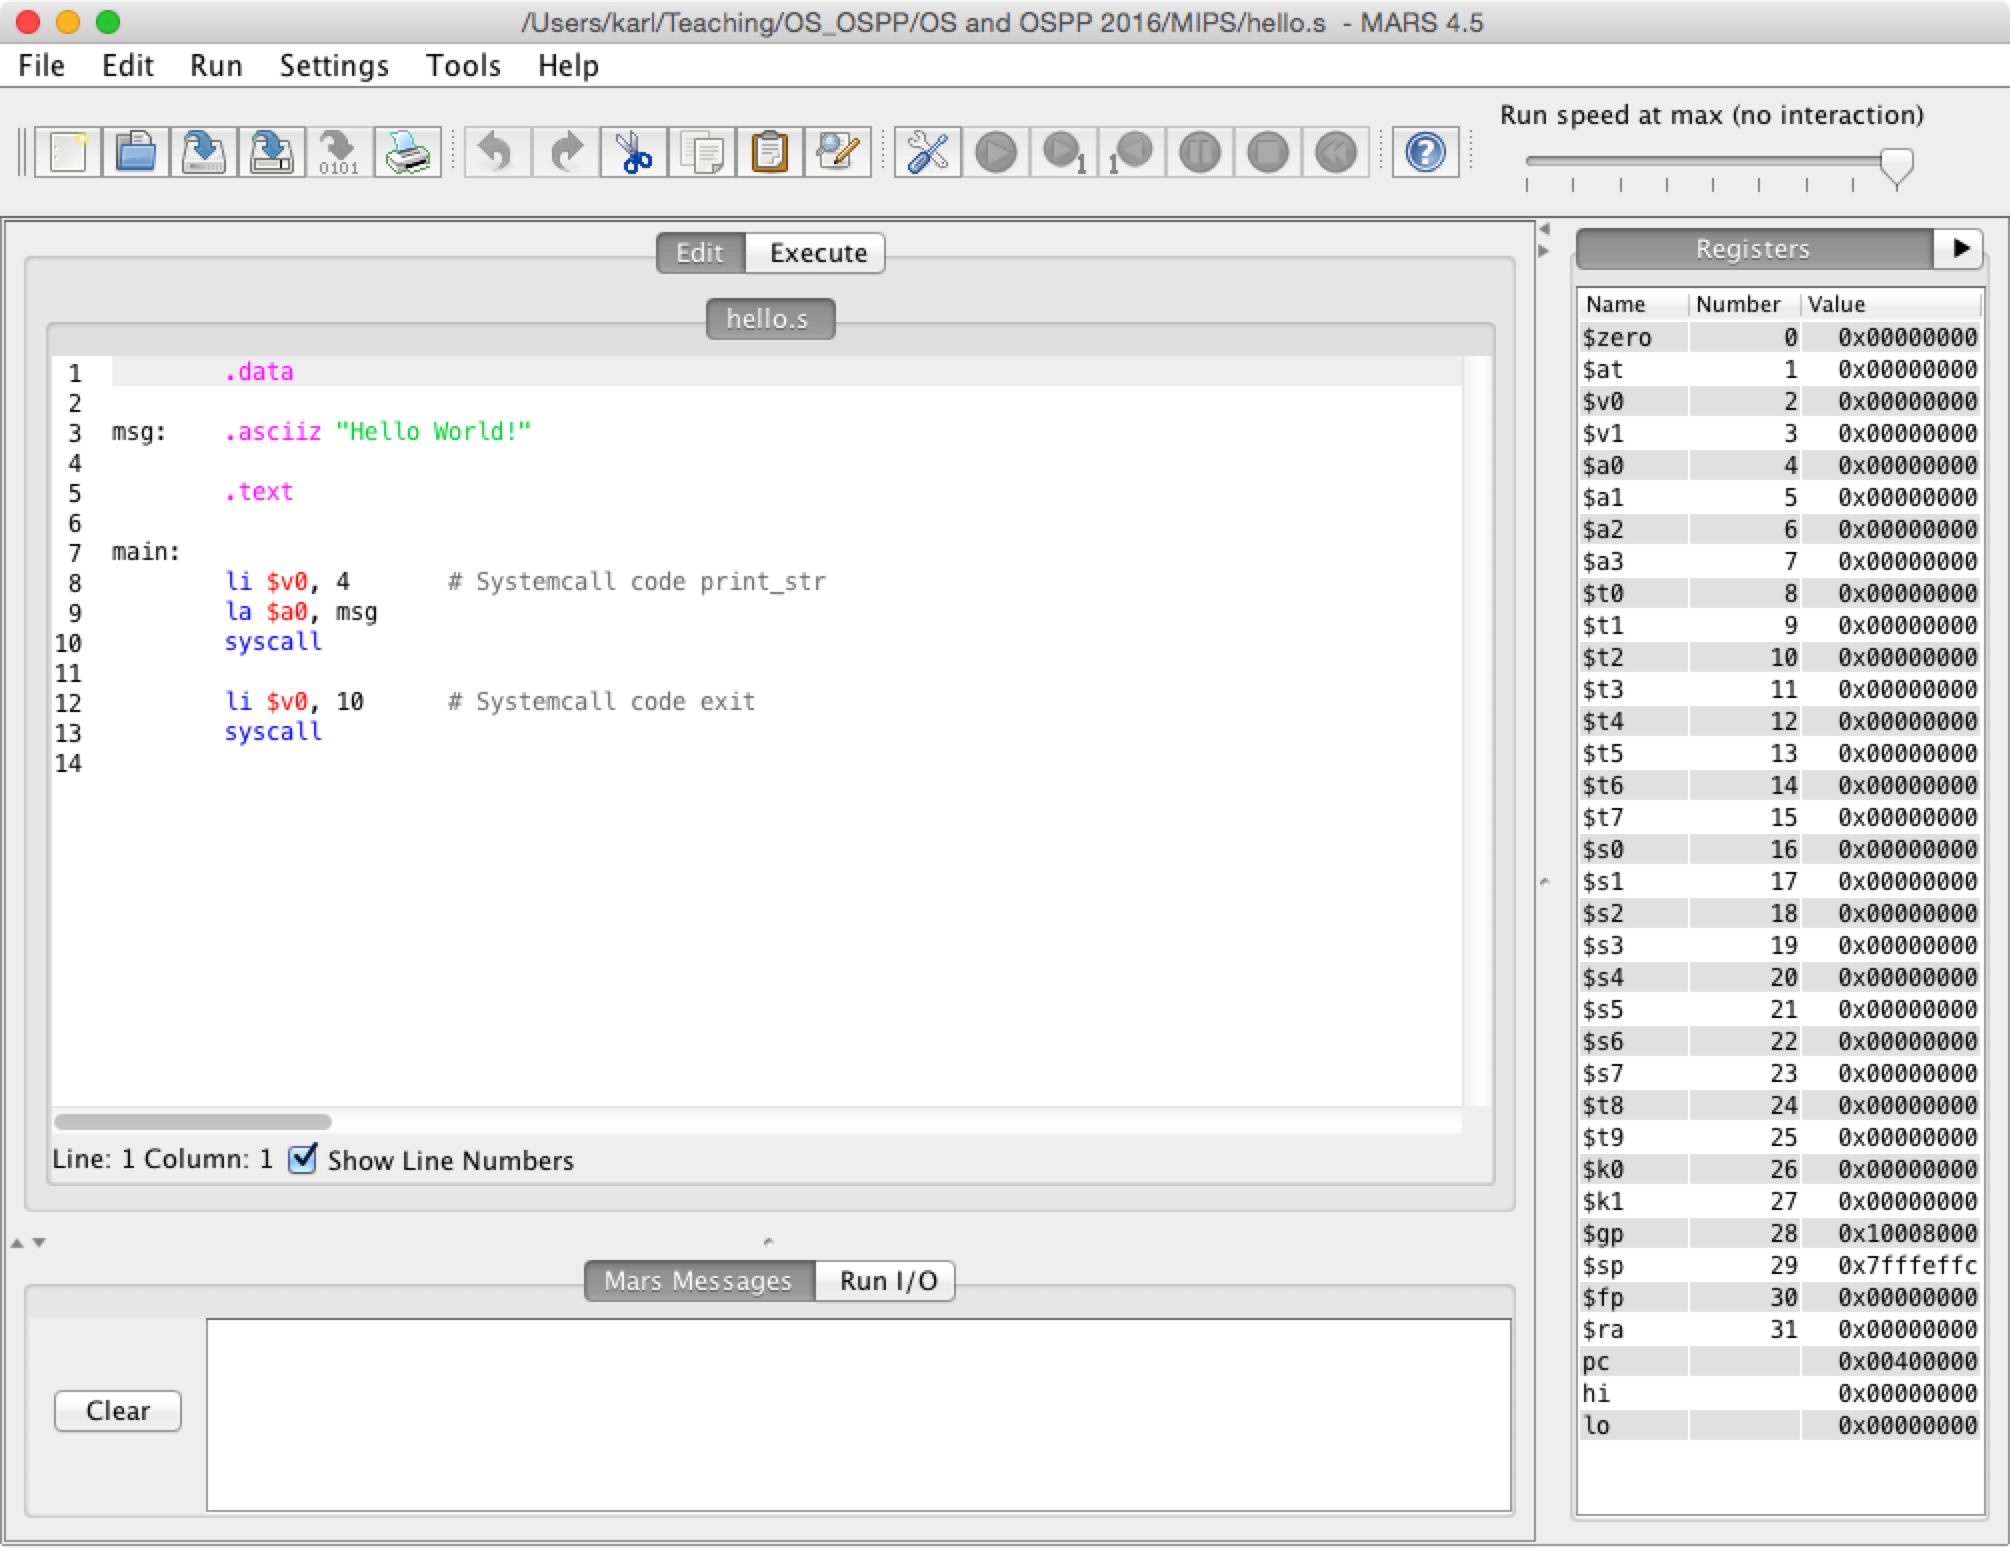

After you loaded a program, the source code is available for edit in the Edit pane.
Change font colors
The default font colors might not be the most pleasing on your eyes. Especially
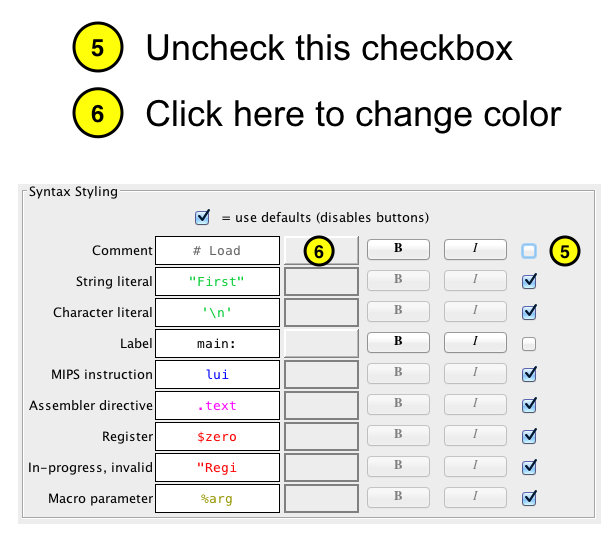
the font color for comments may be hard to read. From the top menu, follow these steps to change
the font colors:
- Settings
- Editor …
- Now a window named Text editor settings will open.
- To the right you find the Syntax styling options.
- Un-check the checkbox to override the default font.
- Click on the button to the right of the font preview to change the color of
the font.
- Click on the button Apply and close in the lower left corner of the window to
apply your settings.

Assemble
To translate the Mips assembly source code to executable machine instructions an
assembler is used.
- Assemble the file by clicking on the icon with the screwdriver and wrench.
Mars Messages
You should see something similar to the following in the Mars Messages display
pane.
Assemble: assembling /path/to/file/hello.s

Assemble: operation completed successfully.
Execute pane
After a successful assembly, the generated machine code instructions together
with the source code instructions are shown in the Execute pane.
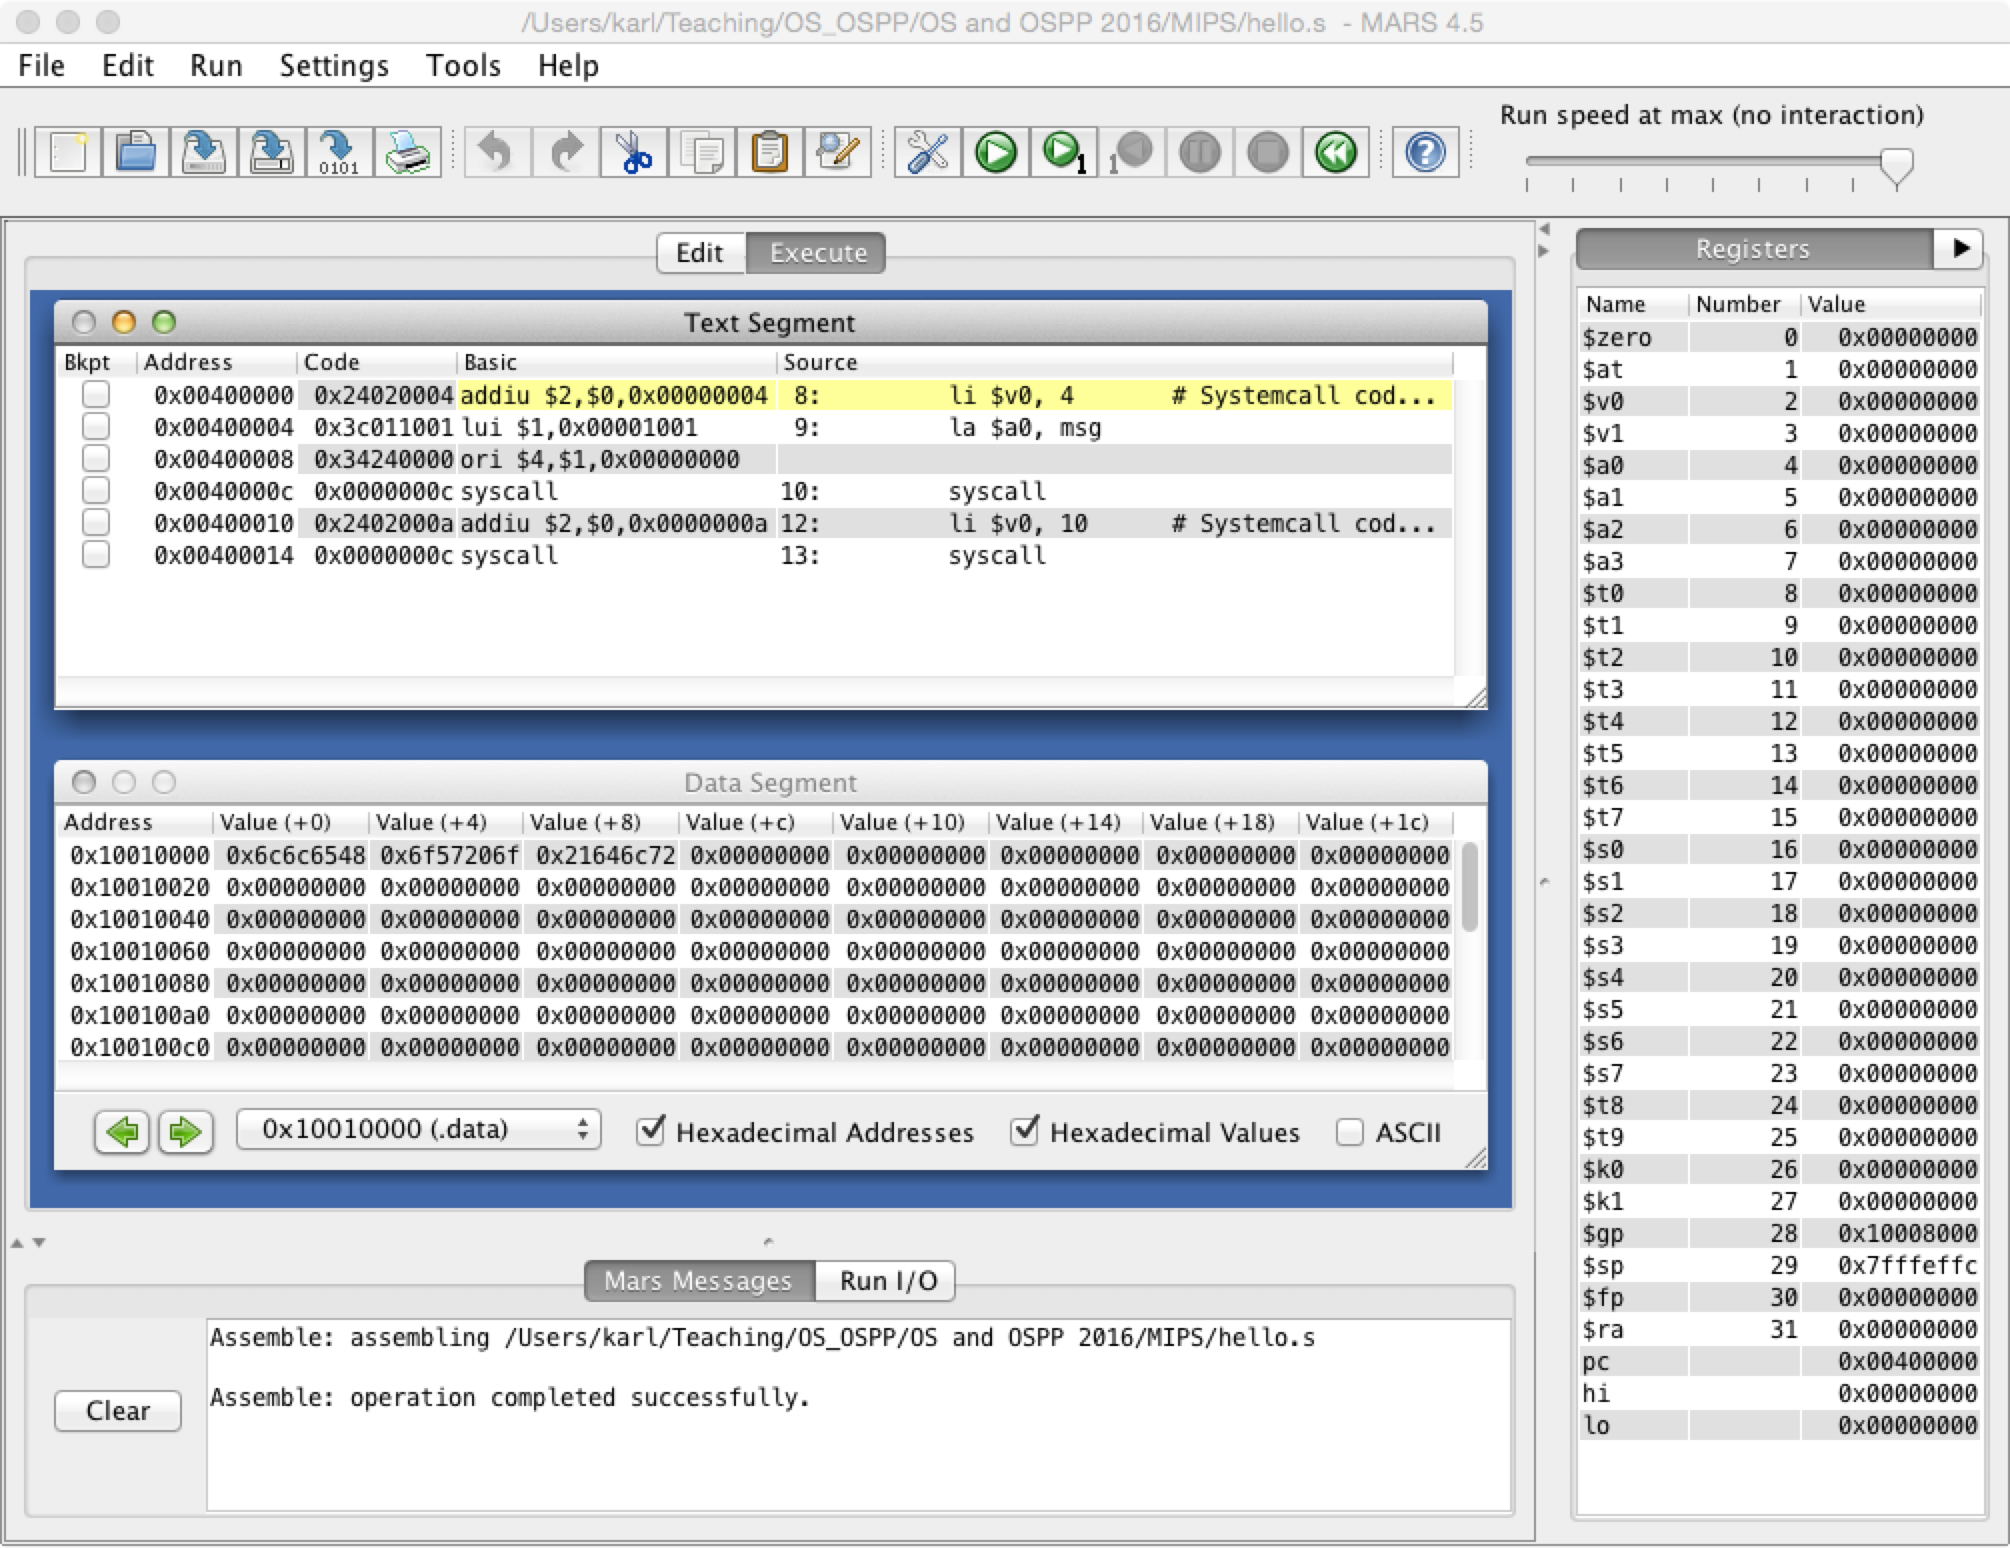

Run to completion
- Click on the play icon to run the program to completion.
Run I/O
In the the Run I/O display window you should see the following output.
Hello World!
-- program is finished running --
Symbol table
From the Settings menu, select Show Label Window (symbol table). Now, the
following window should appear.
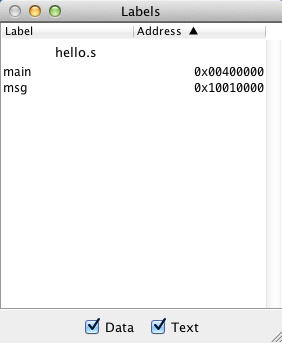

The symbol table shows the actual memory addresses of all labels. For example,
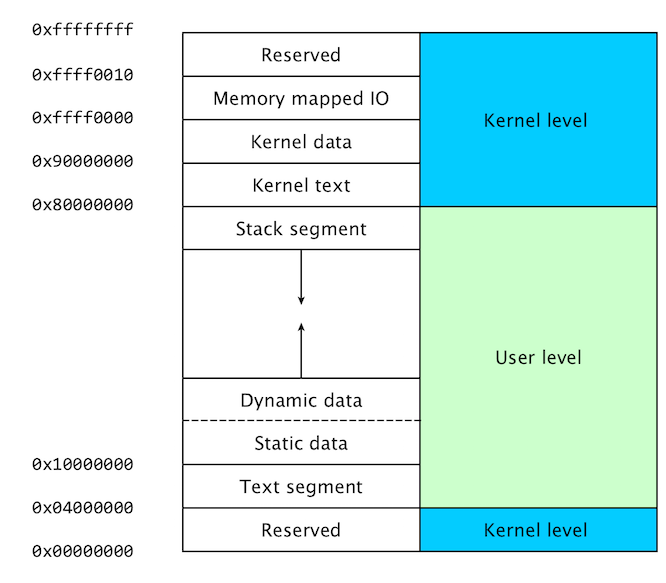
we see that the label main is a mnemonic for the memory address 0x00400000.
When you click on a label in the symbol table, the address of the label is
highlighted in the text or data segment.
Text segment
In the symbol table, click on the label main.
Now the following row should be highlighted with a blue border in the Source
code column in the Text segment area in the Execute tab.
li $v0, 4 # Systemcall code print_str
If you look at the source code (press the Edit tab) you see that this is the
instruction following directly after the label main.
Data segment
In the symbol table, click on the label msg.
Now address 0x10010000 should be highlighted with a blue border in the
Data Segment area in the Execute tab. The value store at this address is
0x6c6c6548.
If you study the data segment in detail you see that the string "Hello World!"
is stored byte for byte starting at address 0x10010000.


Breakpoints and debugging
A very usefull feature of Mars is the ability to set breakpoints. Breakpoints
together with single-stepping and backward single-stepping are very powerful when trying to understand or
debugging a program.
Make sure to view the Execute tab. In the Text segment, click the Bkpt
(breakpoint) checkbox at address 0x00400000.


This will set a breakpoint on the syscall instruction.
- Click on the play icon to run the program.
The execution
will now halt at the breakpoint (the syscall instruction).
- Click on the single-step icon to continue the execution one instruction at the time.
- Click on the single-step-backwards icon to run the execution backwards one instruction at the time.
Study the example programs
You are now ready to continue and study the
other example programs in the mips-examples repository.
