Prerequisites
To prepare for the tutorials and programming assignments you should make sure to go through the material in this section.
To prepare for the tutorials and programming assignments you should make sure to go through the material in this section.
As a student at Uppsala University you have a Microsoft 365 Education account. Microsoft 365 Eduction is a collection of tools and services for students. Examples of what is included in Microsoft 365 Education.
To get access to Microsoft 365 Education you must first activate multi-factor authentication (MFA).
After you activated MFA you can read more here to get started with Microsoft 365 Education.
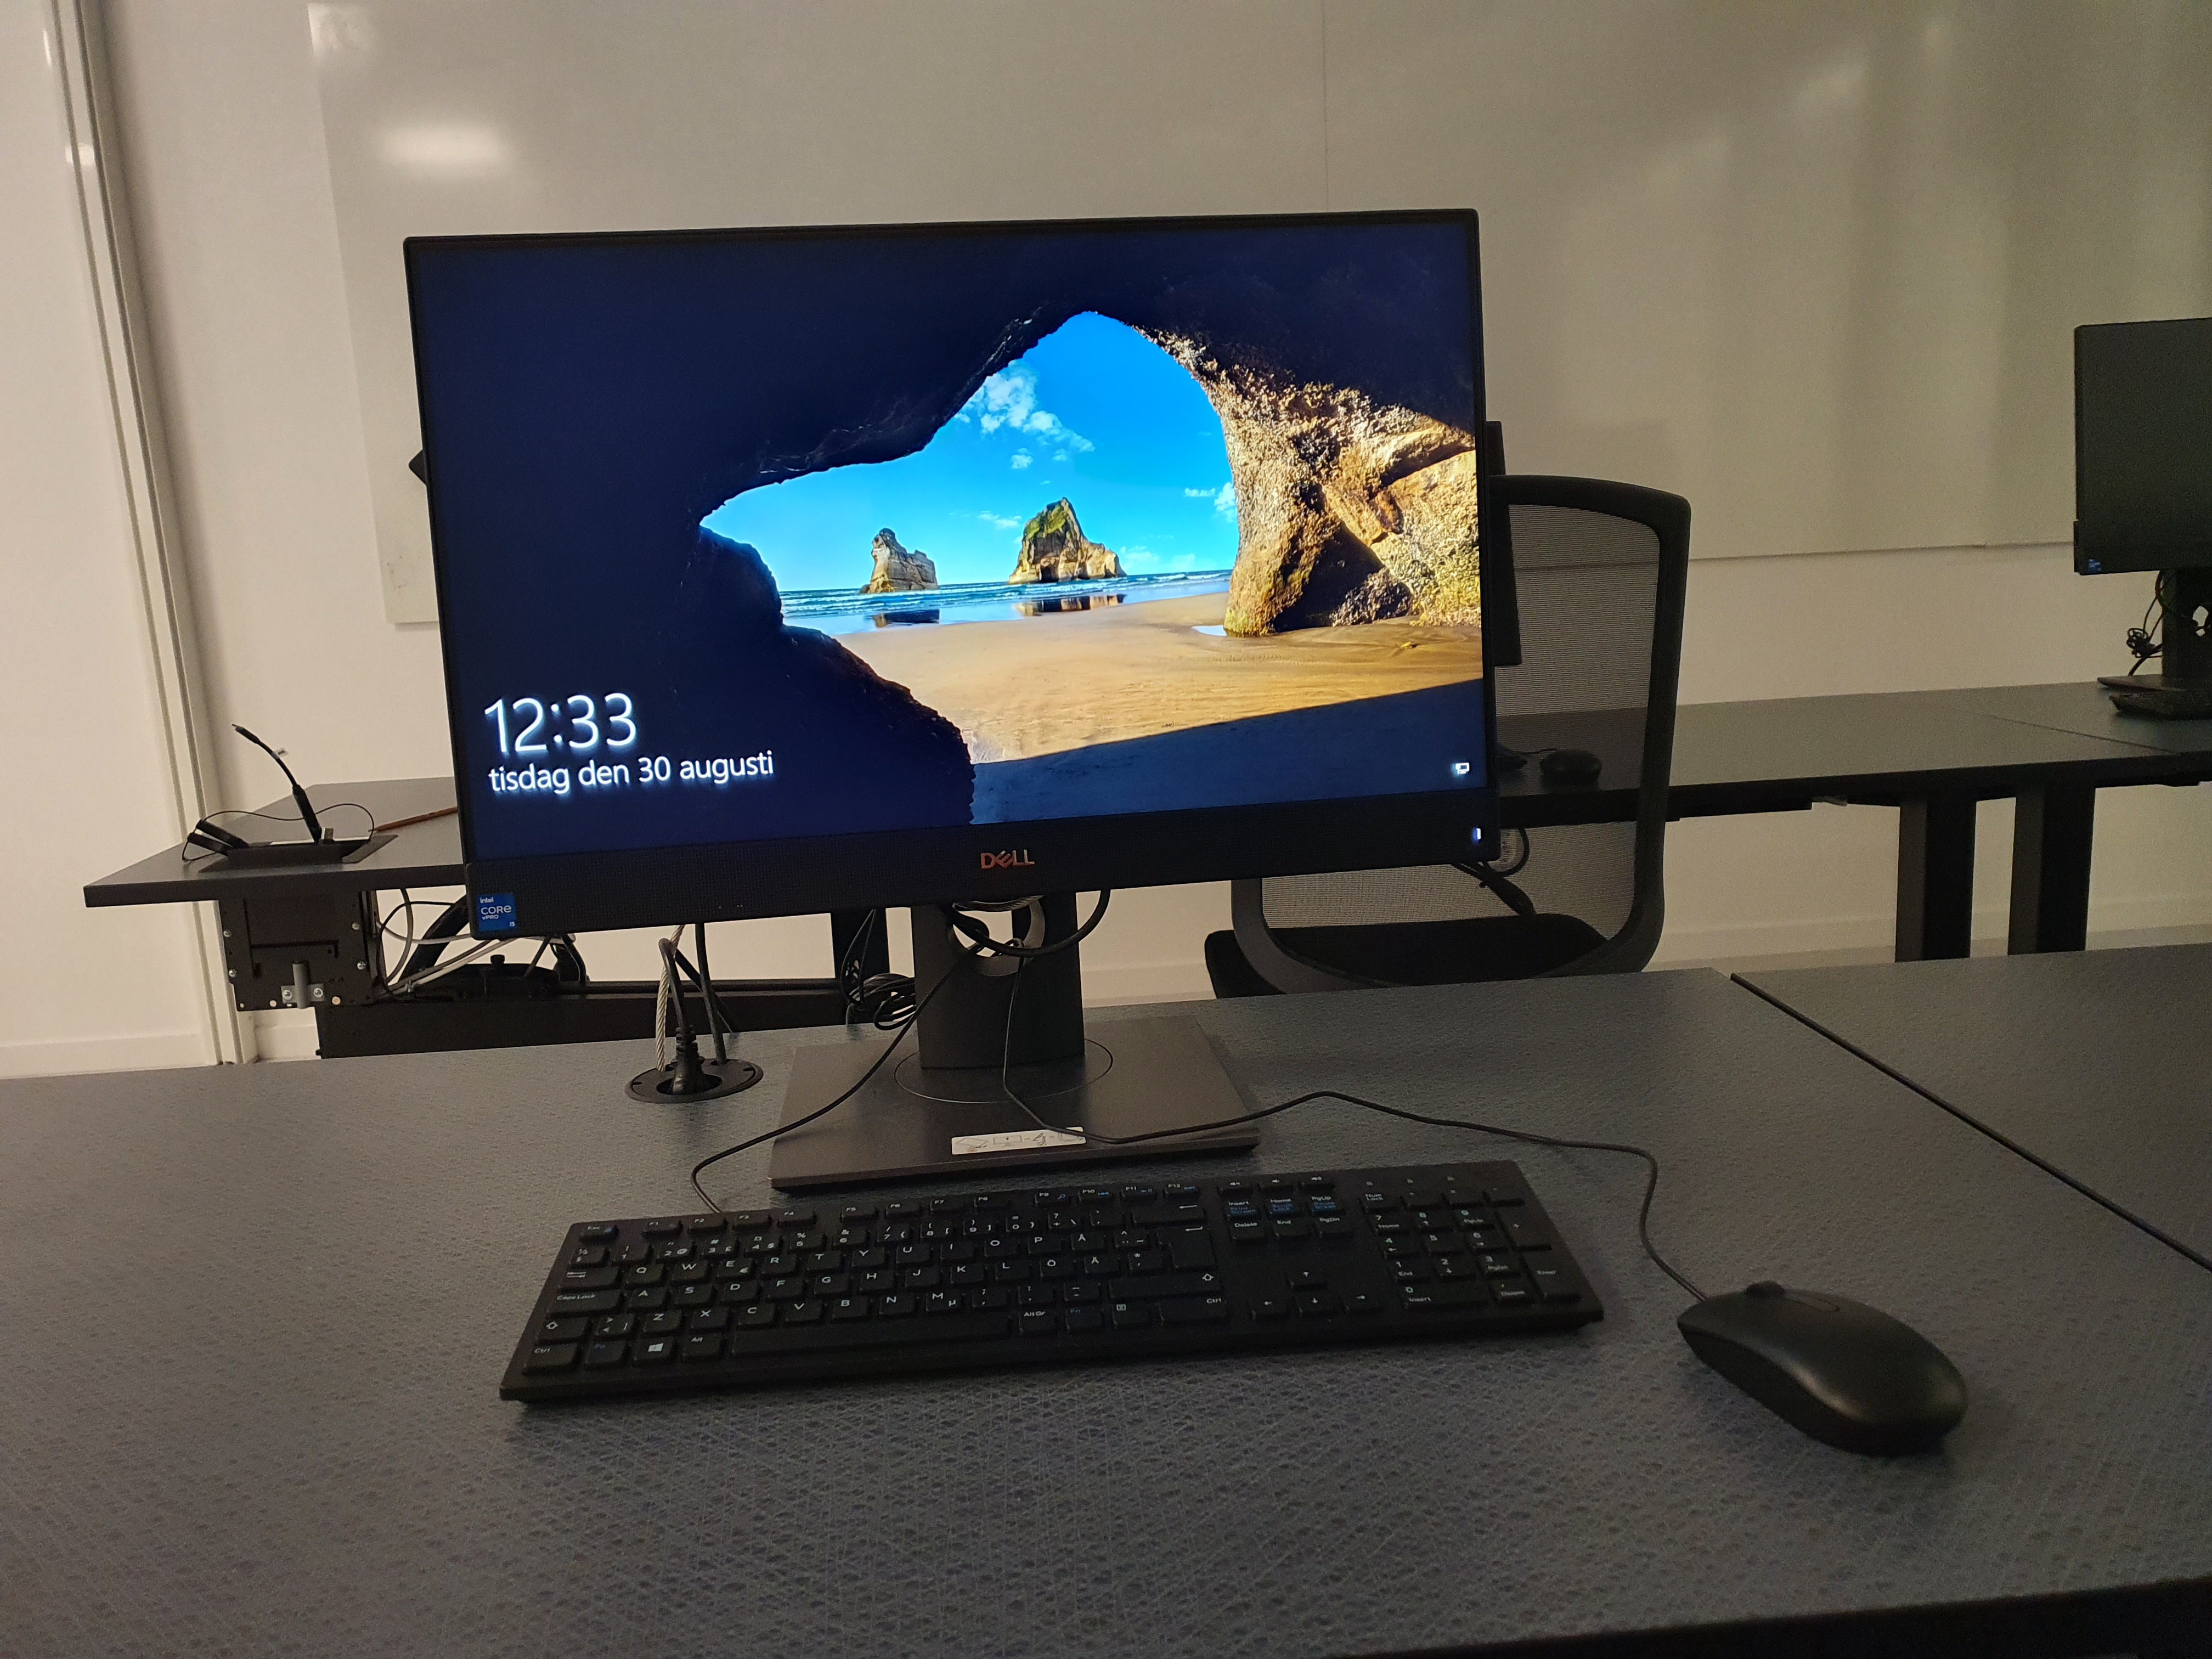
In all computer rooms on campus Ångströmslaboratoriet you find computers with Windows.
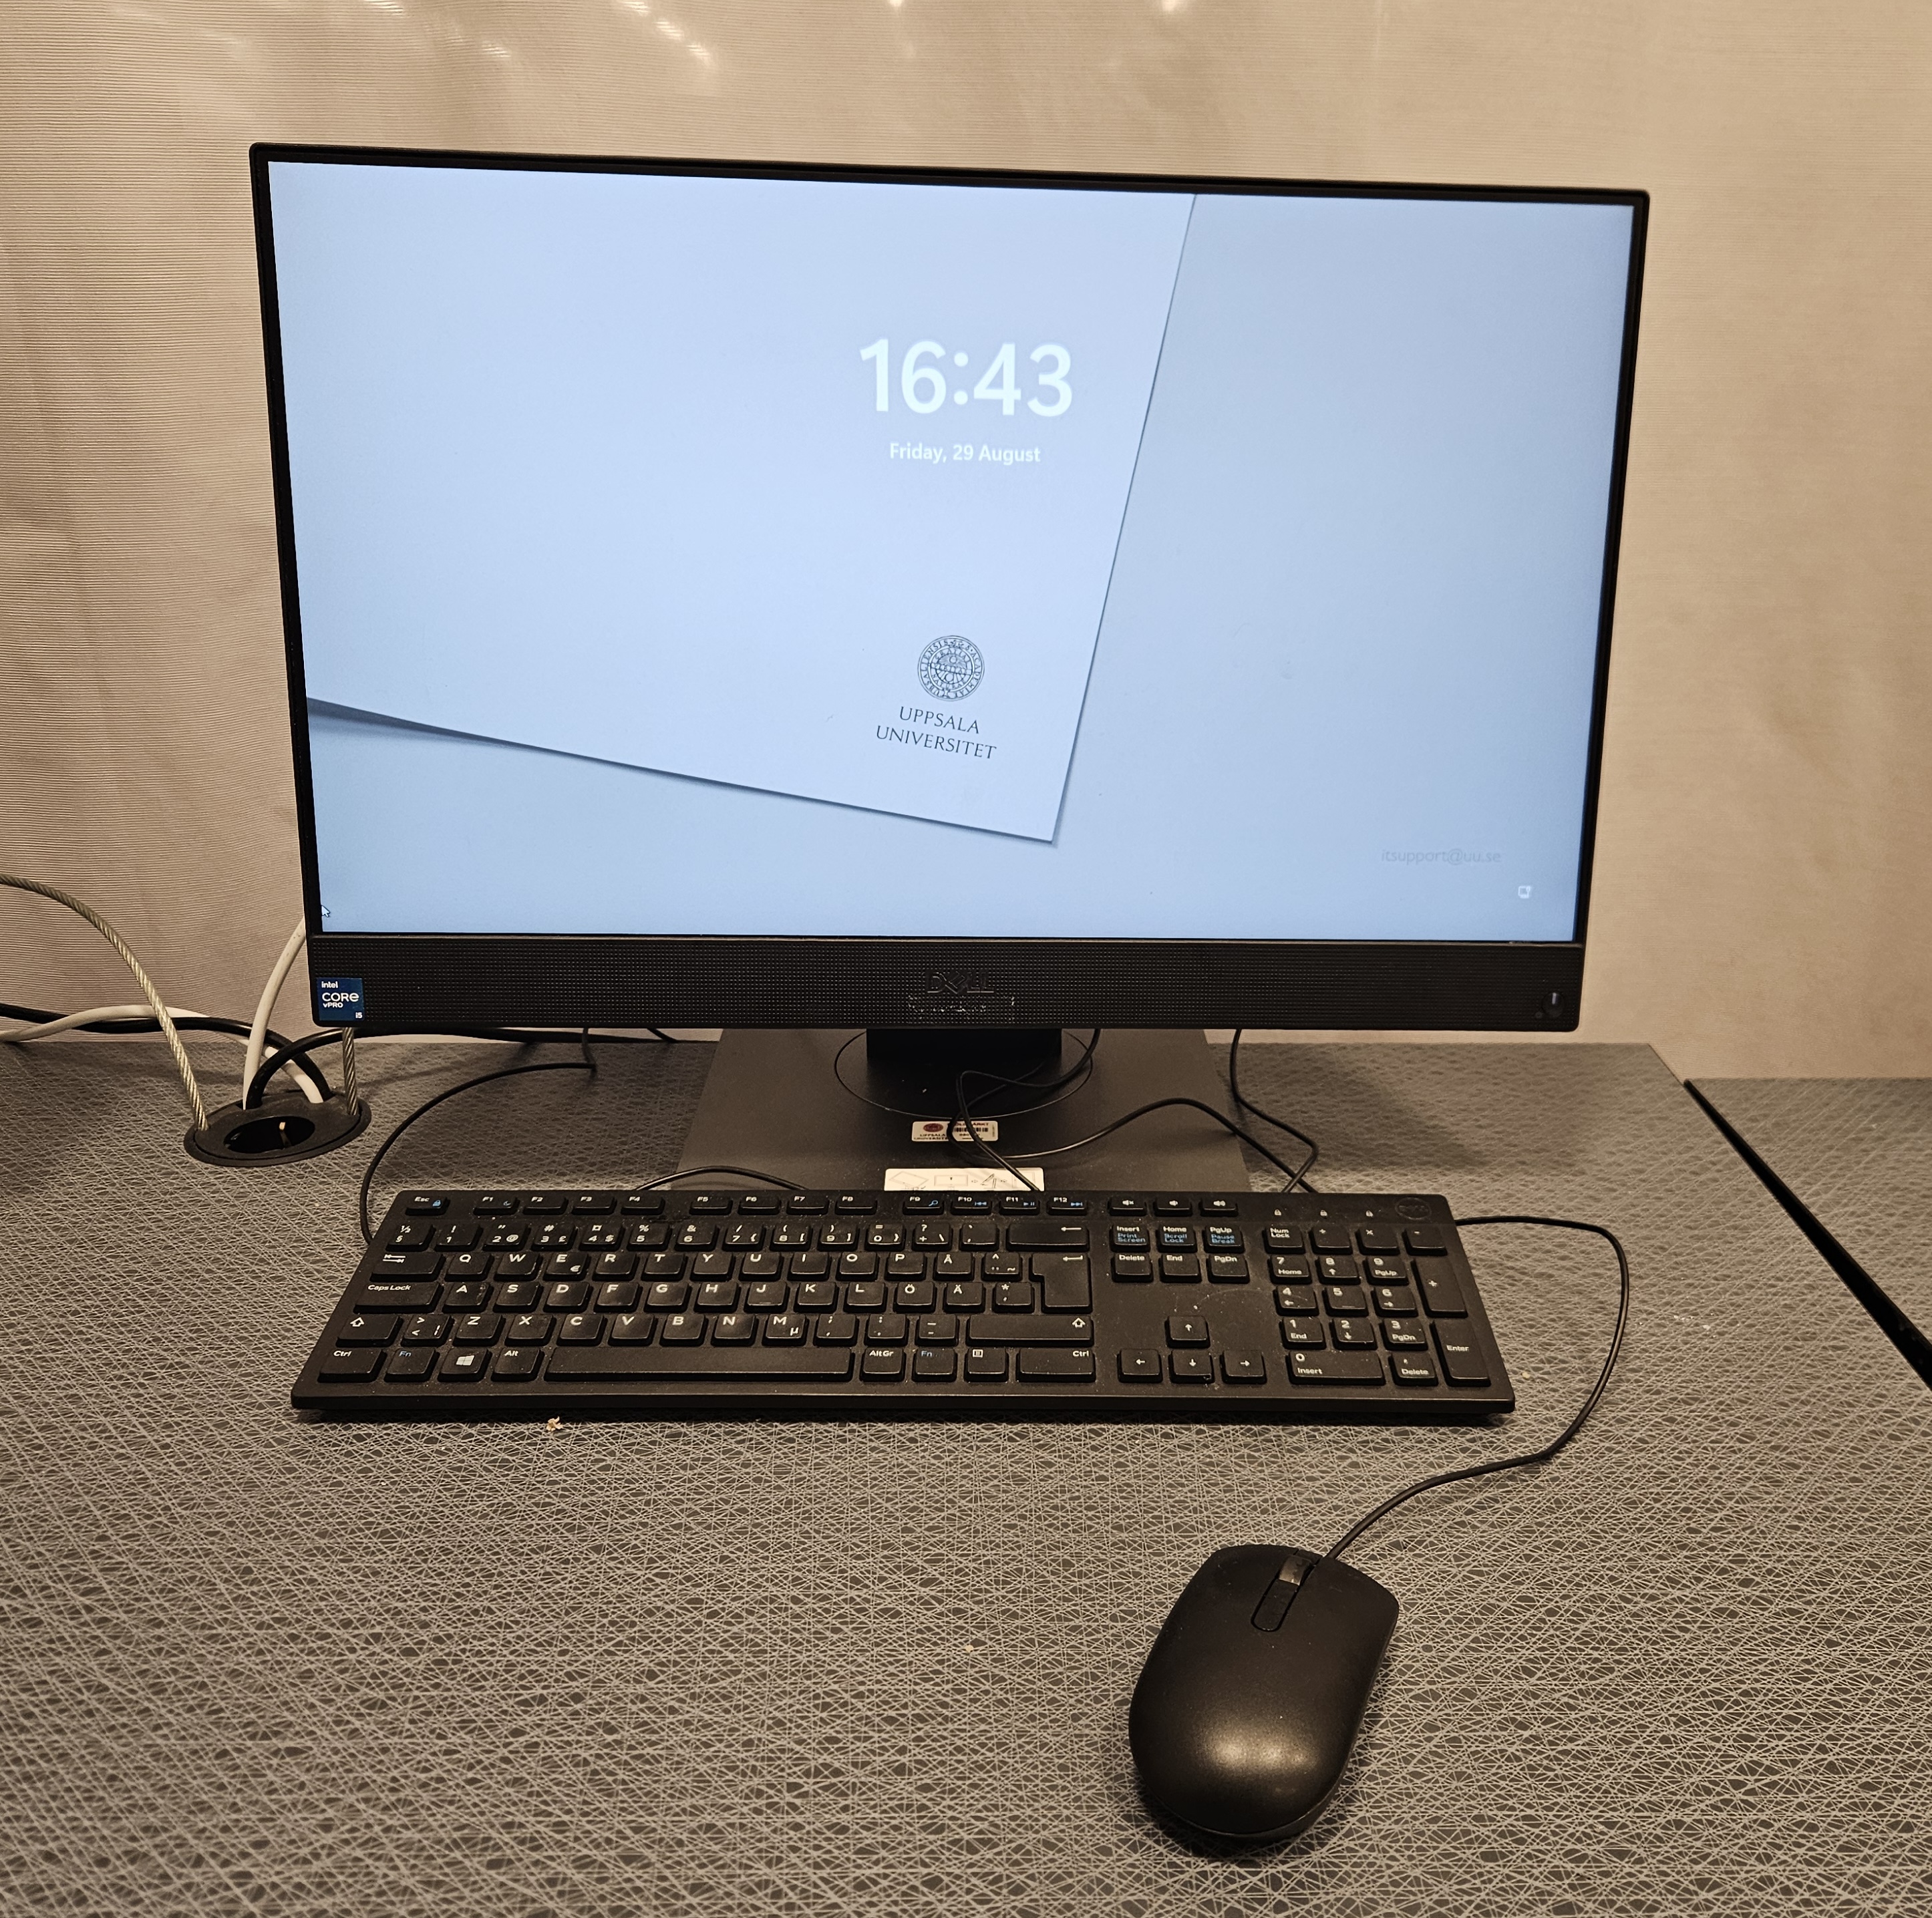
If the computer is on, the power button lights up in the bottom right corner of the screen. Wake up the computer by moving the mouse or pressing any of the keys on the keyboard.
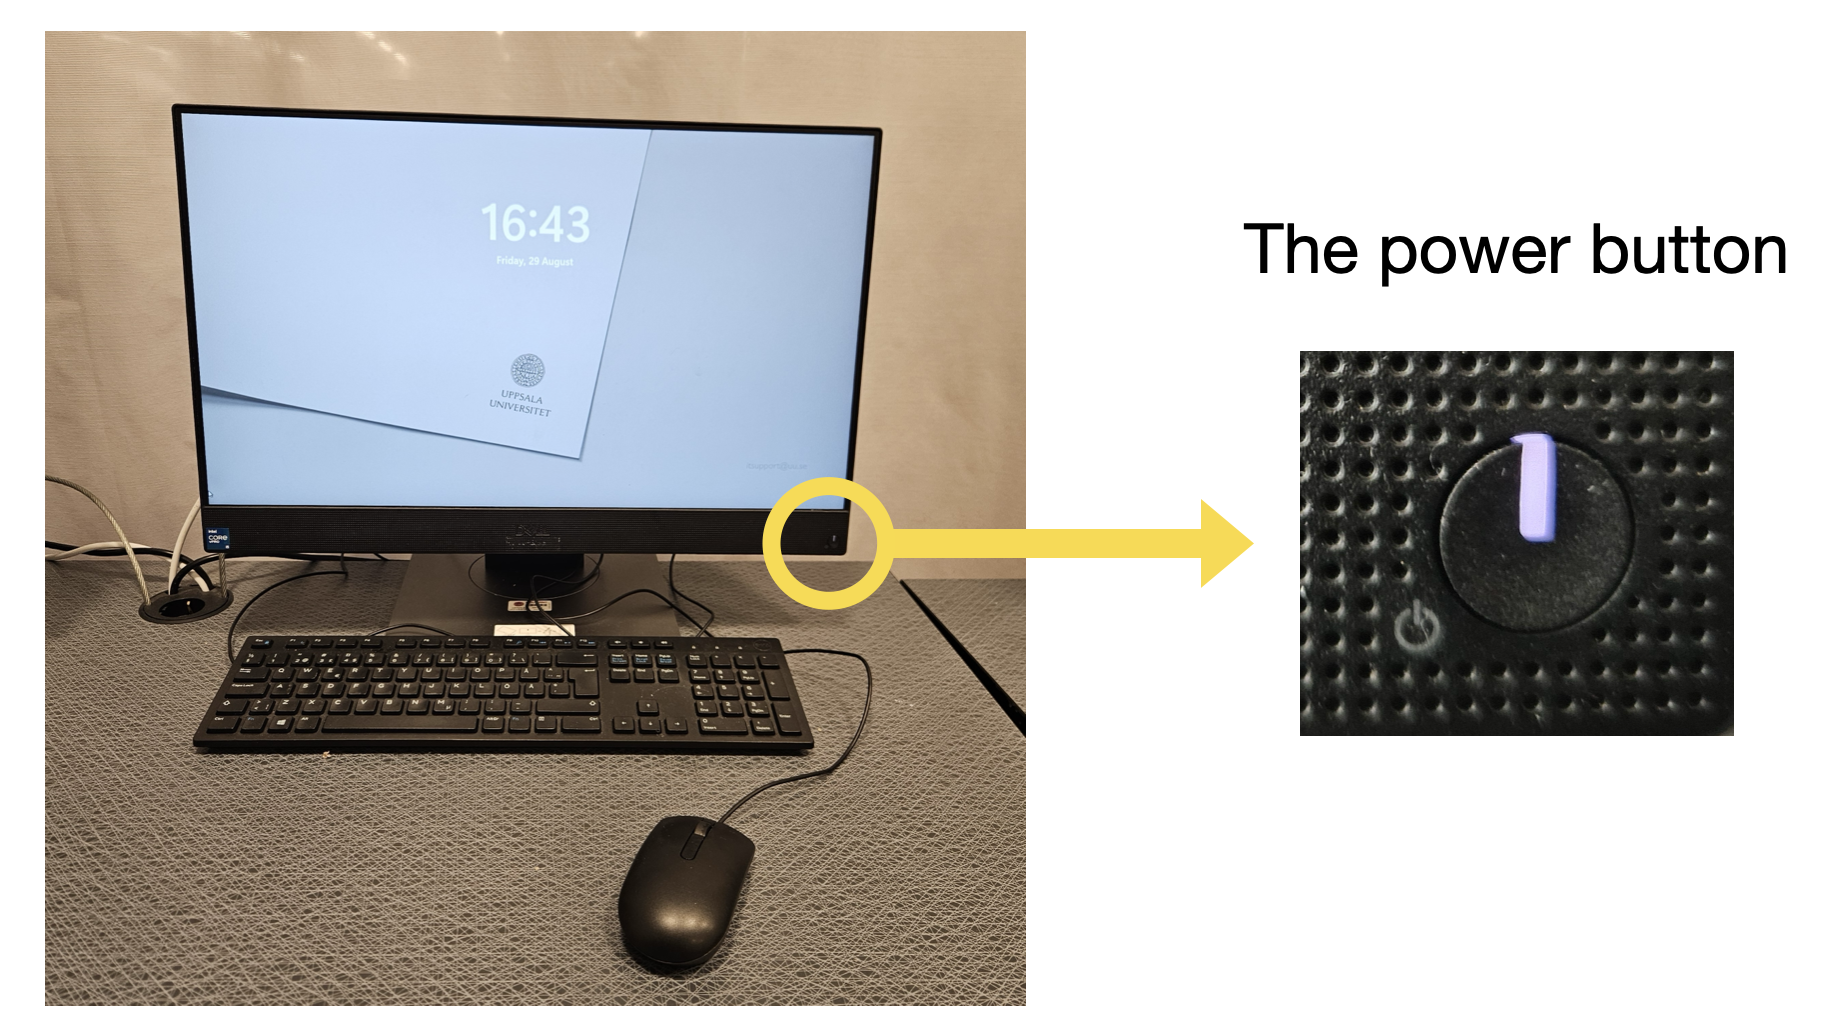
If the power button is not lit, you need to press the power button to
to turn on the computer.
To log in to Windows, enter the username of your
student account in the form abcd1234 and Password A.
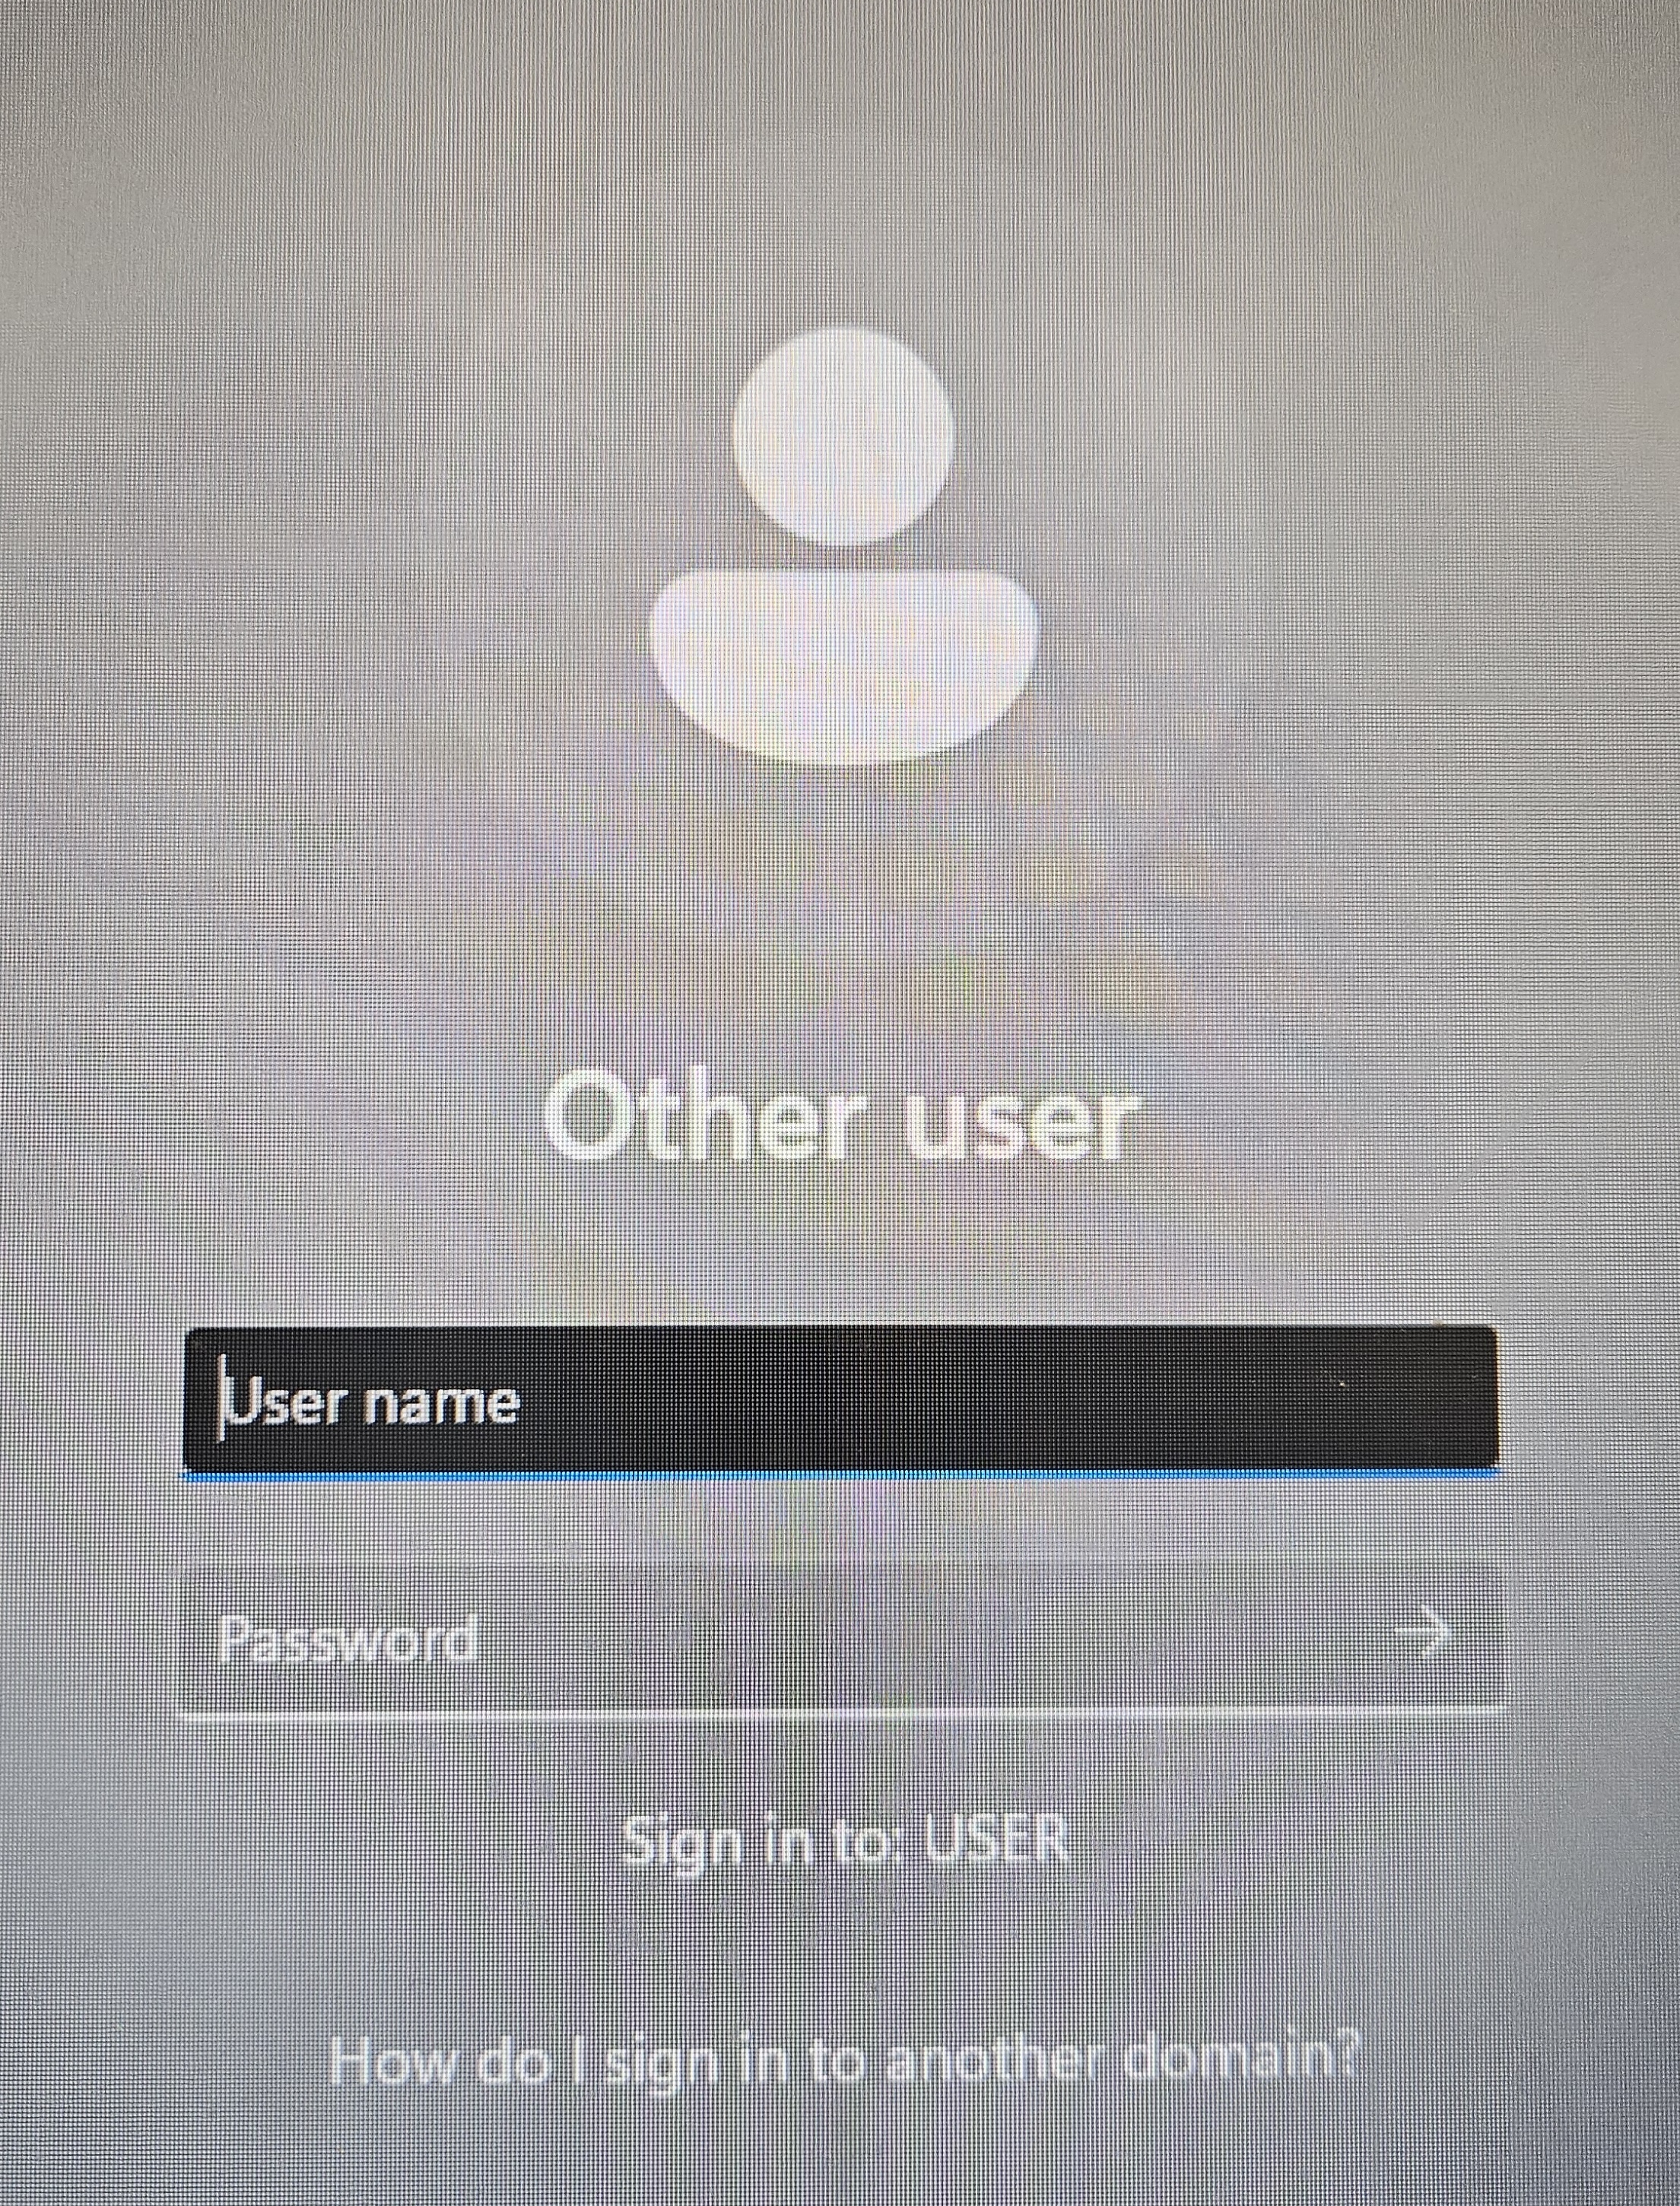
It may take a little while to log in, but after a while the desktop will appear.
Files you store on the university’s computers are stored locally on the very computer you are logged on to. If you store a file on computer A, you will not be able to access it from computer B. It is also not guaranteed that a file you store locally on computer A will still be there the next time you log on to computer A.
Among the icons in the taskbar you find the file explorer.
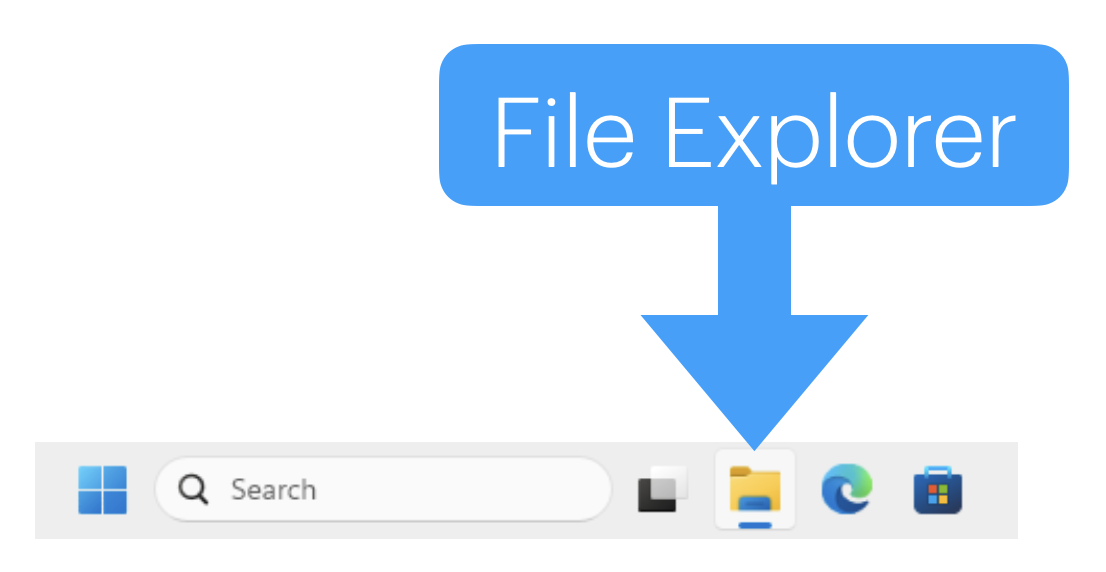
When you click on the file explorer icon, a new window opens.
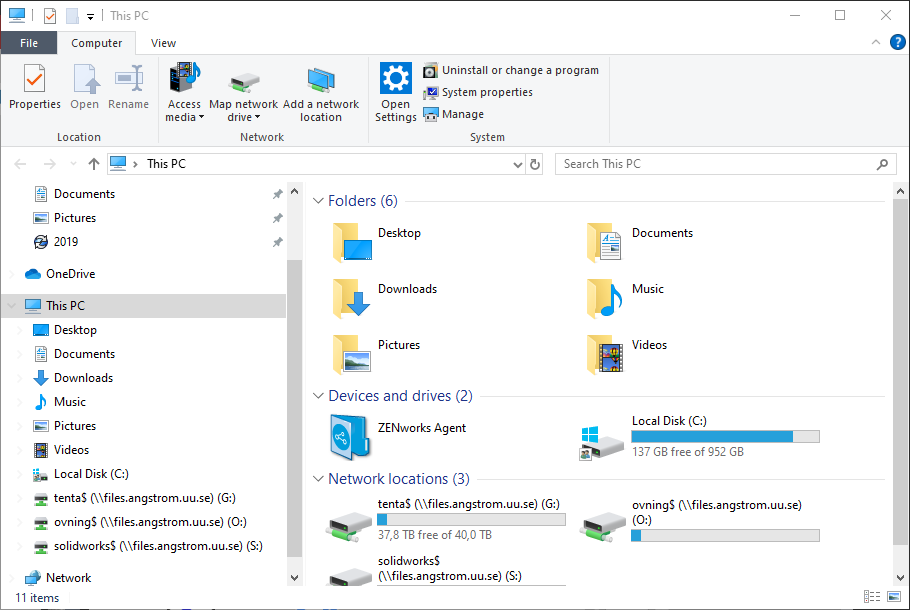
In the file explorer you can se all local files and folders.
At the bottom of the desktop you find the taskbar.

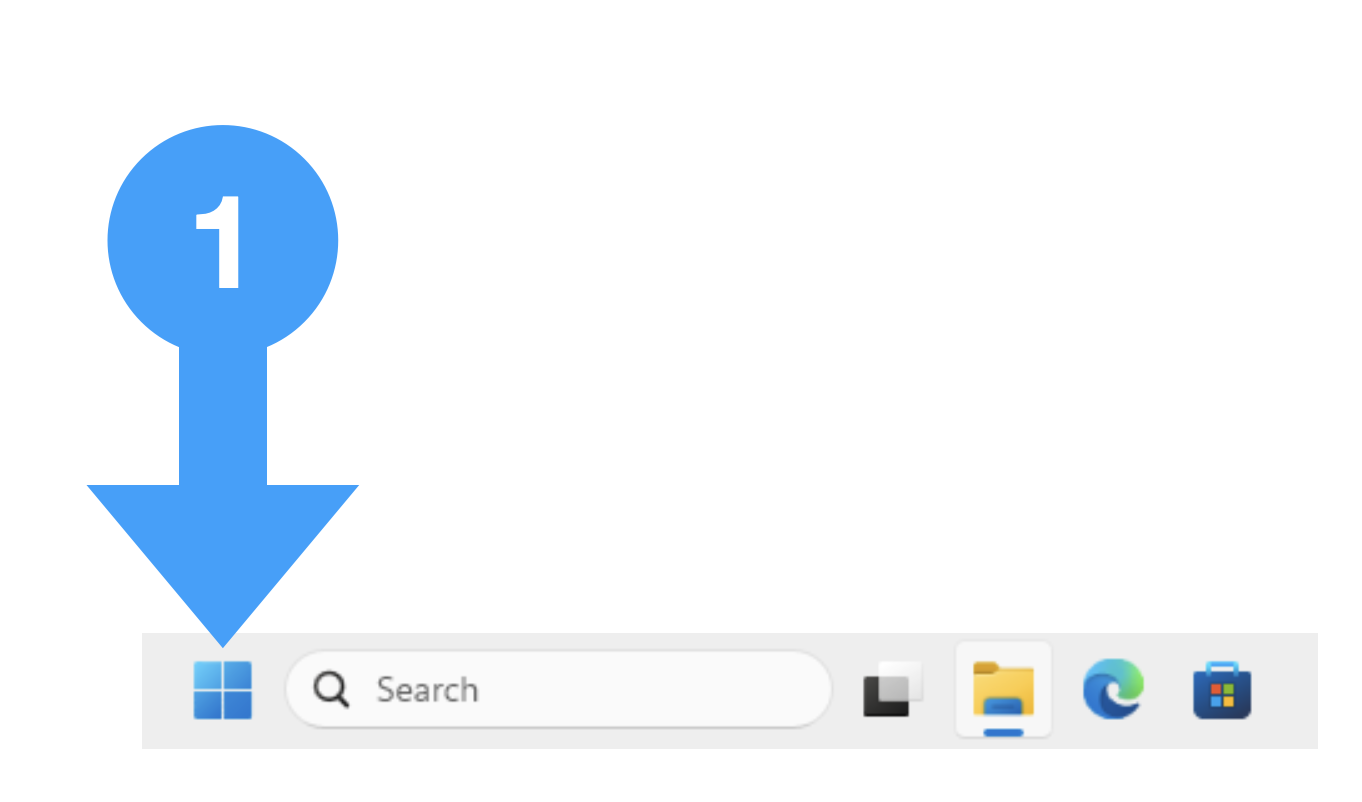
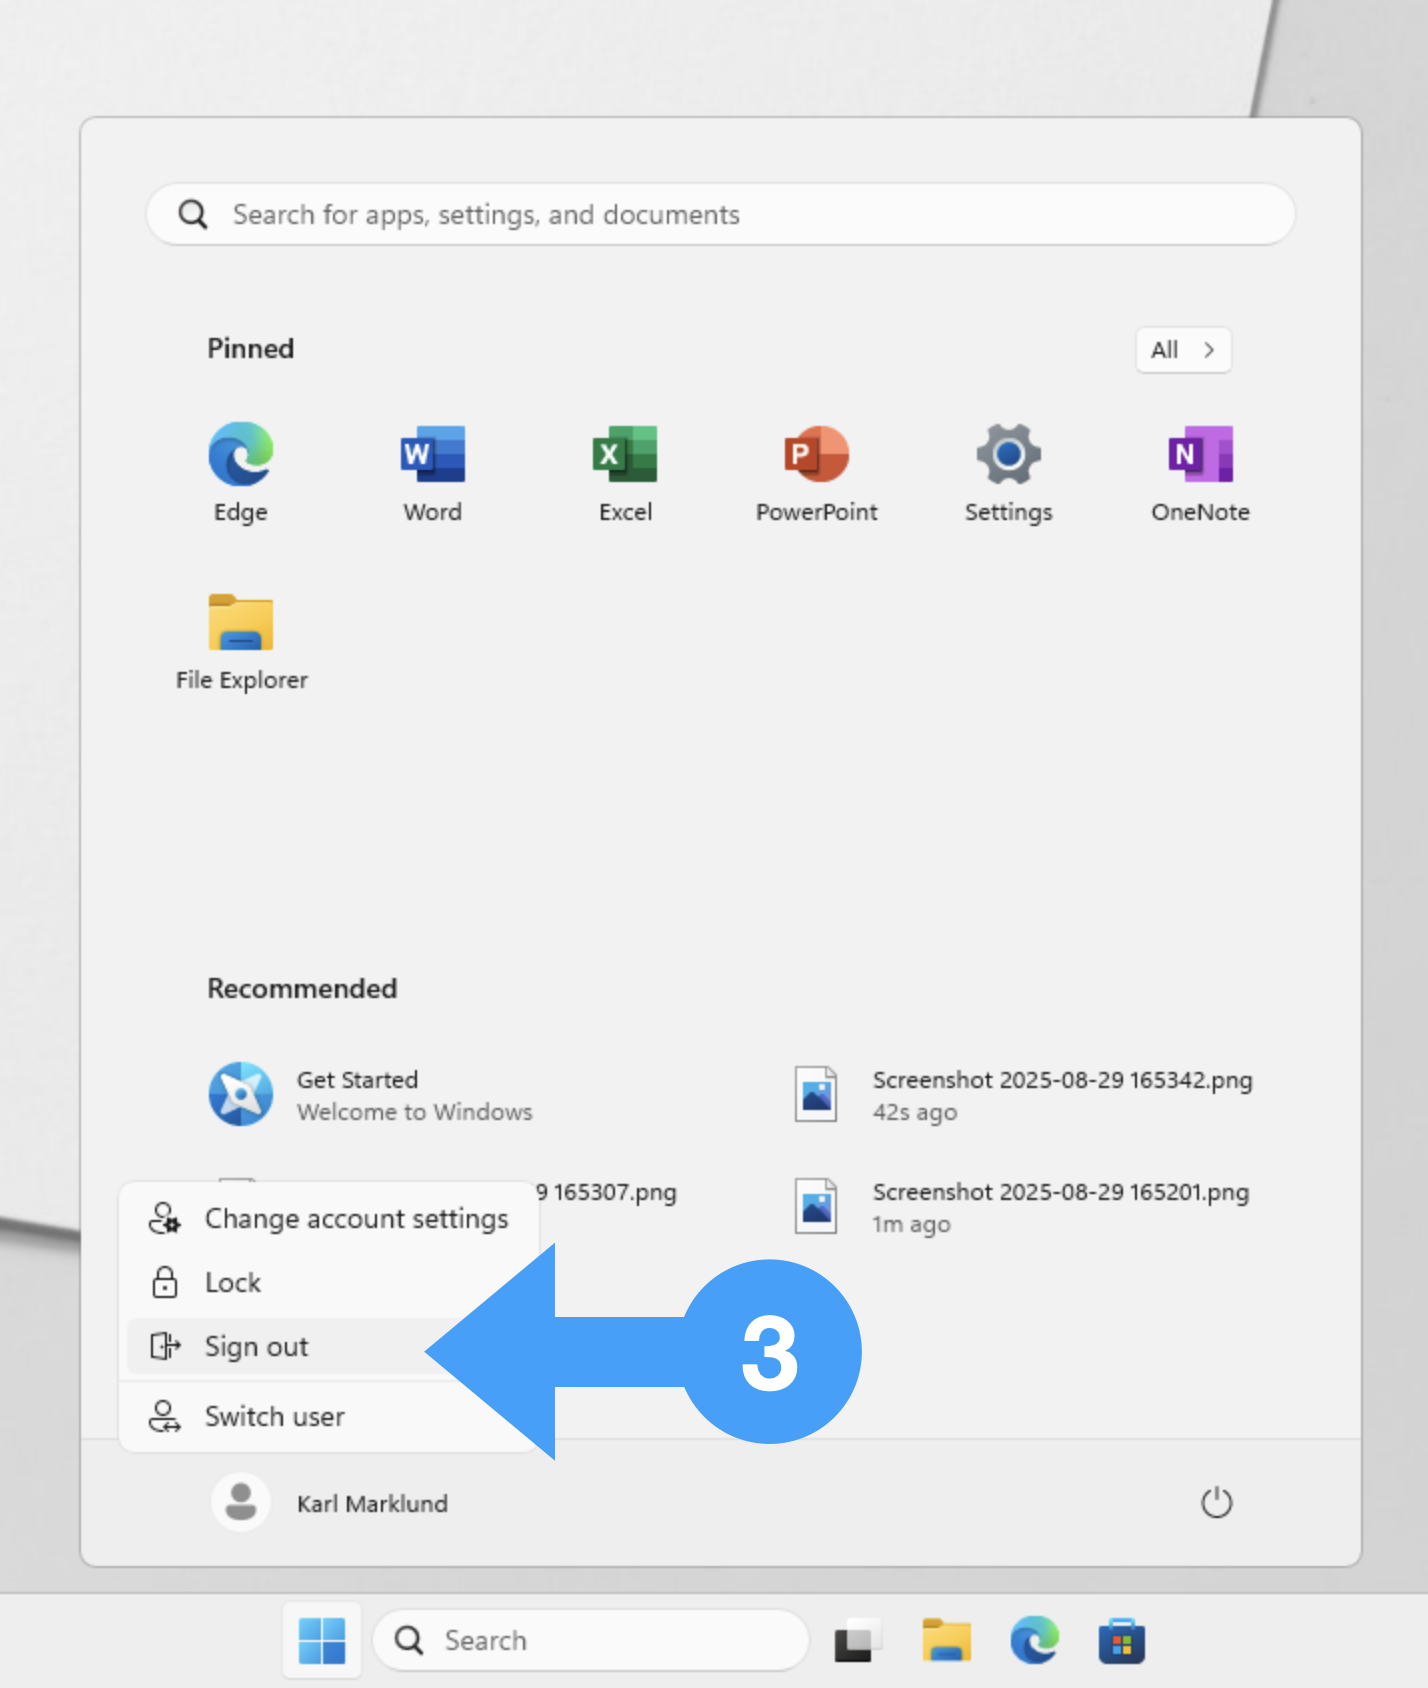
To log out, cllick on Windows symbol (1) in the taskbar.
Click on your name (2).
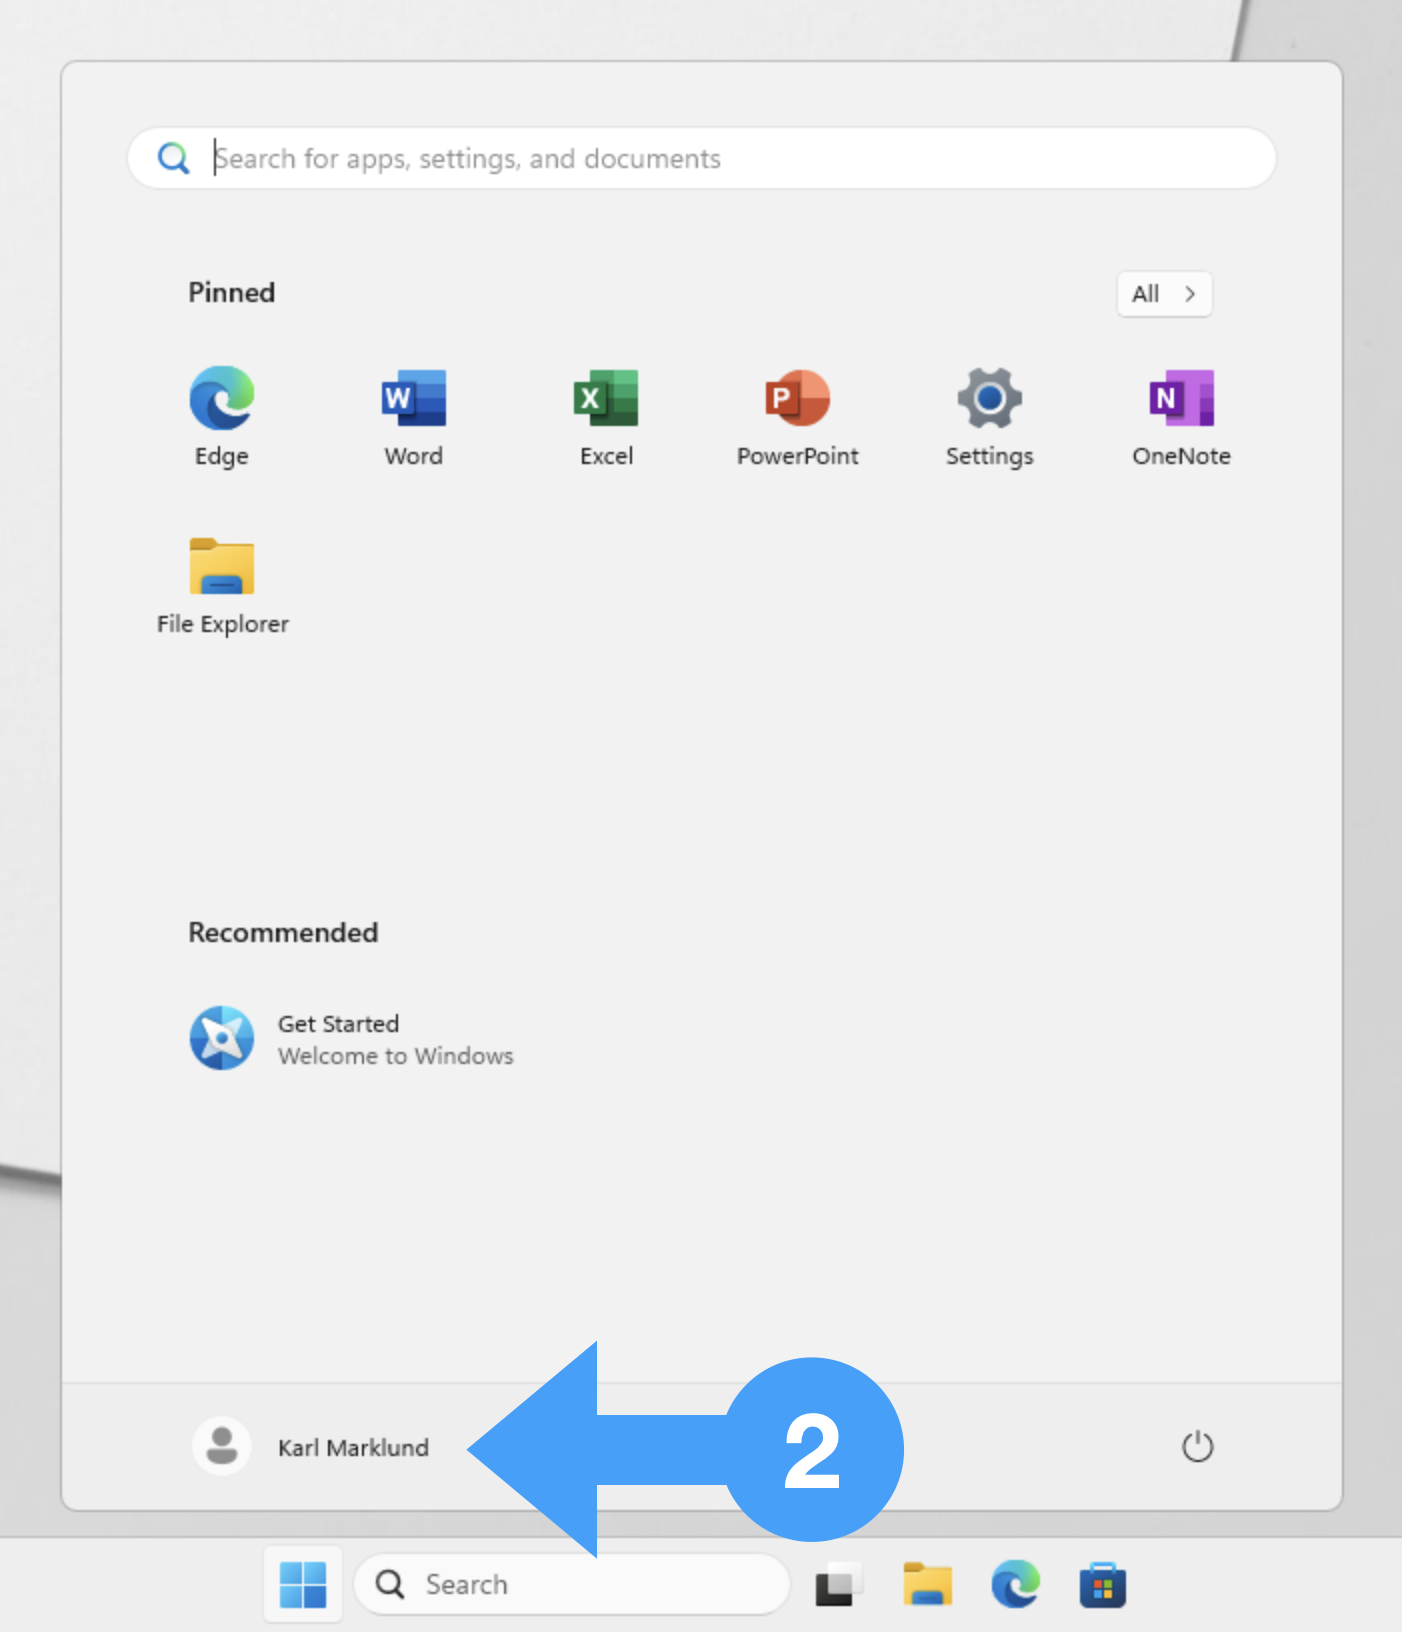
Click on Sign out (3).
Instead of storing your files locally on one of the university’s computers, you should always use OneDrive. With OneDrive you can store your files in one place, share them with others and access them from any device connected to the Internet.
With OneDrive you can work on one of the university’s computers, save a file in OneDrive and later access the file in OneDrive from your private computer.
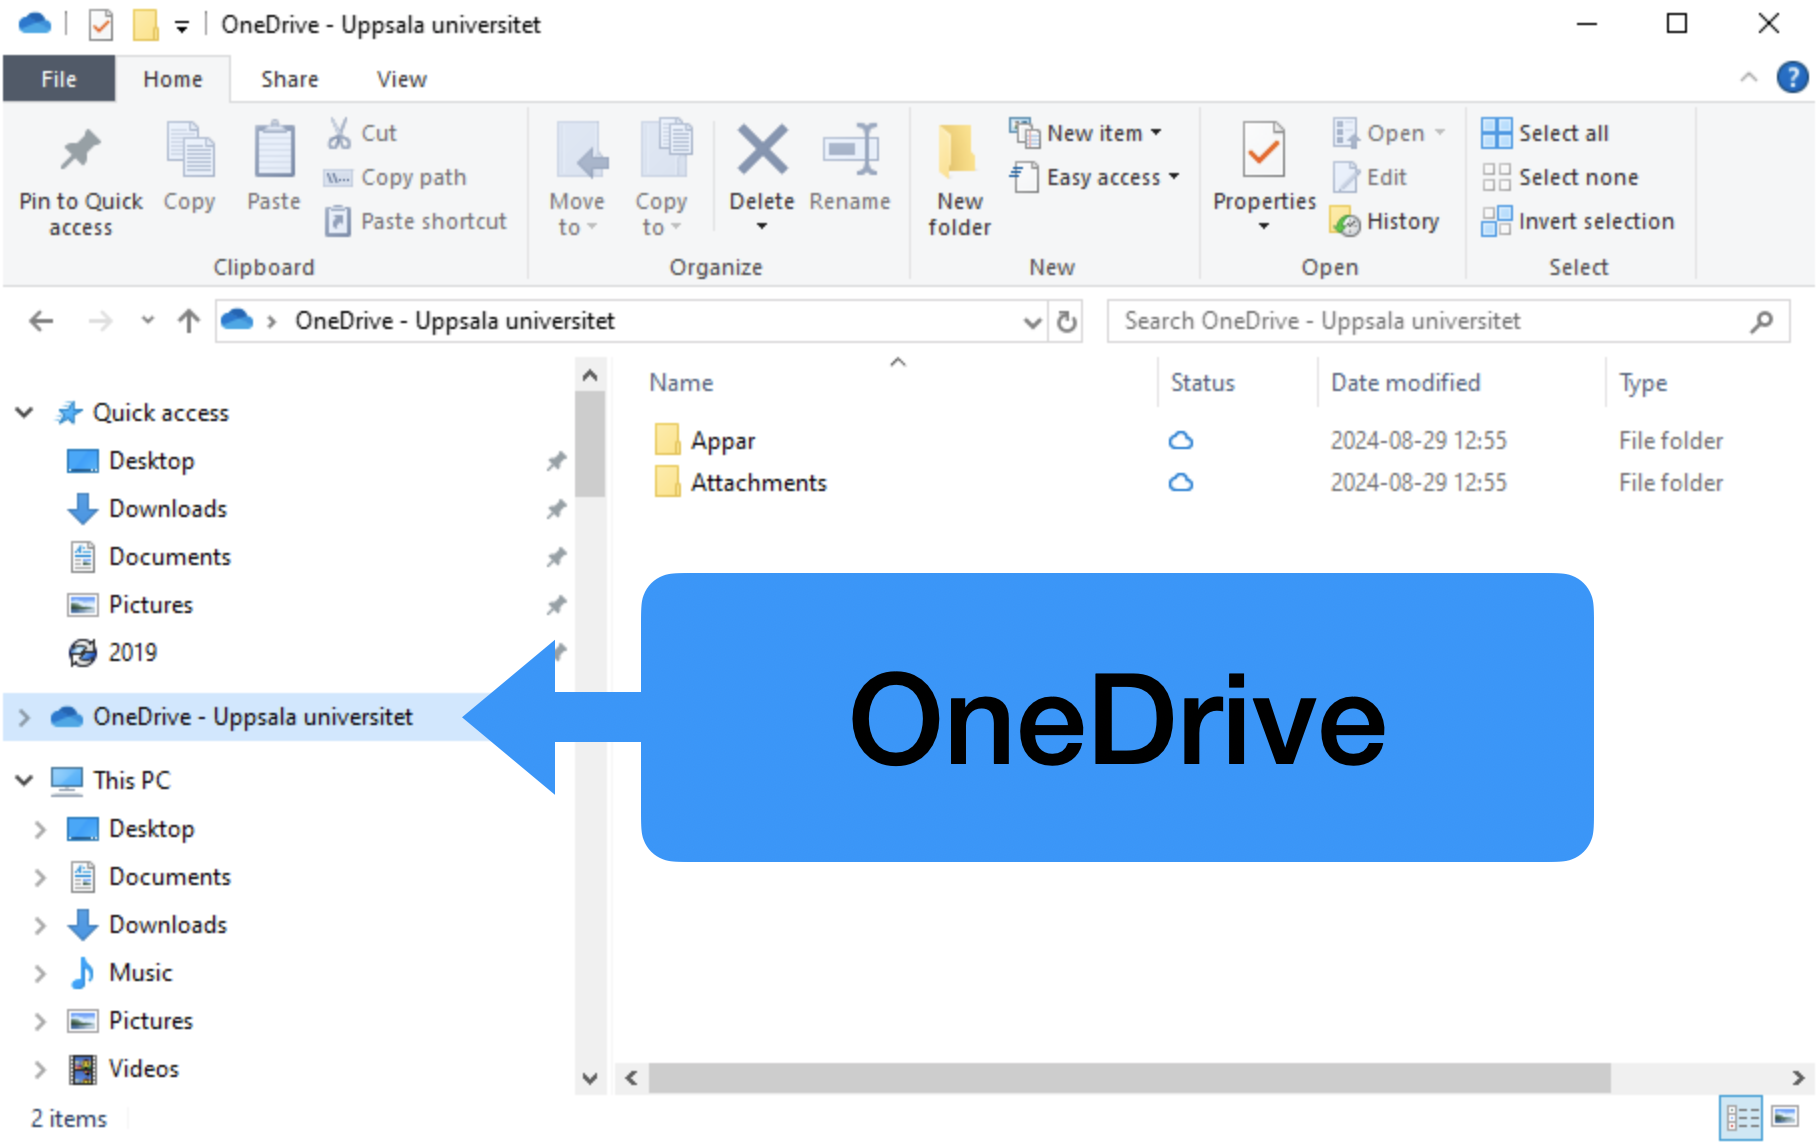
Among the icons in the taskbar you find the file explorer.
When you click on the file explorer icon, a new window opens.

If you find OneDrive in the File explorer, click on OneDrive.
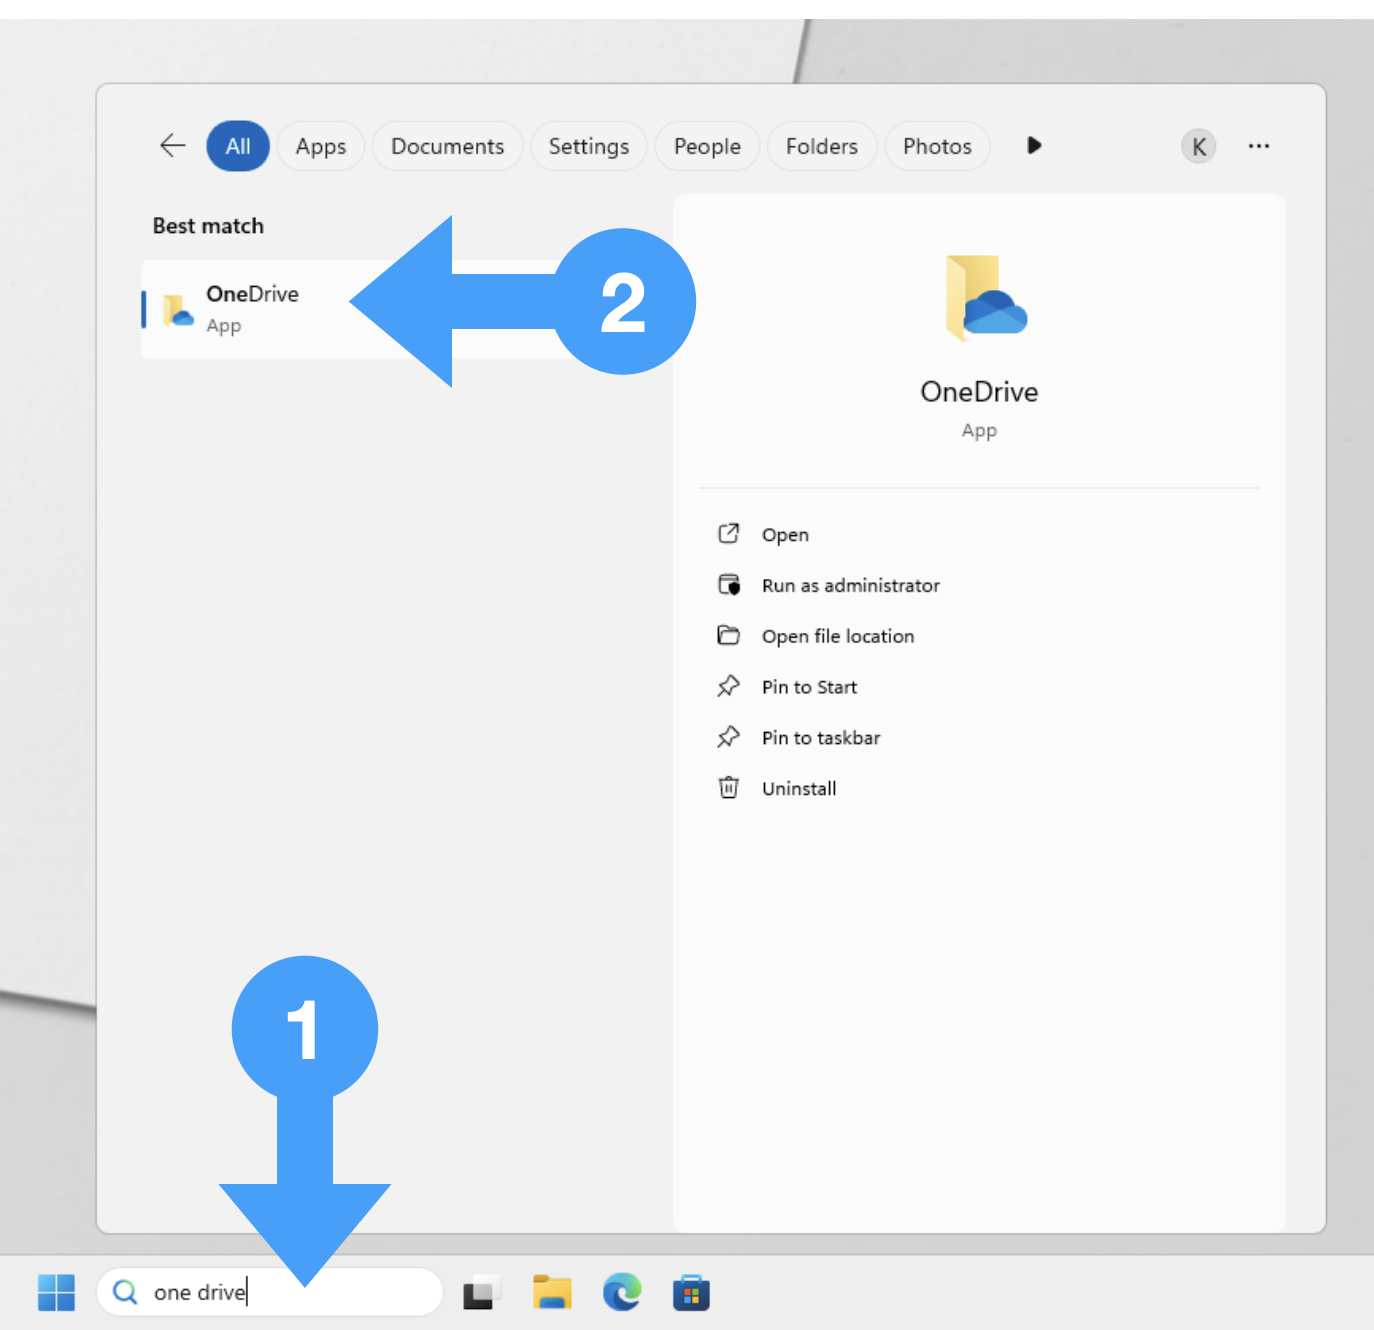
If you don’t find OneDrive in the File explorer, search for One Drive in the taskbar (1) and click on OneDrive App (2).
You must now provide your email address on the form
firstname.lastname.1234@student.uu.se.
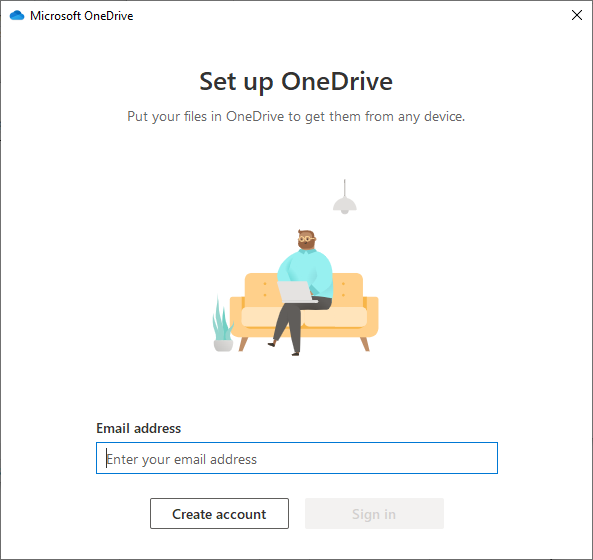
Next, press Sign in. Before you can use OneDrive, you must sign in with your Student account and MFA on your mobile phone.
When you log in for the first time, the following window appears.
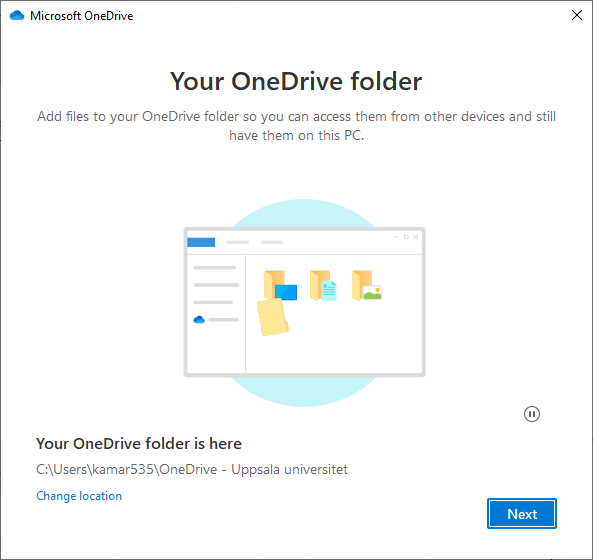
You can press Next a few times to learn more about OneDrive or you can simply close this window.
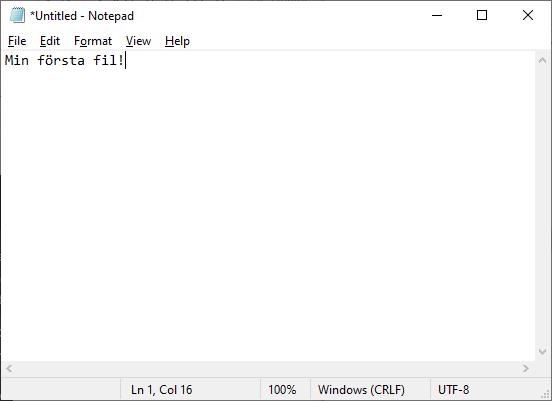
Press the Windows key and search for Notepad to launch this program and enter some text.
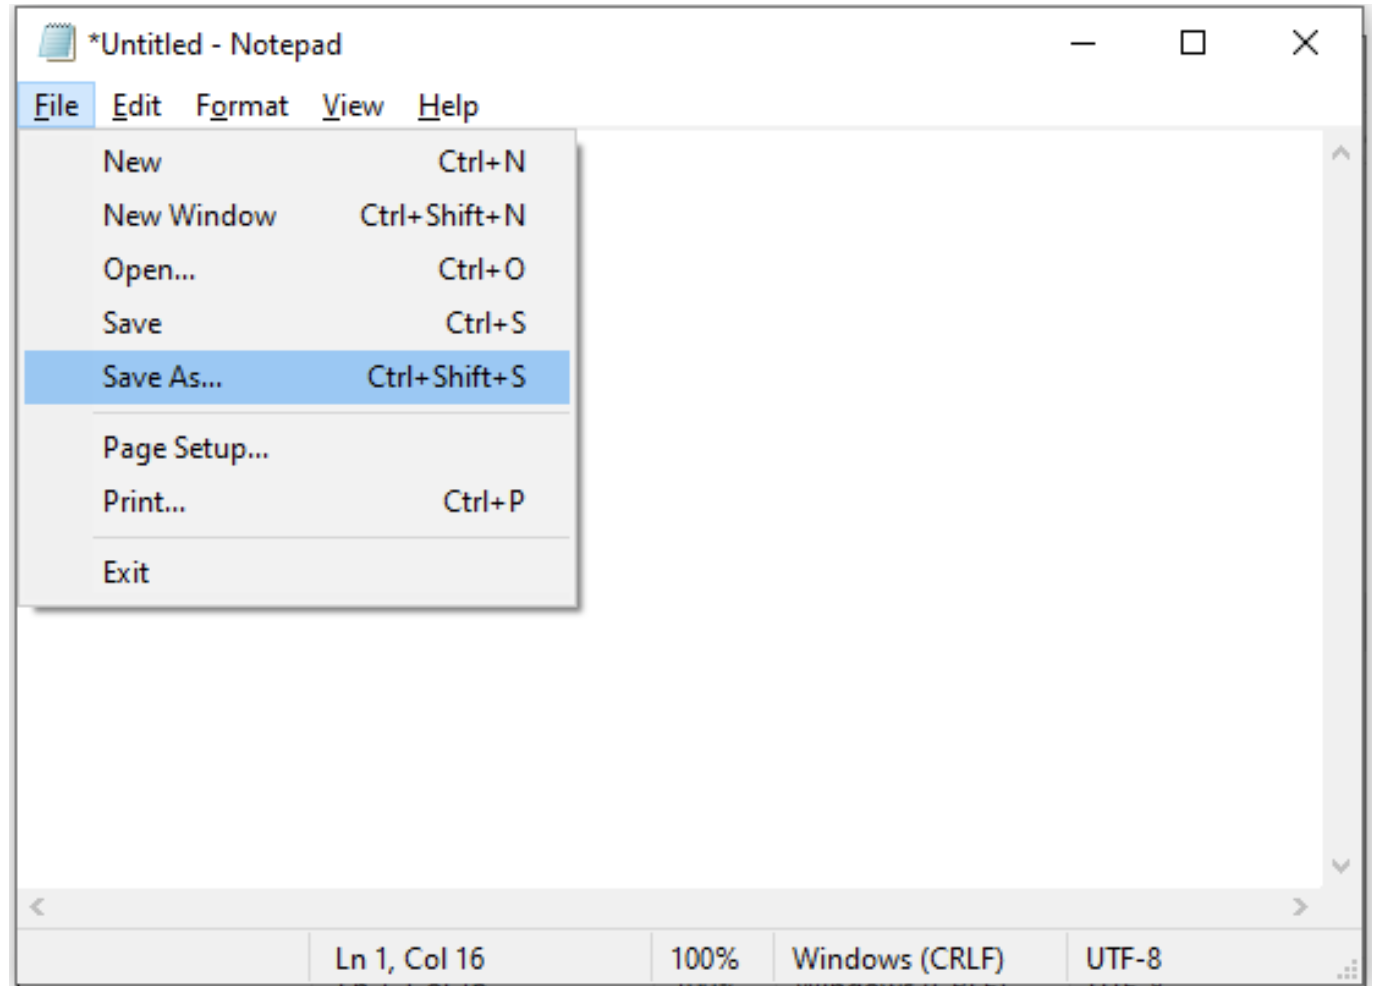
In the meny, click on File and then Save As….
Now the File explorer opens. First click on OneDrive and then on New folder to create a new folder in OneDrive.
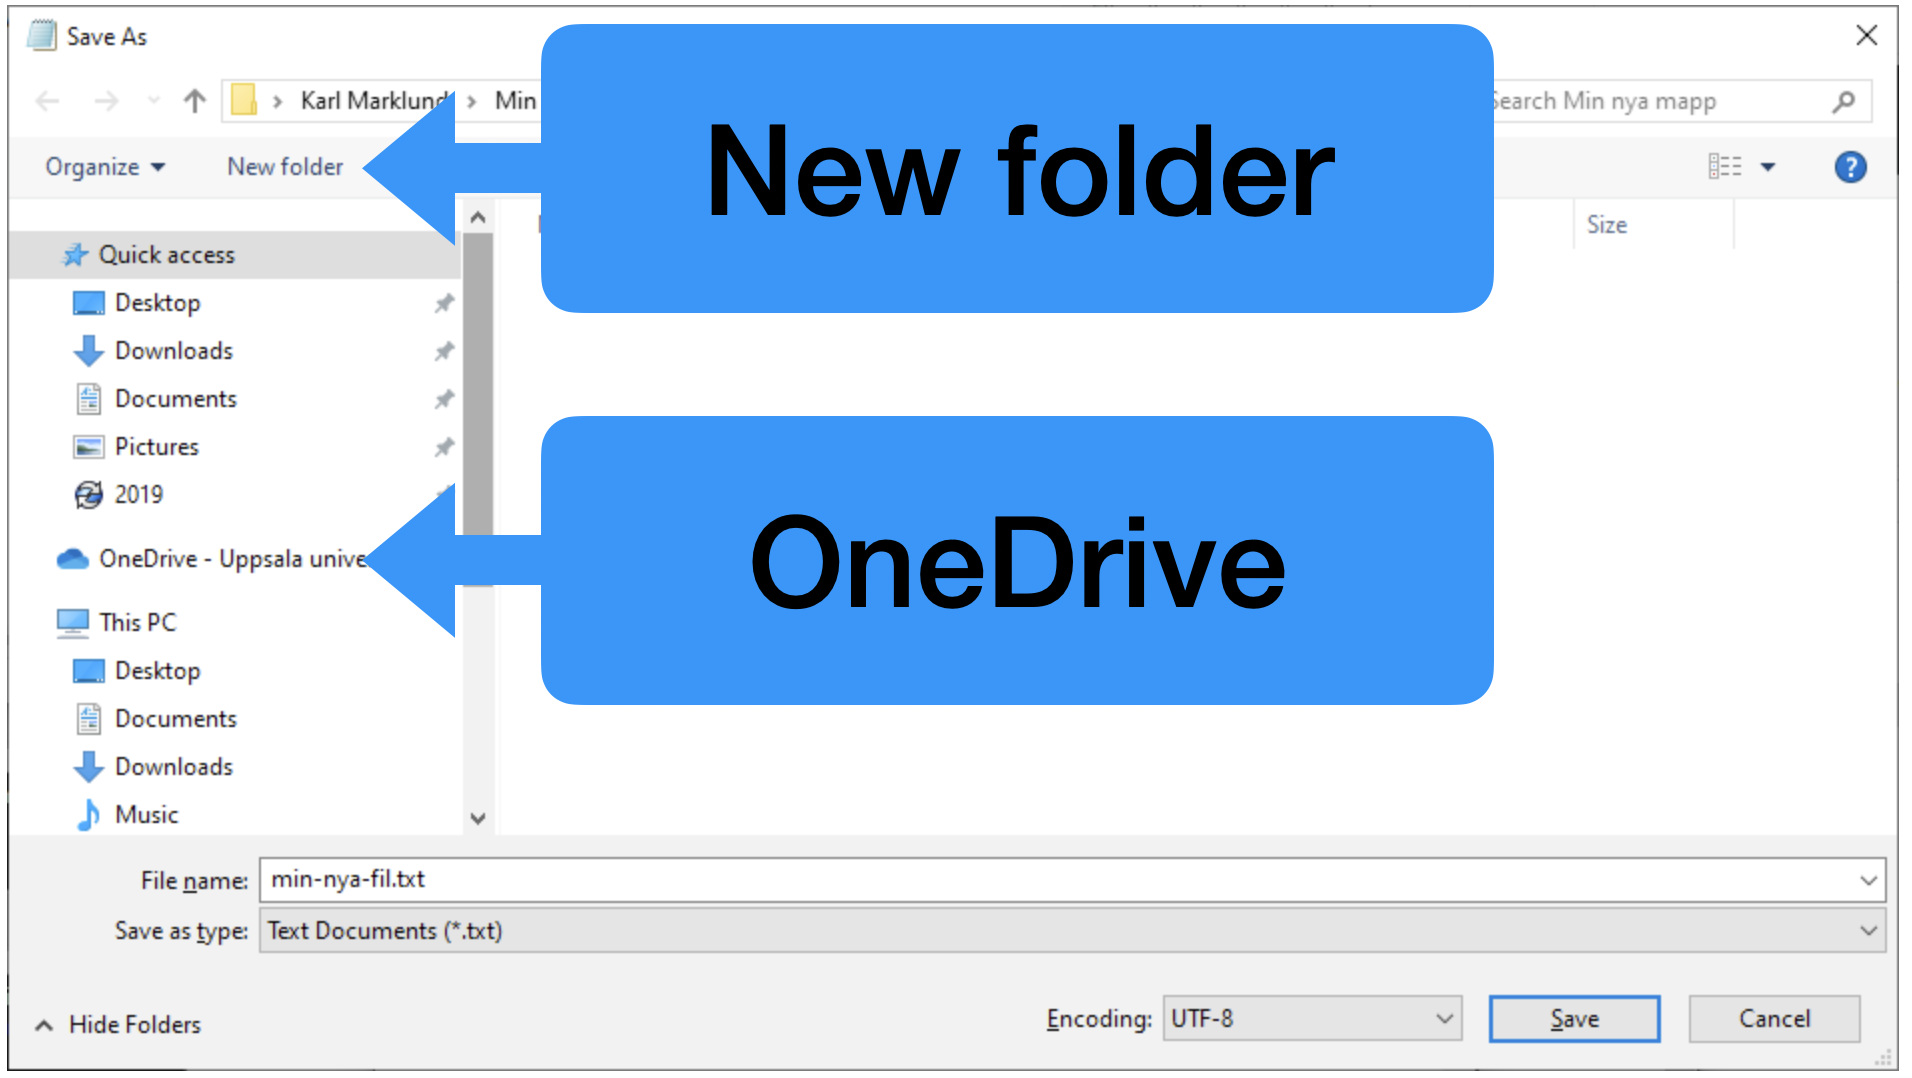
Give the new folder a name, for example My First Folder. In the field File name, enter the name of the new file, for example my-new-file.txt.

Click on Open.
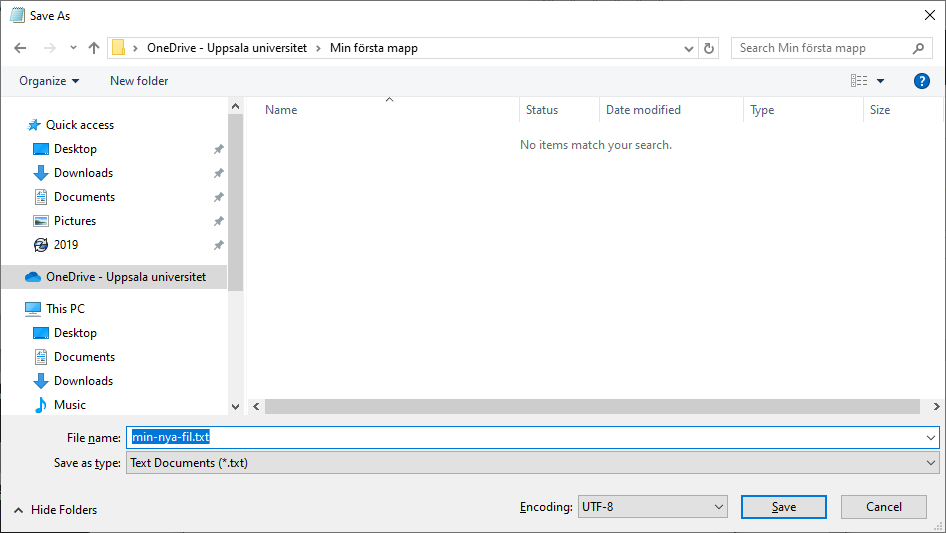
Click on Save. You have now saved the file in the new folder in OneDrive.
The new file is now stored in the My First Folder folder in OneDrive and you can access it via OneDrive on any computer connected to the internet, for example your private Windows computer.
If you are using Windows 10 or Windows 11, OneDrive is already installed. OneDrive is not only available on computers with Windows. You can also download OneDrive for macOS, iOS and Android.
An alternative to activate OneDrive in the file explorer on a computer with Windows is to access OneDrive directly in a web browser by signing in to OneDrive here.
Learn more about OneDrive here.
Here you find information on how to log in to the University’s Linux system from one of the computer rooms for students on Campus Ångströmlaboratoriet.
In all computer rooms on campus Ångstrumslaboratoriet you find computers with Windows.
On campus Ångströmlaboratoiet there are a number of large computers (servers) running Linux somewhere in a basement. As a student, you will never physically interact with these server computers. Instead, you log in to these servers from Windows to get access to the Linux desktop environment on the same screen as Windows. The system used for this is called ThinLinc.
To access the Linux system, you must first log into Windows and from Windows use ThinLinc Client to log in to a Linux server.
Log in to Windows with your student account on
the form abcd1234 and Password A.
Search for ThinLinc in the taskbar (1).
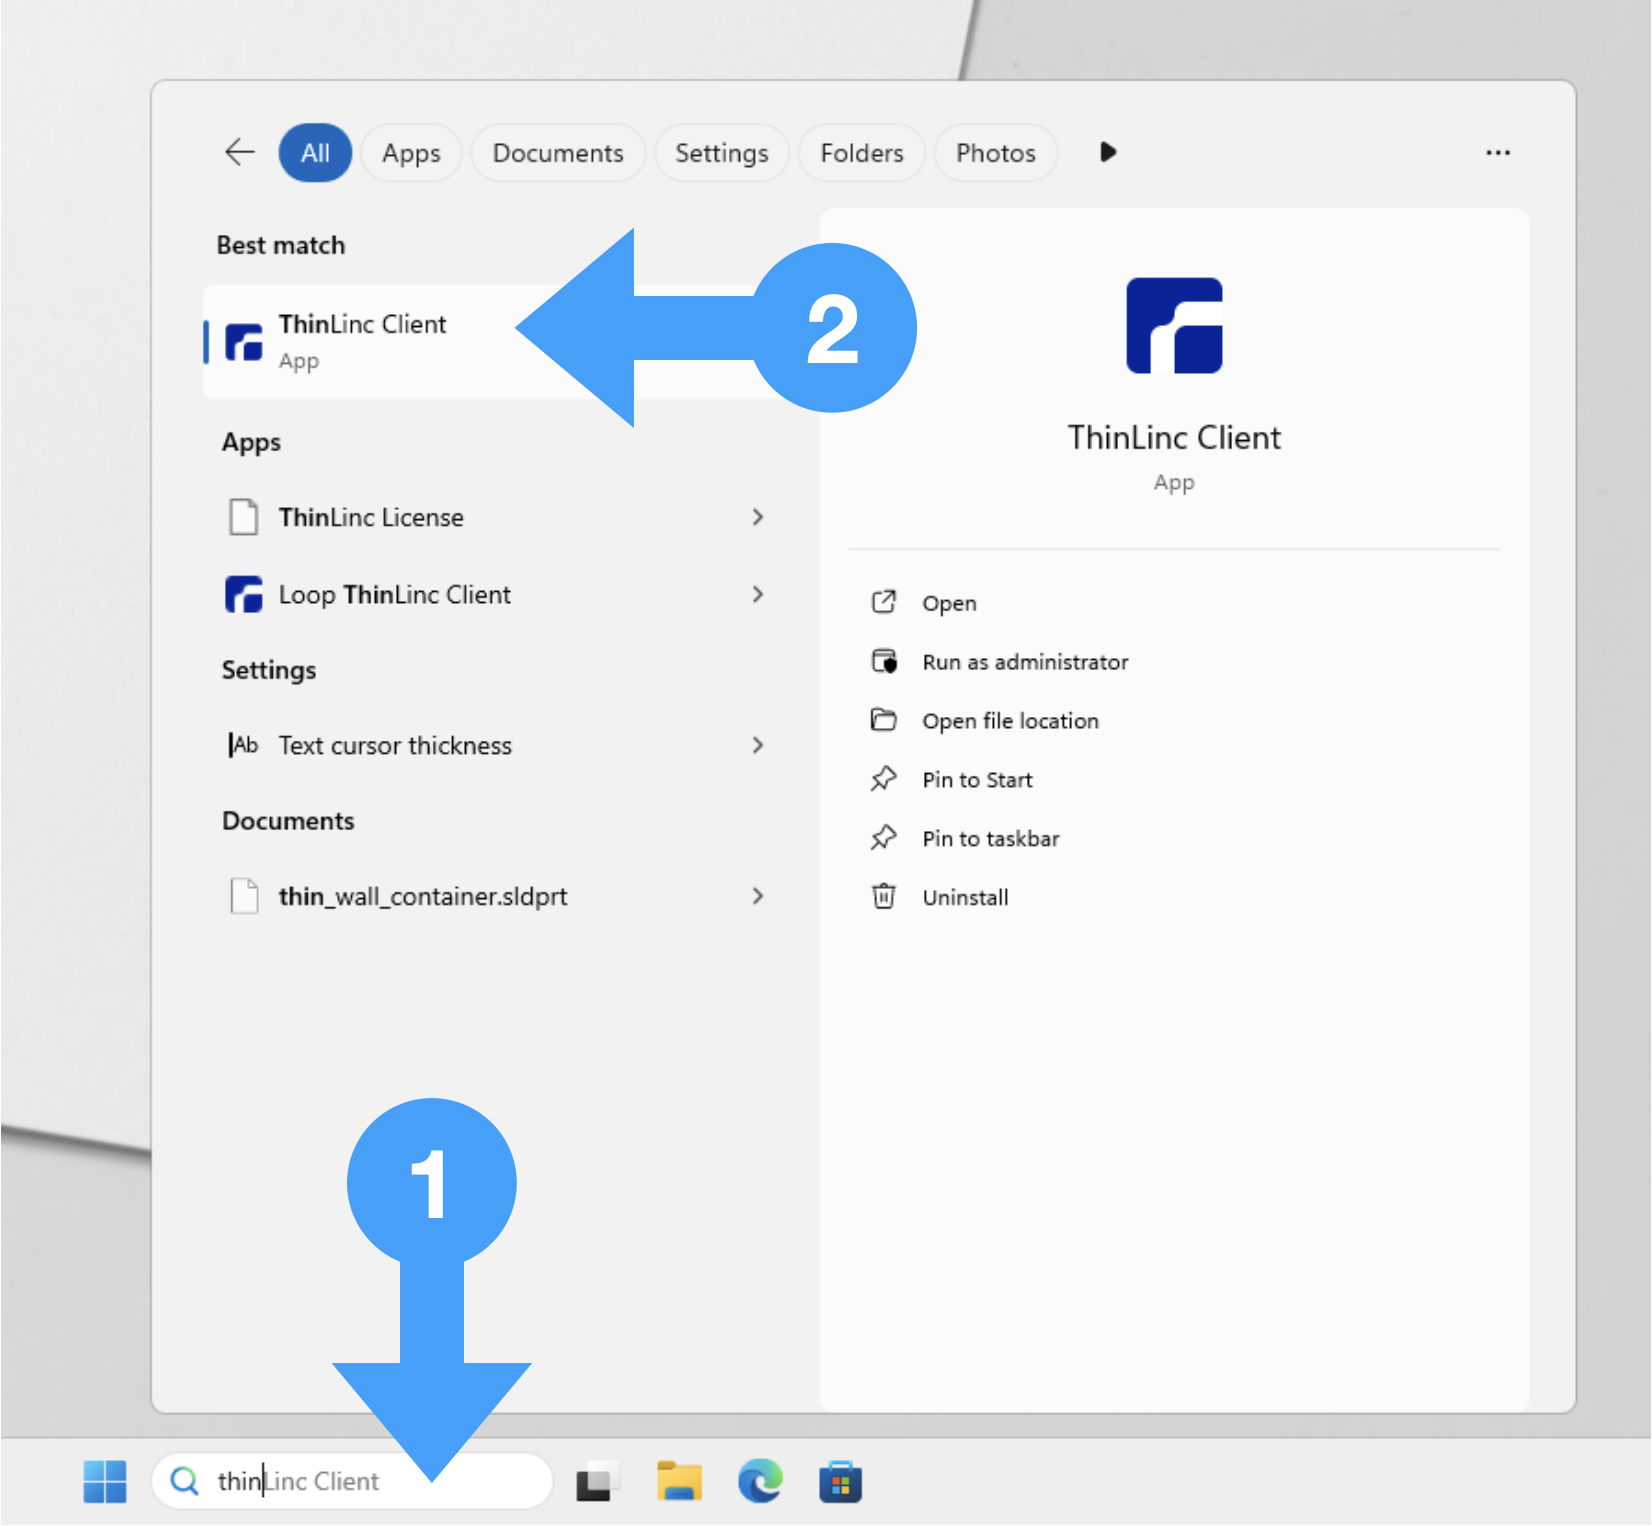
Klick och ThinLinc Client (2).
Click on the ThinLinc Client icon in the taskbar to log in to the Linux system. Enter the following login information.
thinlinc.student.it.uu.se.abcd1234.
Click Connect to login. The first time you log in, you may see the following message.
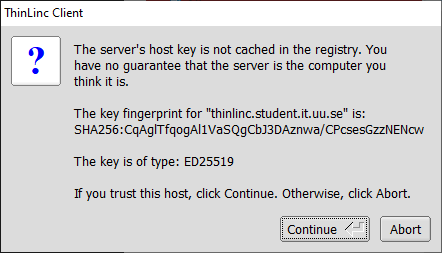
If you see the above message, click on Continue.
After a successful login, new window will open with the Linux desktop environment. You can maximize or resize this window, just like for any other window in Windows. Thus, in the Linux desktop window in Windows you interact with the Linux system that is actually running on a remote server.
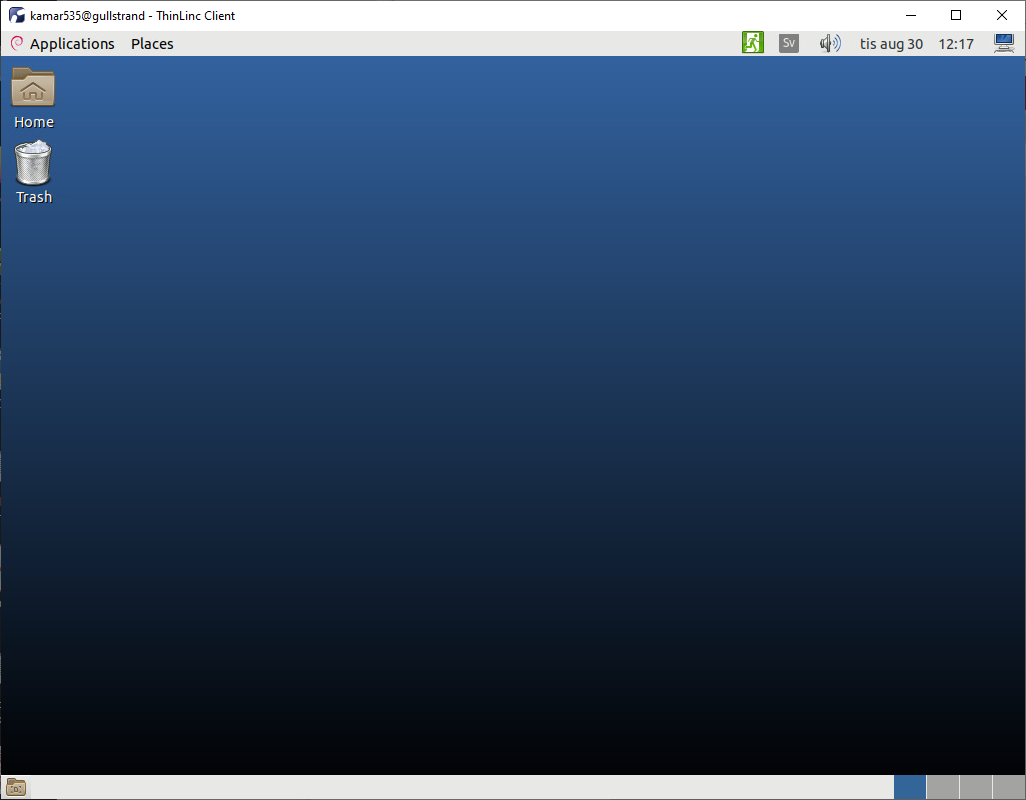
The department Linux system runs Ubuntu Server 18.04 LTS using the Gnome flashback desktop environment with the Numix desktop theme.
You can open a terminal in two ways:
After a few seconds a new terminal window should open.
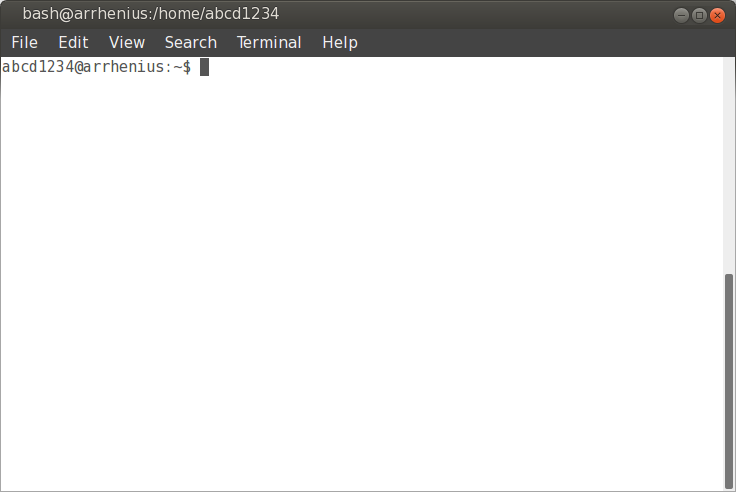
In the upper left corner of the white area of the terminal window you see
abcd1234@arrhenius:~$ . This it the shell prompt with your username on the form
abcd1234 and the name of the Linux server you are
connected to, in this example arrhenius. The shell prompt you see might be
different.
In the above example, the prompt shows the username of the logged in user abcd1234
together with the name of the physical Linux server arrhenius used. You should
see your own user name. If you are logged into a different physical Linux server
you will also see a different server name in the prompt.
It is also possible to tweak the prompt to show custom information such as your username, local time etc.
Since the appearance of the shell prompt might vary, in all further instructions the shell prompt will be omitted and commands you enter att the shell prompt will be presented in a box like this.
ls -F # Example shell commandIf you hover over the box above, a copy button will appear in the upper right corner. Press this button to copy the text in the box. Now you can paste the copied command at the shell prompt in your terminal and press enter to execute the command.
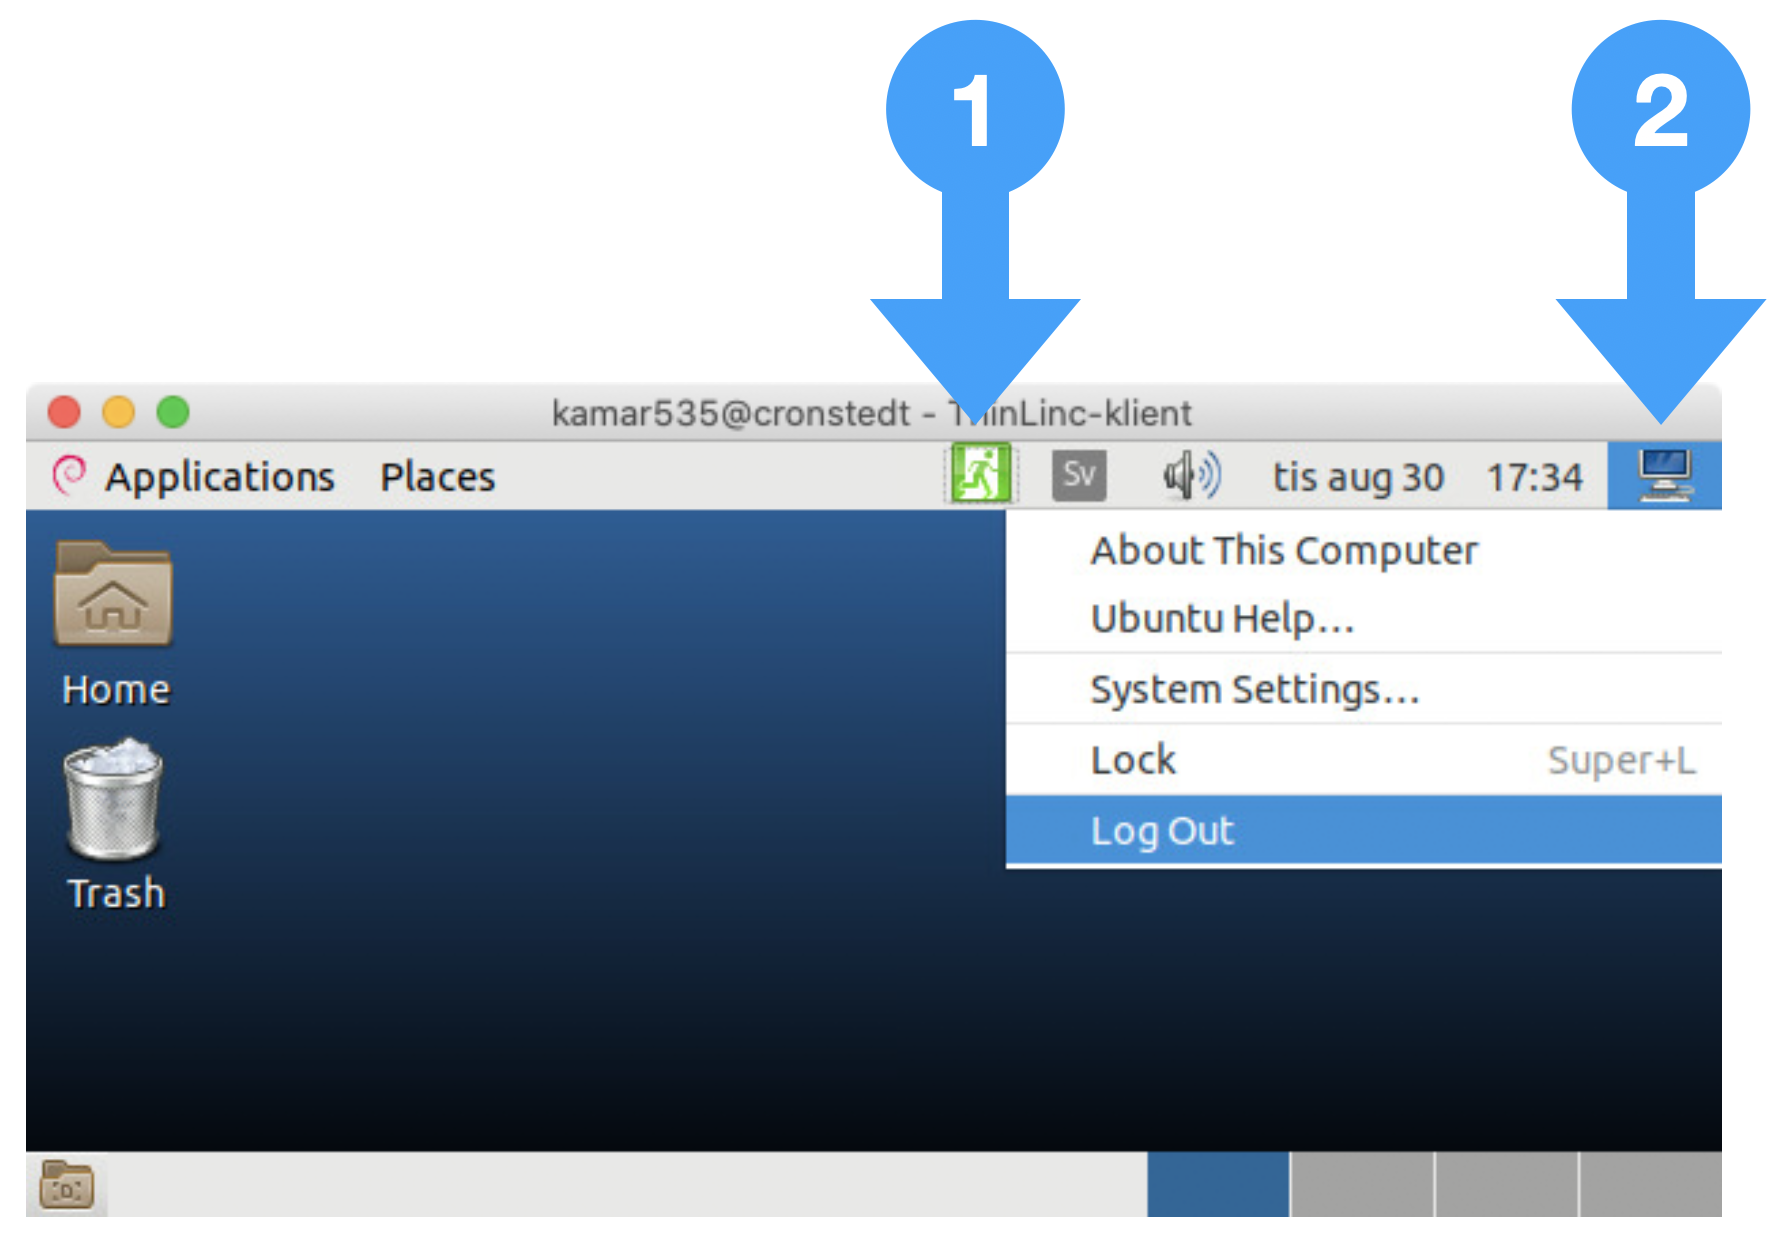
There are two options for logging out from the Linux system. To log out of Linux you can:
Click on the icon with a person walking through a door at the top.
Click on the icon with a computer at the top right and then select Log Out to log out.
After you log out, the Linux window closes. If you logged out by mistake you must restart the ThinLinc Client and login again to continue working with Linux.
You can access the [department Linux System ][dep-linux] remotely using SSH to login to one of the student servers.
Read more here about how to install SSH with X forwarding support on your system.
In the below example, a user with user name abcd1234 uses the ssh command
with the -X option to enable X forwarding to log in to the department Linux
server trygger.it.uu.se.
ssh -X abcd1234@trygger.it.uu.seOne you are logged in, you can start graphical applications from the Linux shell. You can for example run Mars.
mars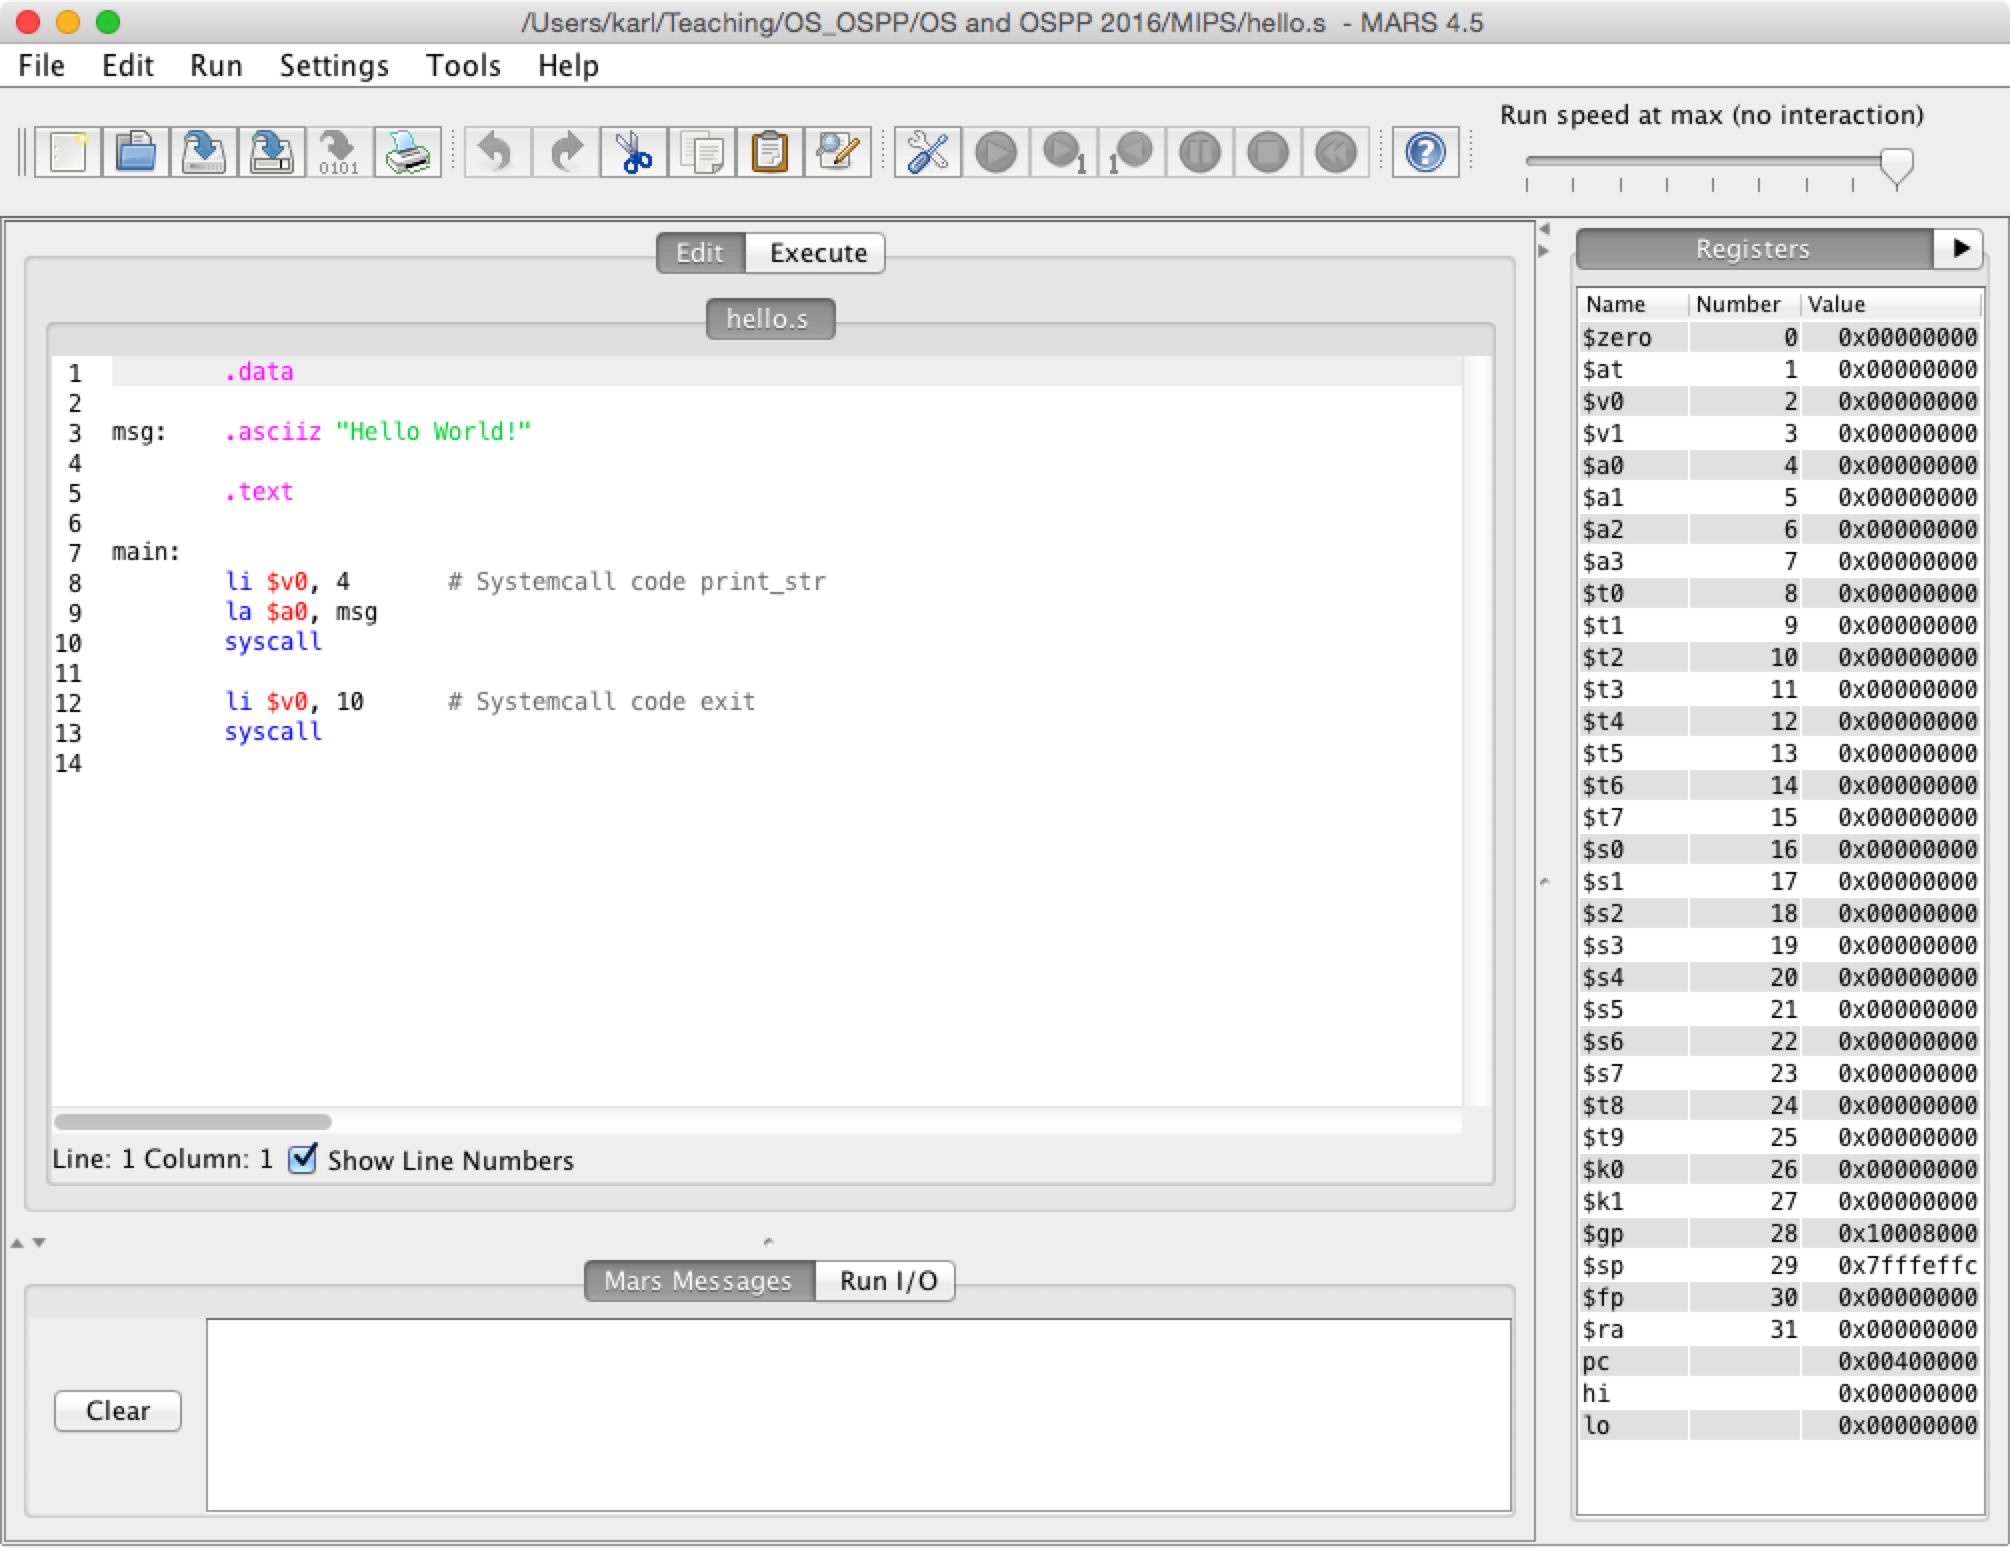
To edit C source code you can for example use the VS Code source code editor remotely.
code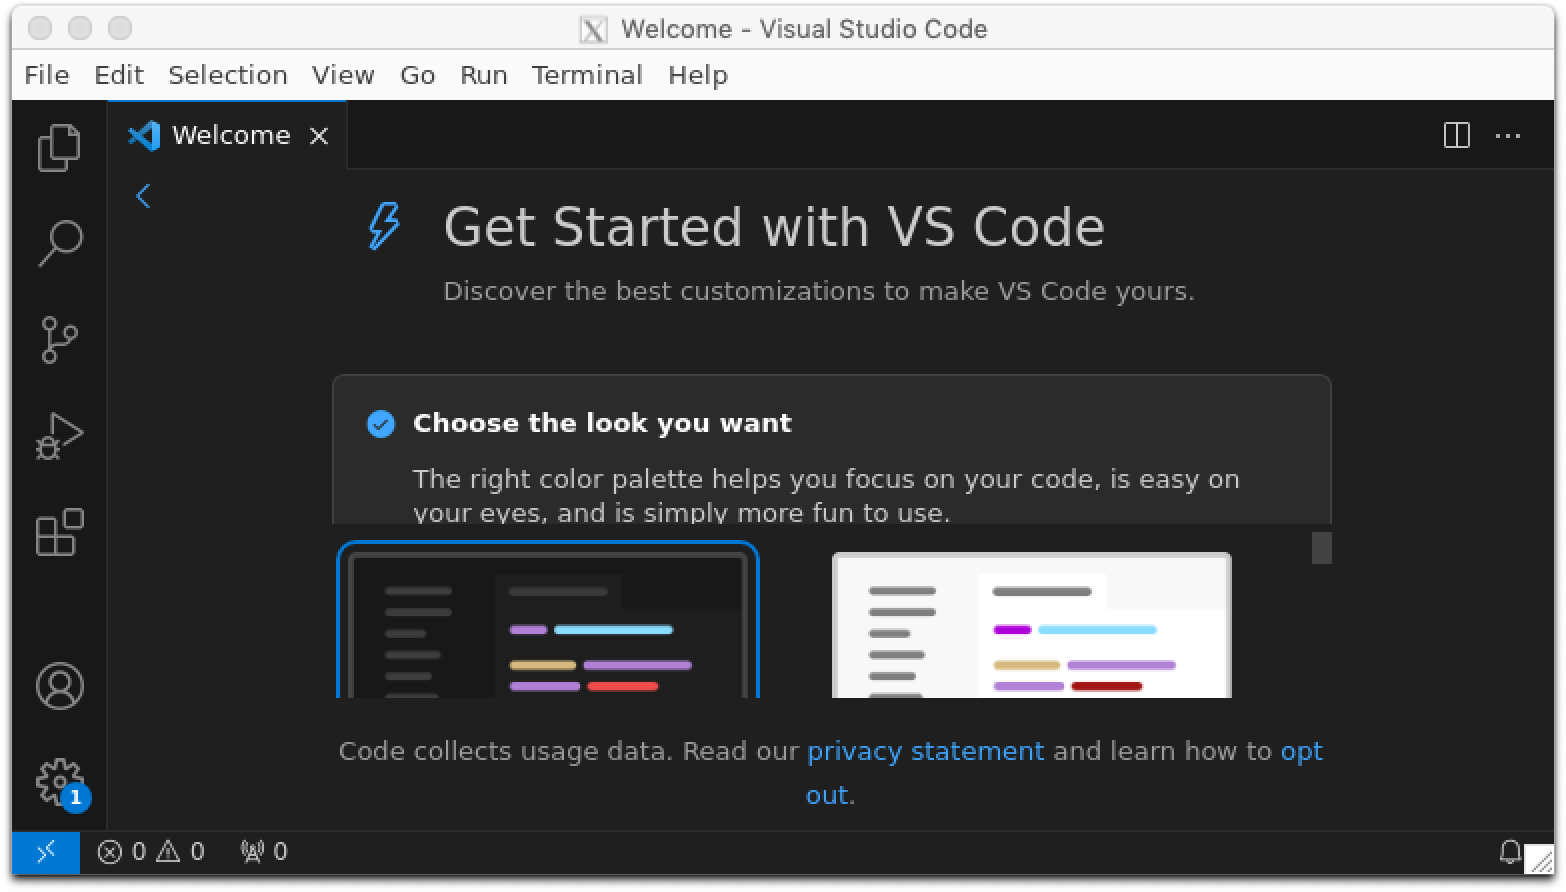
A list of know problems with the department Linux system and workarounds.
![]()
![]()
A shell is a user interface for access to an operating system’s services. Most often the user interacts with the shell using a command-line interface (CLI). The terminal is a program that opens a graphical window and lets you interact with the shell.
Originally, a computer terminal was an electronic or electromechanical hardware device used for entering data into, and displaying data from, a computer or a computing system. The terminal of the first working programmable, fully automatic digital Turing-complete computer, the Z3 (1941), had a keyboard and a row of lamps to show results.1
Early computers where huge machines taking up a lot of space. Commonly a system consisted of multiple cabinets, for example one cabinet for the main processor unit, one or more cabinets for tape drives, one cabinet for each disk drive, one cabinet for a punched card reader and one cabinet for a high speed printer. In the below image, a Univac 9400 system (1967) consisting of multiple cabinets is shown.

A Univac 9400 mainframe computer data center on display in the Techikum29 museum. Photograph by technikum29.
Early user terminals connected to computers were electromechanical teleprinters or teletypewriters (TeleTYpewriter, TTY). In the above image of the Univac 9400 system, the cabinet marked UNICAC 9400 is the main processor cabinet. The terminal is the machine looking like a huge typewriter placed on the desk to the left of the main processor cabinet. Another example of an early terminal is the Teletype Model 33 ASR (1963) shown below.

A model 33 ASR terminal from the Teletype Corporation on display at the Computer History Museum, Mountain View, California, USA. Photograph by Arnold Reinhold.
As technology improved, teleprinter terminals was replaced by video display terminals. One example of such a video display terminal is the DEC VT100 (1978) shown below.

A DEC VT100 terminal. Photograph by Jason Scott.
Note that the DEC VT100 terminal shown above is not a computer. The DEC VT100 terminal was only used for input and output to and from a connected computer. In the below image DEC VT52 video terminal (1974) is connected to a PDP 11/55 computer (1975).

A DEC VT52 video terminal connected to a PDP 11/55 computer. Photograph courtesy of House for Retired and Aged Computers.
A terminal emulator is a program that emulates a video terminal within some other display architecture.2 Today, the term terminal is often used synonymously with a terminal emulator running a shell.
On this page you find a small collection of useful shell commands when working in the terminal. You will also learn about shell variables, the command history and how to read manual pages in the terminal.
Every user on the Linux system has a unique username. The whoami command will show your username.
Type whoami at the shell prompt.
whoamiPress enter to execute the command. Now the result will be printed on the next line in the terminal and a new shell prompt will appear on the line after that.
abcd1234
In the above example the username of the logged in user abcd234 is printed as
the result of the whoami command.
In all examples and instructions you should replace abcd1234 with your actual username.
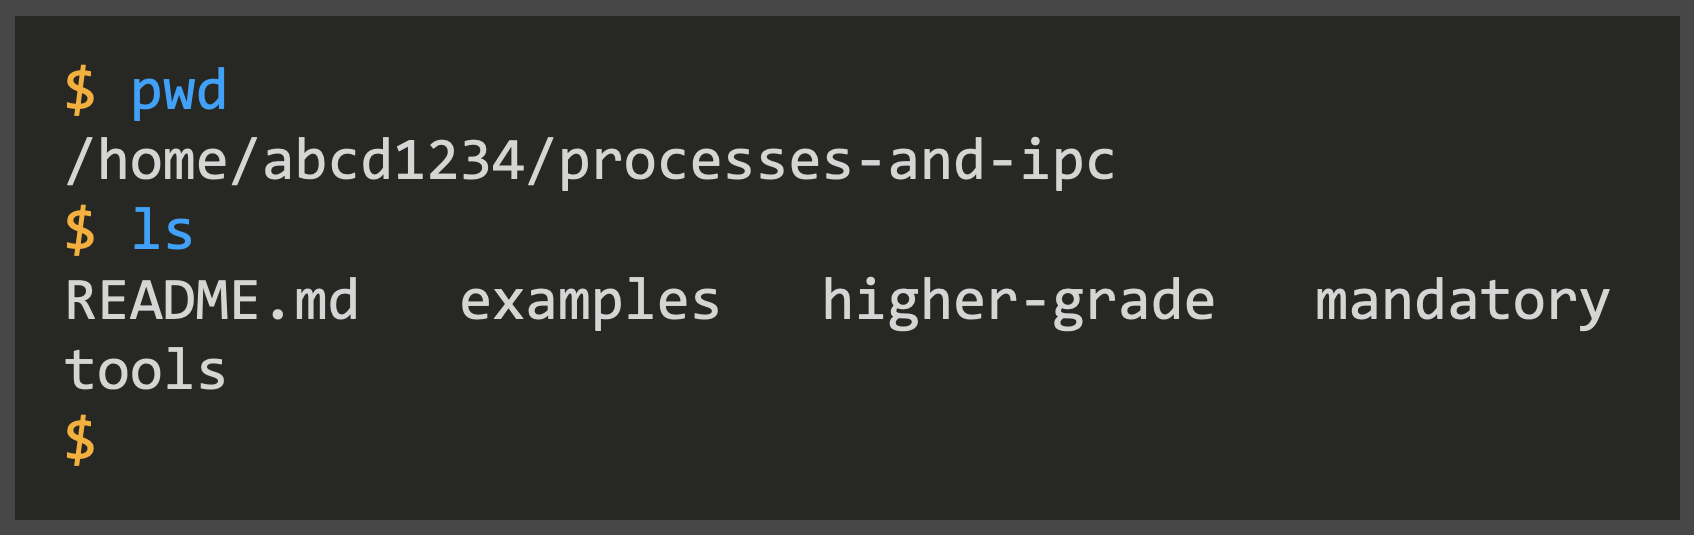
The shell has a concept of a current working directory. The pwd (print working
directory) command prints the full path of the current working directory.
Type pwd at the shell prompt.
pwdPress enter to execute the command.
/home/abcd1234In the above example the current working directory /home/abcd1234 is printed
as the result of the pwd command.
On the Linux system each user has a private home directory to where she/he can save files and create sub directories.
When you first log in to the Linux system the home directory will be used as the current working directory in the shell.
For user abcd1234 the full path to the home directory is /home/abcd1234.
To list the files and directories in the current working directory the ls command can be used. The name ls is a short form of list (files).
Type ls at the shell prompt.
lsPress enter to execute the ls command. You should see something similar to the
below as result but you might see other files and folders listed.
foo.txt Desktop public_htmlIn the above example the only content in the current working directory is the
text file foo.txt and two sub directories Desktop and public_html. You may see
many more directories and files.
To get some more information about files and folder various options can be given
to the ls command. One useful option is -F that marks directories
with a trailing slash /.
ls -FYou should now see something similar to this.
foo.txt Desktop/ public_html/The tree command displays the contents of the current directory and
subdirectories as a tree structure.
treeThe output takes a graphical form which will resemble the following example:
.
├── README.md
├── one.txt
├── sub
│   └── three.txt
└── two.txt

1 directory, 4 files
In the above example, there are three files (README.md, one.txt and
two.txt) and one sub directory (sub) in the current working directory. In
the sub directory sub there is a single file three.txt.
You can provide tree with the path to a directory to visualize its content.
tree subNow, only subtree of the sub directory is shown.
sub/
└── three.txt

0 directories, 1 fileIf you run macOS and tree is not installed, use Homebrew to install tree.
brew install treeThe cd command navigates to a different folder. The name cd means change directory.
First print the current working directory.
pwdThis will show the path of the current working directory, for example.
/home/abcd1234To navigate to the Desktop folder, type cd Desktop at the shell prompt and press
enter.
cd DesktopPrint the current working directory to confirm.
pwdYou should now see your absolute path to your Desktop directory.
/home/abcd1234/DesktopNote how the current working directory changed from /home/abcd1234 to
/home/abcd1234/Desktop as the result of the cd Desktop command.
The directory above the current working directory can be referred to using ...
To navigate to the parent directory, type cd .. and press enter.
cd ..Now, execute the pwd command again.
pwdAnd, you are back in your home directory.
/home/abcd1234Note how the current working directory changed back from /home/abcd1234/Desktop
to /home/abcd1234 as the result of the cd .. command.
The cat command can be used to print the content of a file to the terminal.
Assume you have the following file named foo.txt in the current working directory.
The first line of the file.

The third line. The second line is empty.
The last line of the file.
You can now print the content of foo.txt to the terminal using the cat command.
cat foo.txtNow, the content of the file foo.txt will be printed out in the terminal.
The first line of the file.

The third line. The second line is empty.
The last line of the file.
The name cat is a short form
of concatenate which means to
join together. If more than one argument is given to cat the contents of the
provided files will be joined together and printed to the terminal.
In the below example cat is used to concatenate the file foo.txt with itself.
cat foo.txt foo.txtThis will output the contents of the file foo.txt twice.
The first line of the file.

The third line. The second line is empty.
The last line of the file.
The first line of the file.

The third line. The second line is empty.
The last line of the file.
One useful option to the cat command is -n:
cat -n foo.txt, which prefixes each line with a line number.
     1	The first line of the file.
     2
     3	The third line. The second line is empty.
4 The last line of the file.The wc command counts the number of words, lines and bytes.
wc foo.txtIn this example the file foo.txt has four lines of text with a total of 20 words and 98 bytes.
4 20 98In the above example we see that the file foo.txt contains for lines, 20 words and 98 bytes.
The grep command searches its input for a pattern and prints all lines in the
input that contains that pattern.
To search for the the string X in the input type grep X at the shell prompt
and press enter.
grep XNote that we don’t get back the shell prompt. This is because the grep command is still running waiting for input.
The grep command will now read input from the terminal and print back all
lines containing the character X.
Now type Hello and press enter.
HelloThere is no X in the string Hello and therefore grep will not print back the string Hello to the terminal.
Type Hello mr X and press enter and watch what happens.
Hello mr X
Hello mr X
Once you type Hello mr X the grep command will print Hello mr X right back to
the terminal since it contains a matching X.
Lets try a few more lines and observe what happens.
abc
abcXdef
abcXdef
xxx
xXx
xXx
Only lines containing a matching X will be echoed back to the terminal.
To tell grep that you are done (no more input), press Ctrl D (press and hold
down the control key and while you still hold down the control key press the
D key).
Press Ctrl D. Now grep terminates and you get back to the shell prompt.
To filter the lines in a file, the name of the file can be given together with a search pattern to grep.
Assume you have the file foo.txt in your current directory. Using cat:
cat foo.txt, prints the contents of the file to the terminal:
The first line of the file.

The third line. The second line is empty.
The last line of the file.
In the below example only lines containing of in the file foo.txt will be printed to the terminal.
grep of foo.txtThe above command will result in the following being printed to the terminal.
The first line of the file.
The last line of the file.The usefulness of grep might not obvious at this point. To make grep useful
we will combine grep with ls to filter the output of ls.
First we use ls to list all files and folders.
ls
foo.txt    Desktop    public_html
If we are only interested in files (and folders) with names ending in .txt we
can combine ls and grep to using the pipe character |.
ls | grep .txtIn this example, only the foo.txt files matches the .txt pattern.
foo.txt In the above example, first the ls command executes but it does not print its
result back to the terminal. Instead, the result of the ls command becomes the
input to the grep command. The only file or folder name containing .txt is
foo.txt.
Using the pipe character | the output of the command to the left becomes the
input to the command to the right. This is called piping the two commands
together.
It is often useful to compress multiple files and folders into a single file that can later be decompressed and expanded to get back the original files and folders. There exists many file formats for compressed file archives.
The name tarball is often used to refer to a tar archive file.
Download the following gziped compressed tar archive (tarball) to your home folder:
From the terminal, make sure you have the downloaded tarball in the current
working directory. If you have many files in the current working directory you can
use ls together with grep to search for files with names matching .tar.
ls | grep .tarHopefully you will see the downloaded tar ball in the result.
archive.tar.gz In the above example the output of ls is piped together with grep to filter the
output of ls to only print any files (or folders) containing .tar. You
should see archive.tar.gz among the results.
To see the contents of a tarball without extracting all the files you can use
tar with options t and f.
tar tf archive.tar.gzIn this example this is the content of the archive.tar.gz tar ball.
archive/
archive/large.txt
archive/small.txt
archive/sub_folder/
archive/sub_folder/info.txt
In the above example we see that the tarball archive.tar.gz contains the top
level directory archive with sub folder sub_folder. In the top level directory
archive there are two files (large.txt and small.txt) and in the sub folder
sub_folder there is a single file (small.txt).
To unpack and extract the contents of a gzipped tarball we need to use the xvfz
options together with the tar command.
tar xvfz archive.tar.gzNow the name of each directory/file that is extracted is printed to the terminal.
x archive/
x archive/large.txt
x archive/small.txt
x archive/sub_folder/
x archive/sub_folder/info.txt
Now the tarball have been unpacked. Use ls to see what happened to the current
working directory.
ls | grep archiveNow you should have both the tar ball archive.tar.gz and the extracted
archive in your working directory.
archive
archive.tar.gz
In the above example we now have a new directory named archive inside the
current working directory.
Use cd to “step inside” the archive directory.
cd archiveNext, use ls -F to list the content in this directory.
ls -FThis is the content of the archive folder.
large.txt
small.txt
sub_folder/
Using the -R option ls will be run recursively stepping inside every sub-directory.
ls -RThe contents of the archive folder viewed recursively.
large.txt	small.txt	sub_folder

./sub_folder:
info.txt
In the result printed by ls -R a single period . means the current working
directory.
To print anything to the terminal simply type echo followed by the text you want
to print.
echo HelloThe text Hello now appears in the terminal.
HelloNote that Hello is echoed back to the terminal as the result of executing the
echo Hello command before the shell prints the next command prompt.
The shell can set and read variables. Sometimes it is useful to use the value of a built-in shell variable to make a command more generic and/or portable.
Remember that the command woami can be used to print your username.
whoamiIn this example your username is abcd1234.
abcd1234An alternative to woami is to use echo together with the shell variable
USER. In order for echo to know if you want to print the string "USER" or
the value of the shell variable USER shell variables must be prefixed with $
or enclosed within ${ }.
This:
echo Hello USER, results in:
Hello USERBut this:
echo Hello $USER, results in:
Hello abcd1234And this:
echo Hello ${USER}Results in:
Hello abcd1234Another useful shell variable is HOME with the full path to the home directory
for the logged in user. You can use echo to check the value of the HOME variable.
echo $HOMEIn this example the result is:
/home/abcd1234Often you type and run a command in the terminal and later you wants to run the very same command again. To prevent you from having to type the same thing again the shell keeps a history of executed command. To navigate the history, simply press the up-arrow to move backwards in history and press the down-arrow to move forward in history.
![]()
![]()
Try the following command in the terminal:
pwd, resulting in:
/home/abcd1234And now this command:
whoami, resulting in:
abcd1234If you want to repeat the whoami command, simply press the up-arrow key once.
Instead if you wish to run the pwd command again, press the up-arrow key twice.
For more information about command you can always refer to the corresponding
built in manual page. For example, to read the manual page for the ls command
simply type man ls and press enter at the shell prompt.
man lsThis will print the manual one page at a time to the terminal. To view the next page, press the space bar. To quit, press q.
To learn more about the build in manual pages read the manual page about the man command.
man manA summary of useful control keys when reading man pages.
| Key | Behavior |
|---|---|
| q | Quit and get back to the terminal |
| Space bar or F | Move forward one page |
| D | Move forward half a page |
| B | Move backwards one page |
| U | Move backwards half a page |
To learn more about the Ubuntu Linux shell:
To learn more about tar file archives (tarballs):

Source code for all tutorials and assignments will be made available in various repositories on GitHub. To download source code you will use Git to clone repositories to your Department Linux user account or to your private computer.
Open a terminal, type git --version and press enter.
git --versionIf git is installed you will something similar to this as a result in the
terminal.
git version 1.9.1If git is not installed you will something similar to this as a result in the
terminal.
git: command not foundIf git is not installed on your system, install git by following
these
instructions.
Let’s look at the following example GitHub repository.
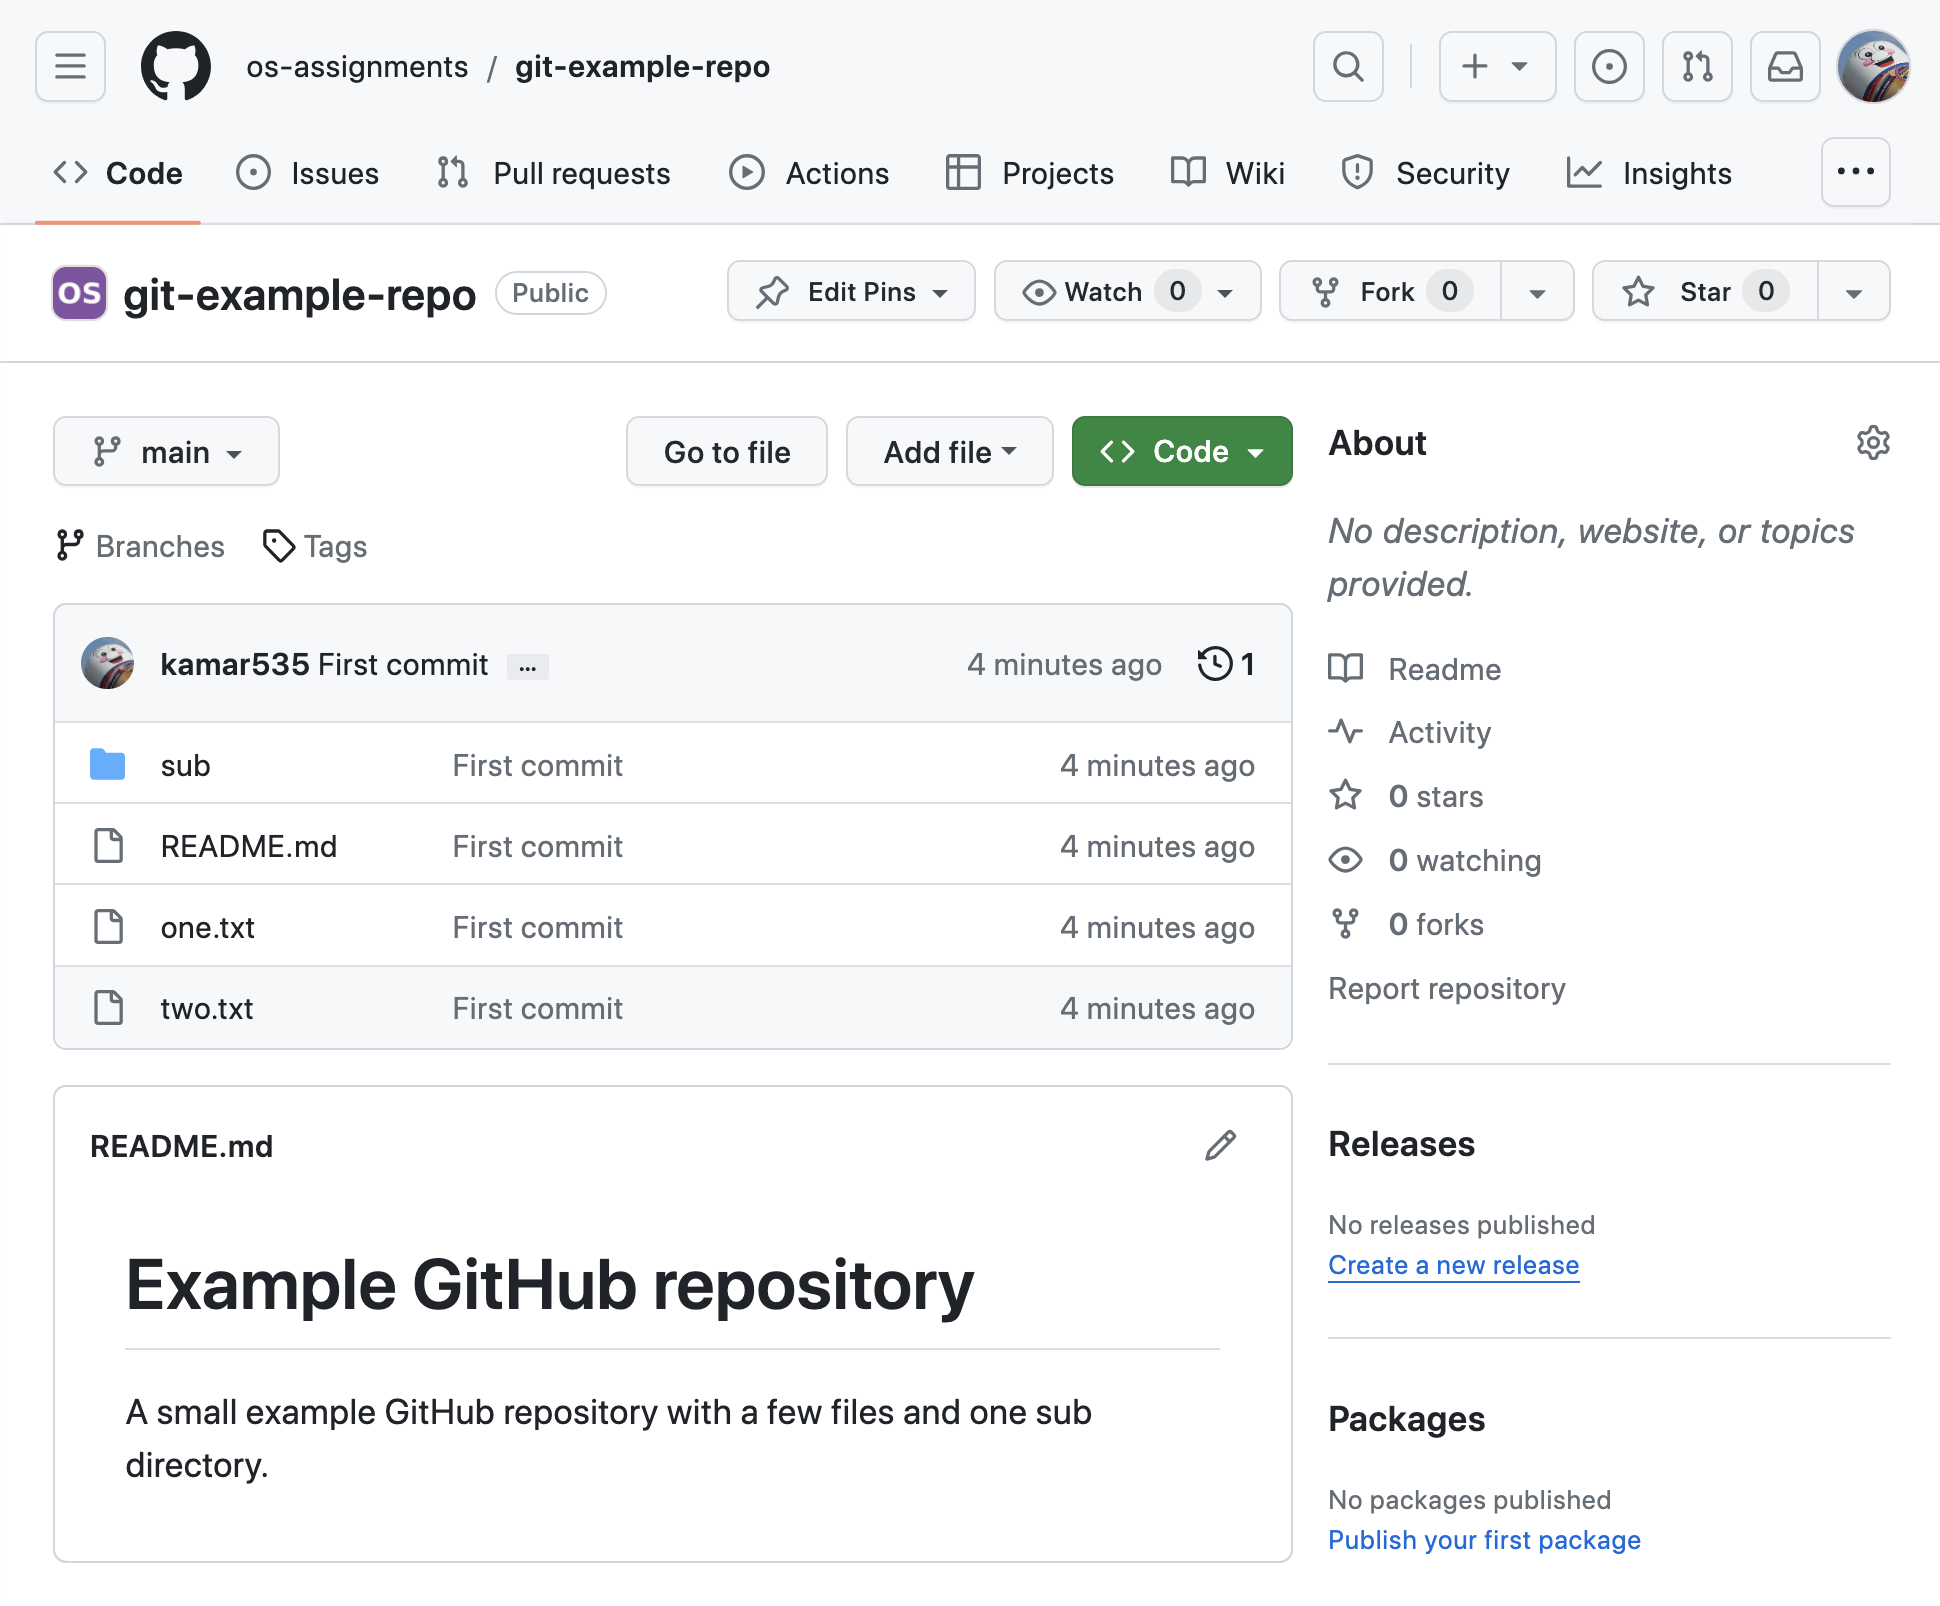
The repository contains the folder sub and the files README.md, one.txt
and two.txt. The sub folder contains a single file named third.txt.
By clicking on a file, for example the one.txt file, you will see the content of the file.
A small text file.Click on the green button named Code (1). Now a small pop-up will appear showing the repository URL. To copy the repository URL click on copy-to-clipboard icon (2) to the right of the URL.

From the terminal, navigate to a directory where you want the cloned directory
to be created. To clone the example repository, type git clone followed by a space and paste the repository URL.
$ git clone https://github.com/os-assignments/git-example-repo.gitPress enter to execute the command. Now you should see something similar to this written to the terminal.
Cloning into 'git-example-repo'...
remote: Counting objects: 14, done.
remote: Compressing objects: 100% (8/8), done.
remote: Total 14 (delta 1), reused 14 (delta 1), pack-reused 0
Unpacking objects: 100% (14/14), done.
Checking connectivity... done.
Note the first line Cloning into 'git-example-repo'.... This tell
you that the cloned repository is found in the newly created directory git-example-repo
within the current working directory.
To get an overview of the cloned repository, use the tree command.
tree git-example-repoThe tree command will print out a tree view showing all files and folders in
the git-example-repo directory.
git-example-repo
├── README.md
├── one.txt
├── sub
│   └── three.txt
└── two.txt

1 directory, 4 files
From the above we see that in the git-example-repo we find the files
README.md, one.txt and two.txt. In the same directory we also find a sub
directory named sub. Within the sub directory we find a single file named
three.txt.
In order to study how the operating system interacts with the hardware, Mips assembly will be used.
To edit and execute Mips assembly programs we will use Mars (Mips Assembler and Runtime Simulator). Mars is available on the department Windows and Linux system.
Mars will run on any system (including Windows) as long as you have Java installed. If you prefer, you may download and install Mars on your private computer.
To execute a MIPS program memory must be allocated. The MIPS computer can
address 4 Gbyte of memory, from address 0x0000 0000 to 0xffff ffff. User memory
is limited to locations below 0x7fff ffff. In the below figure the layout of the
memory allocated to a MIPS program is shown.
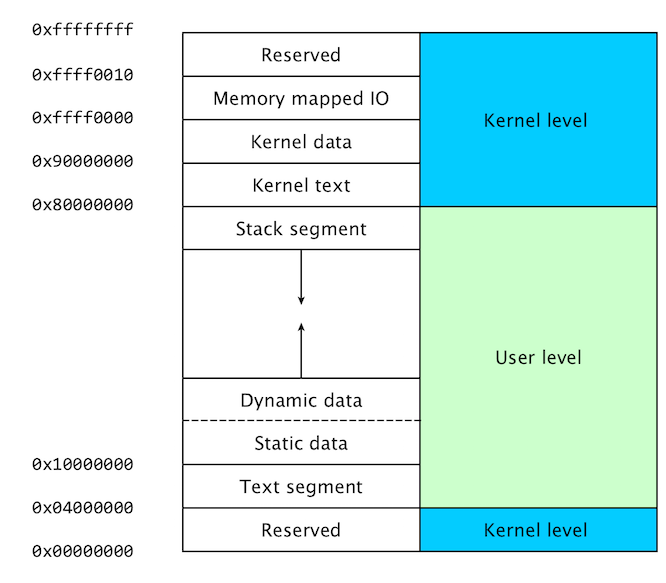
The purpose of the various memory segments:
Before you continue, you must clone the mips-examples repository.
From the terminal, navigate to a directory where you want the cloned directory to be created and execute the following command.
git clone https://github.com/os-assignments/mips-examples.gitNow you should see something similar to this written to the terminal.
Cloning into 'mips-examples'...
remote: Counting objects: 9, done.
remote: Compressing objects: 100% (7/7), done.
remote: Total 9 (delta 0), reused 9 (delta 0), pack-reused 0
Unpacking objects: 100% (9/9), done.
Checking connectivity... done.To get an overview of the cloned repository, use the tree command.
tree mips-examplesNow you should see a tree view of all files and directories in the
mips-examples directory.
mips-examples/
├── README.md
├── arrays.s
├── basics.s
├── hello.s
└── jump_and_branches.s

0 directories, 5 files
You are now ready to continue with the Introduction to MARS tutorial.
This is a short guide on how to launch and use Mars.
Mars is installed both on the department Windows system and the department Linux system.
Mars will run on any system (including Windows) as long as you have Java installed. If you prefer, you may download and install Mars on your private computer.
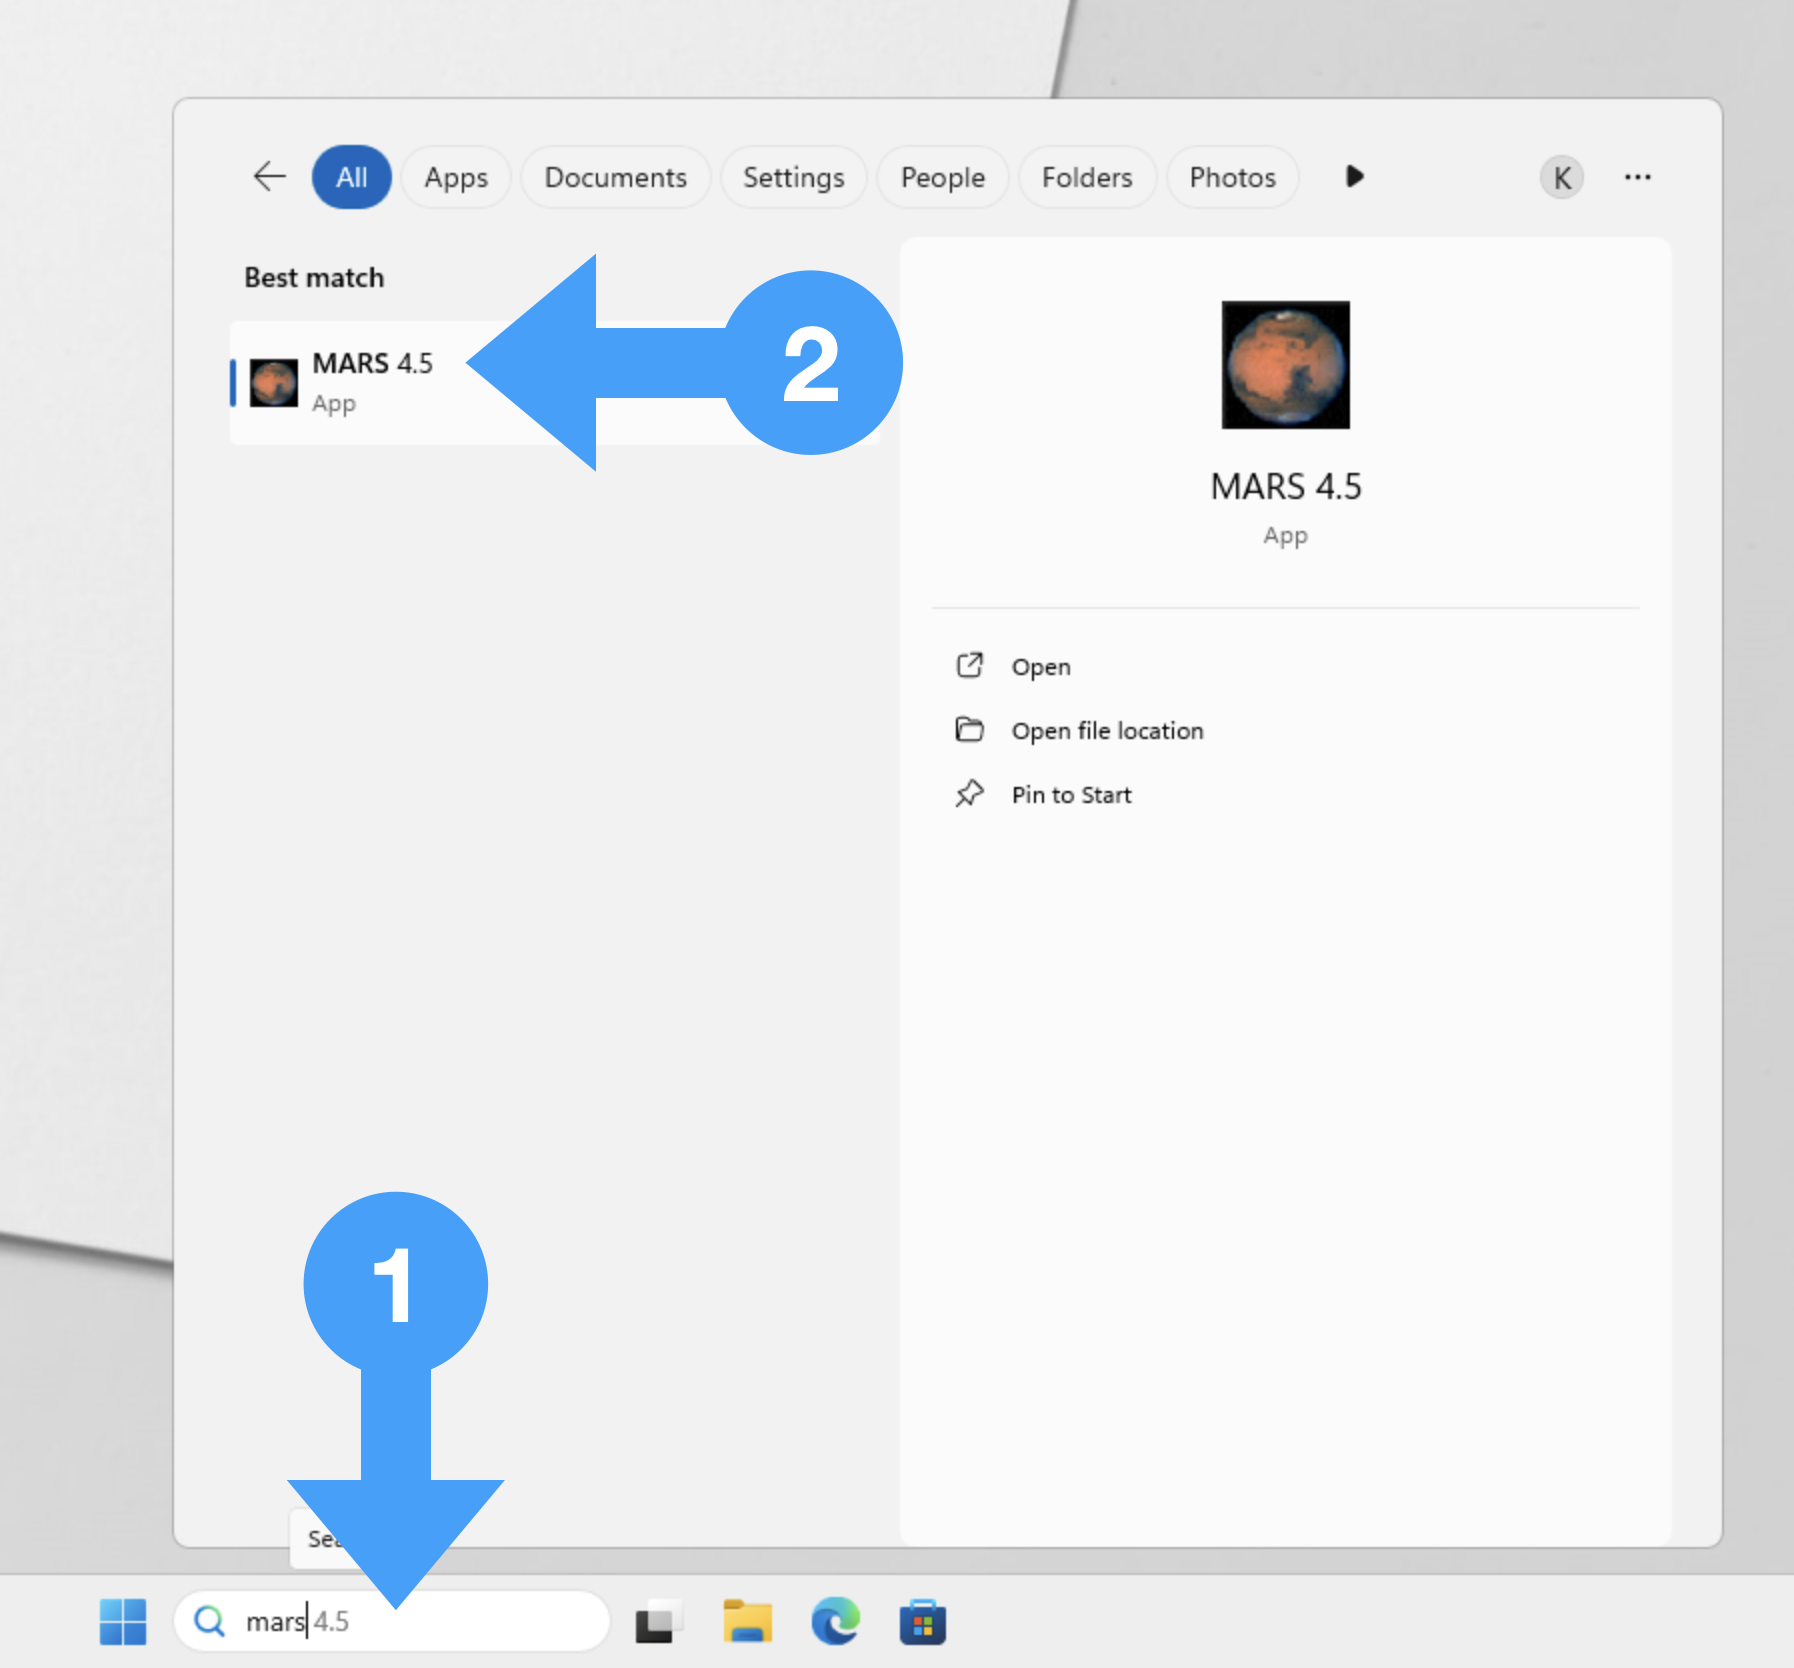
Log in in to Windows. Search for Mars in the taskbar (1) and click on Mars (2).
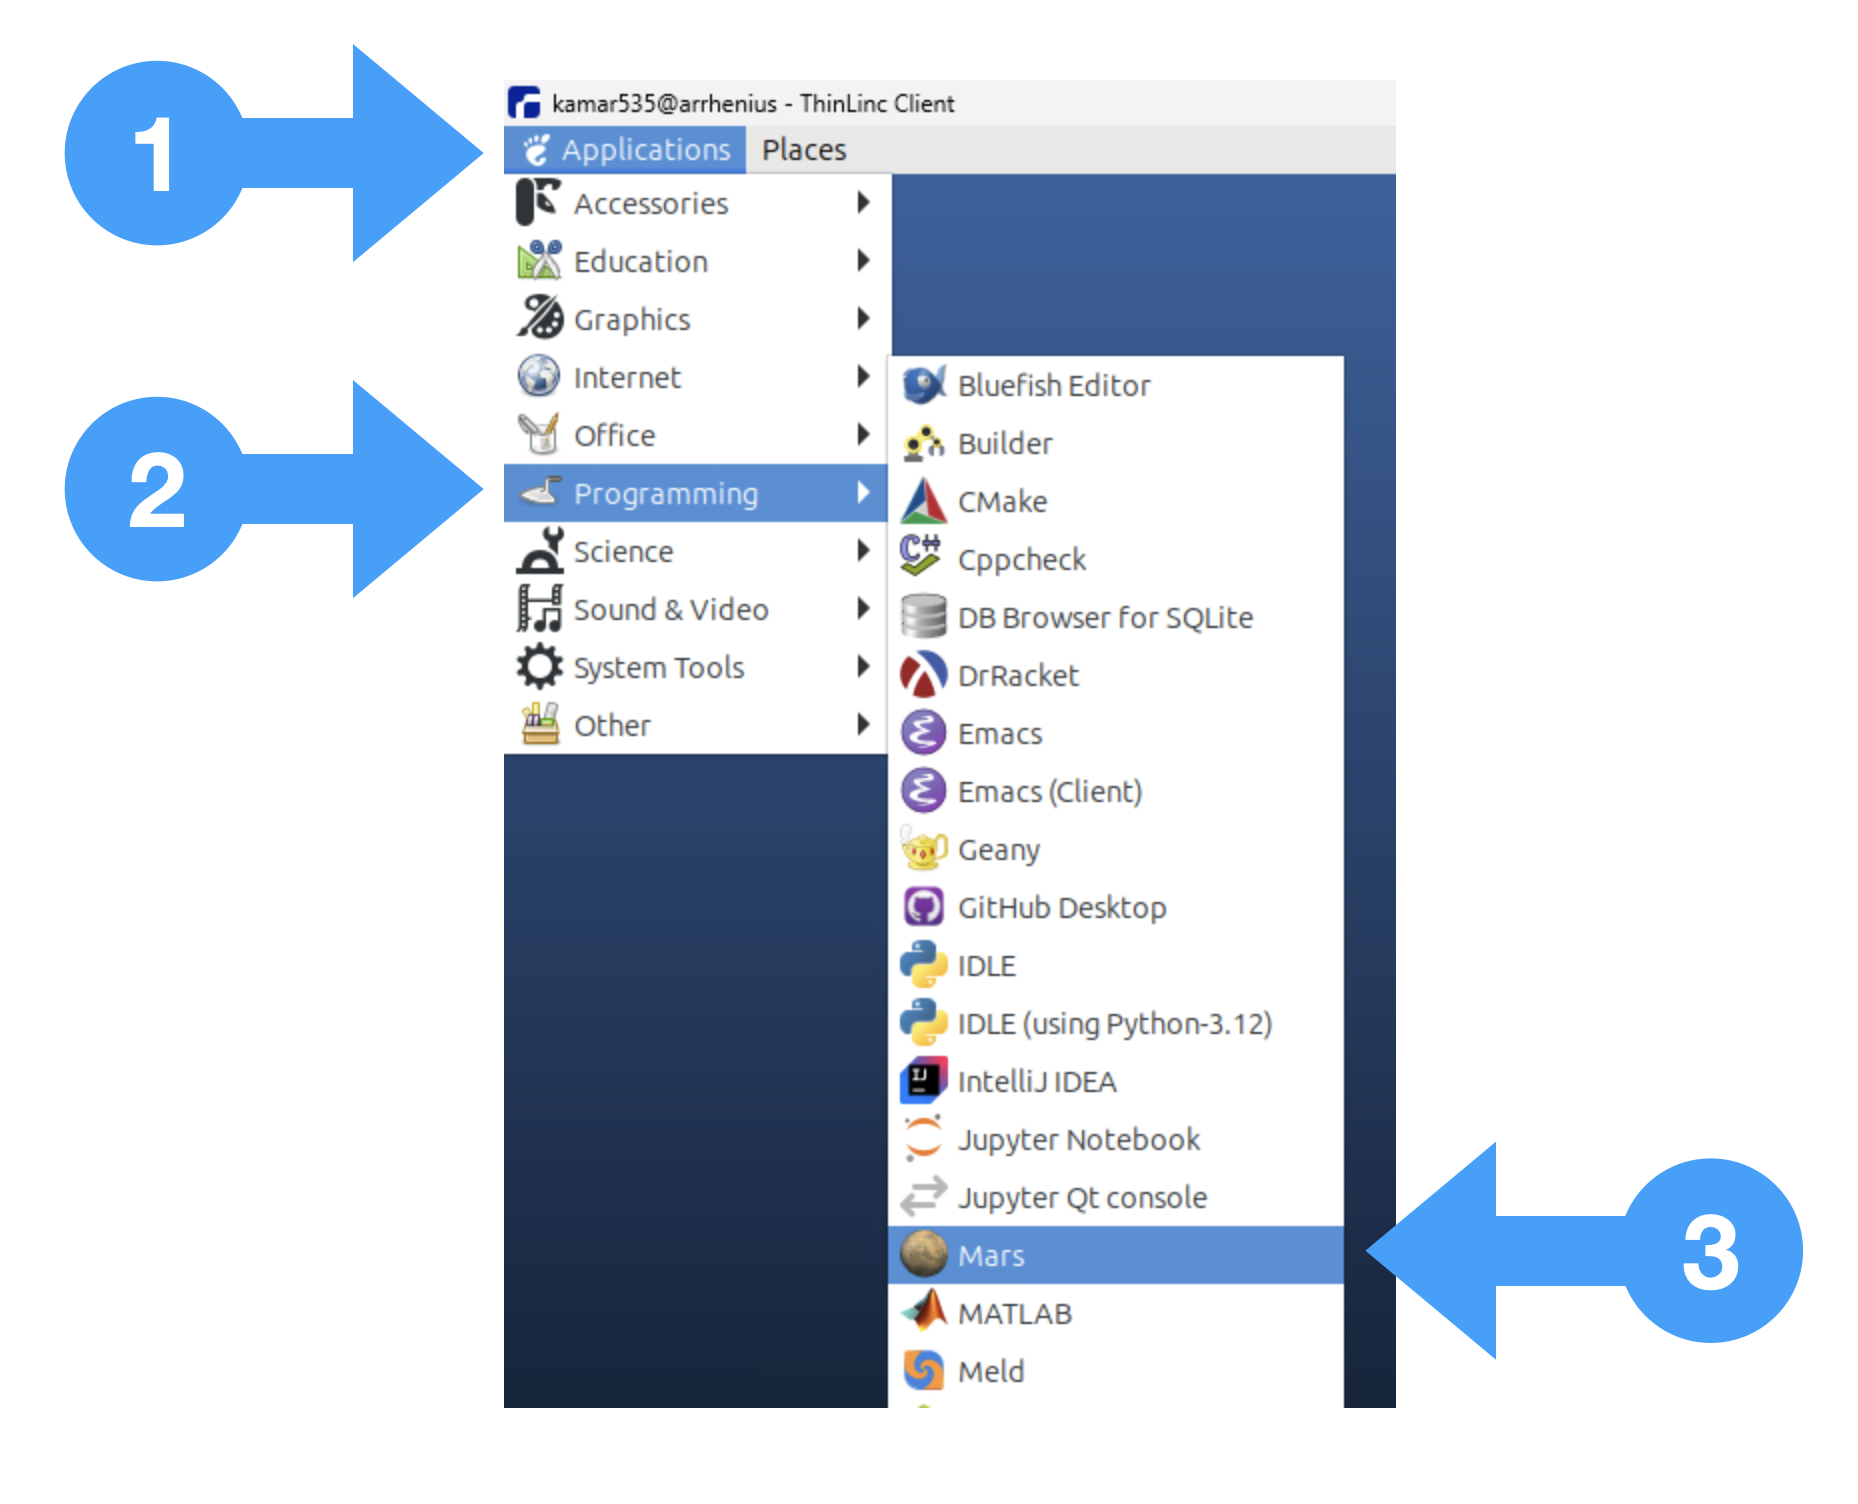
Log in to the department Linux system. From the Applications menu (1), select Programming (2) and then Mars (3).
When you successfully start Mars you should see something similar to this.
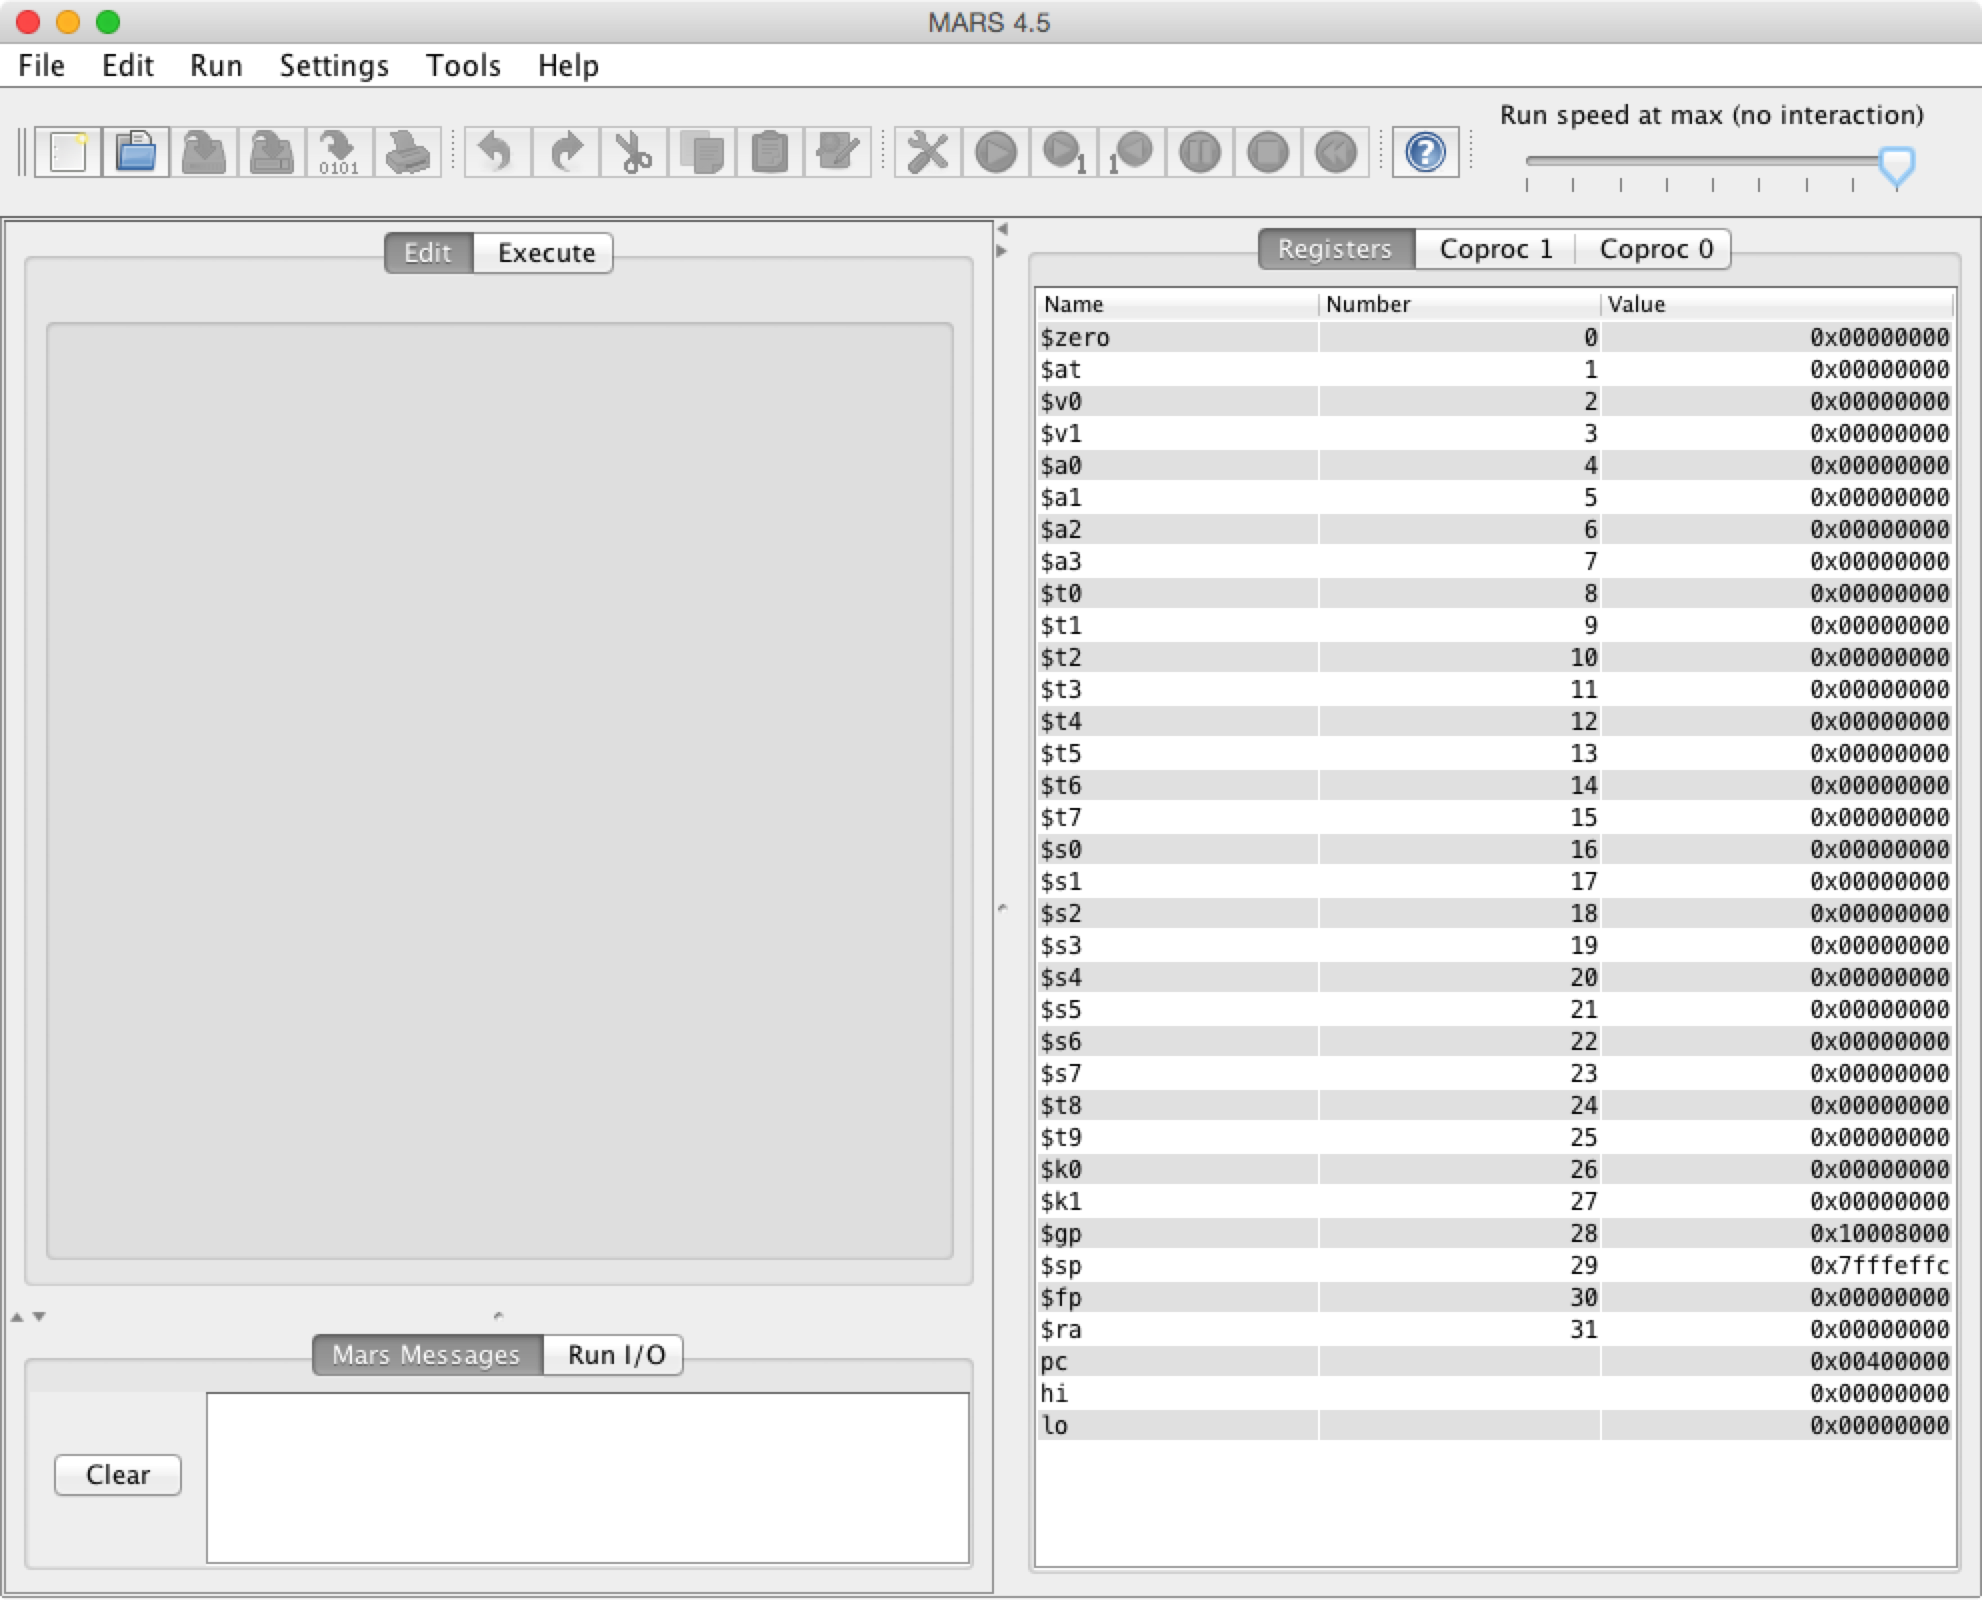
Mars is an Integrated Development Environment (IDE) for Mips Assembly Language Programming.
At the top you find the top level menu: File, Edit, Run, Settings, Tools and Help.
Under the top level menu a collection of icons show some of the most commonly used tools and operations. The most important of these controls are described in the below table.
| Control | Description |
|---|---|
| Load a file. | |
| Assemble the program in the Edit tab. | |
| Save the current file. | |
| Run the assembled program to completion (or breakpoint). | |
| Execute a single instruction (single-step). | |
| Undo the last instruction (single-step backwards). | |
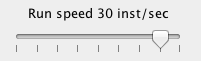
| Adjust the execution speed. |
In the middle left you find two tabs: Edit and Execute.
To the right you find the registers pane. Here the contents of all registers are shown. There are three register tabs:
In the lower left corner there are two tabs: Mars Messages and Run I/O.
The Mars Messages tab is used for displaying assembly or runtime errors and informational messages. You can click on assembly error messages to highlight and set focus on the corresponding line of code in the editor.
The Run I/O tab is used at runtime for displaying console output and entering console input as program execution progresses.
Before you continue you should already have cloned the mips-examples repository.
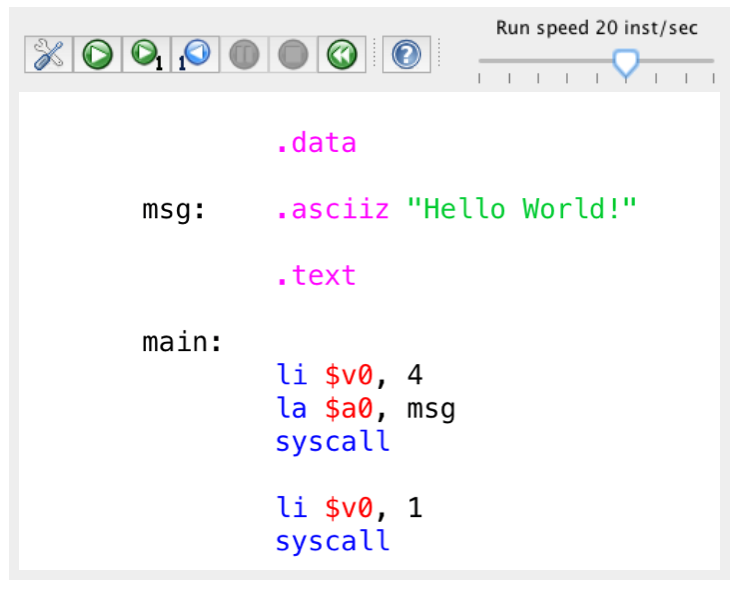
Among the examples programs in the misp-exmples repository you find hello.s.
Open the file hello.s in the Mars simulator by selecting Open from the File menu.
You should now see something similar to this.
After you loaded a program, the source code is available for edit in the Edit pane.
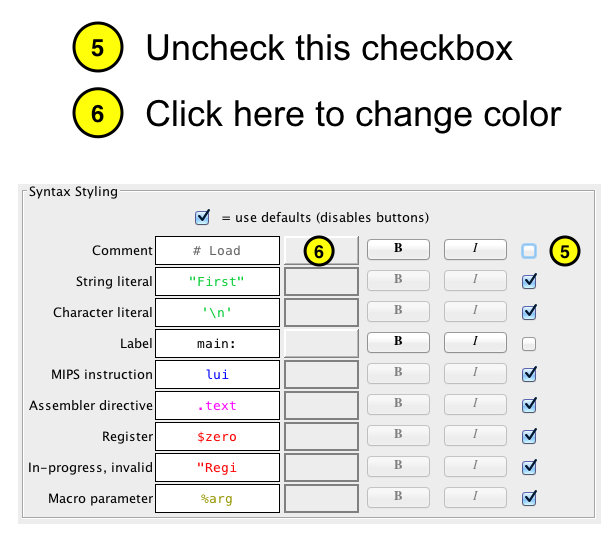
The default font colors might not be the most pleasing on your eyes. Especially the font color for comments may be hard to read. From the top menu, follow these steps to change the font colors:
To translate the Mips assembly source code to executable machine instructions an assembler is used.
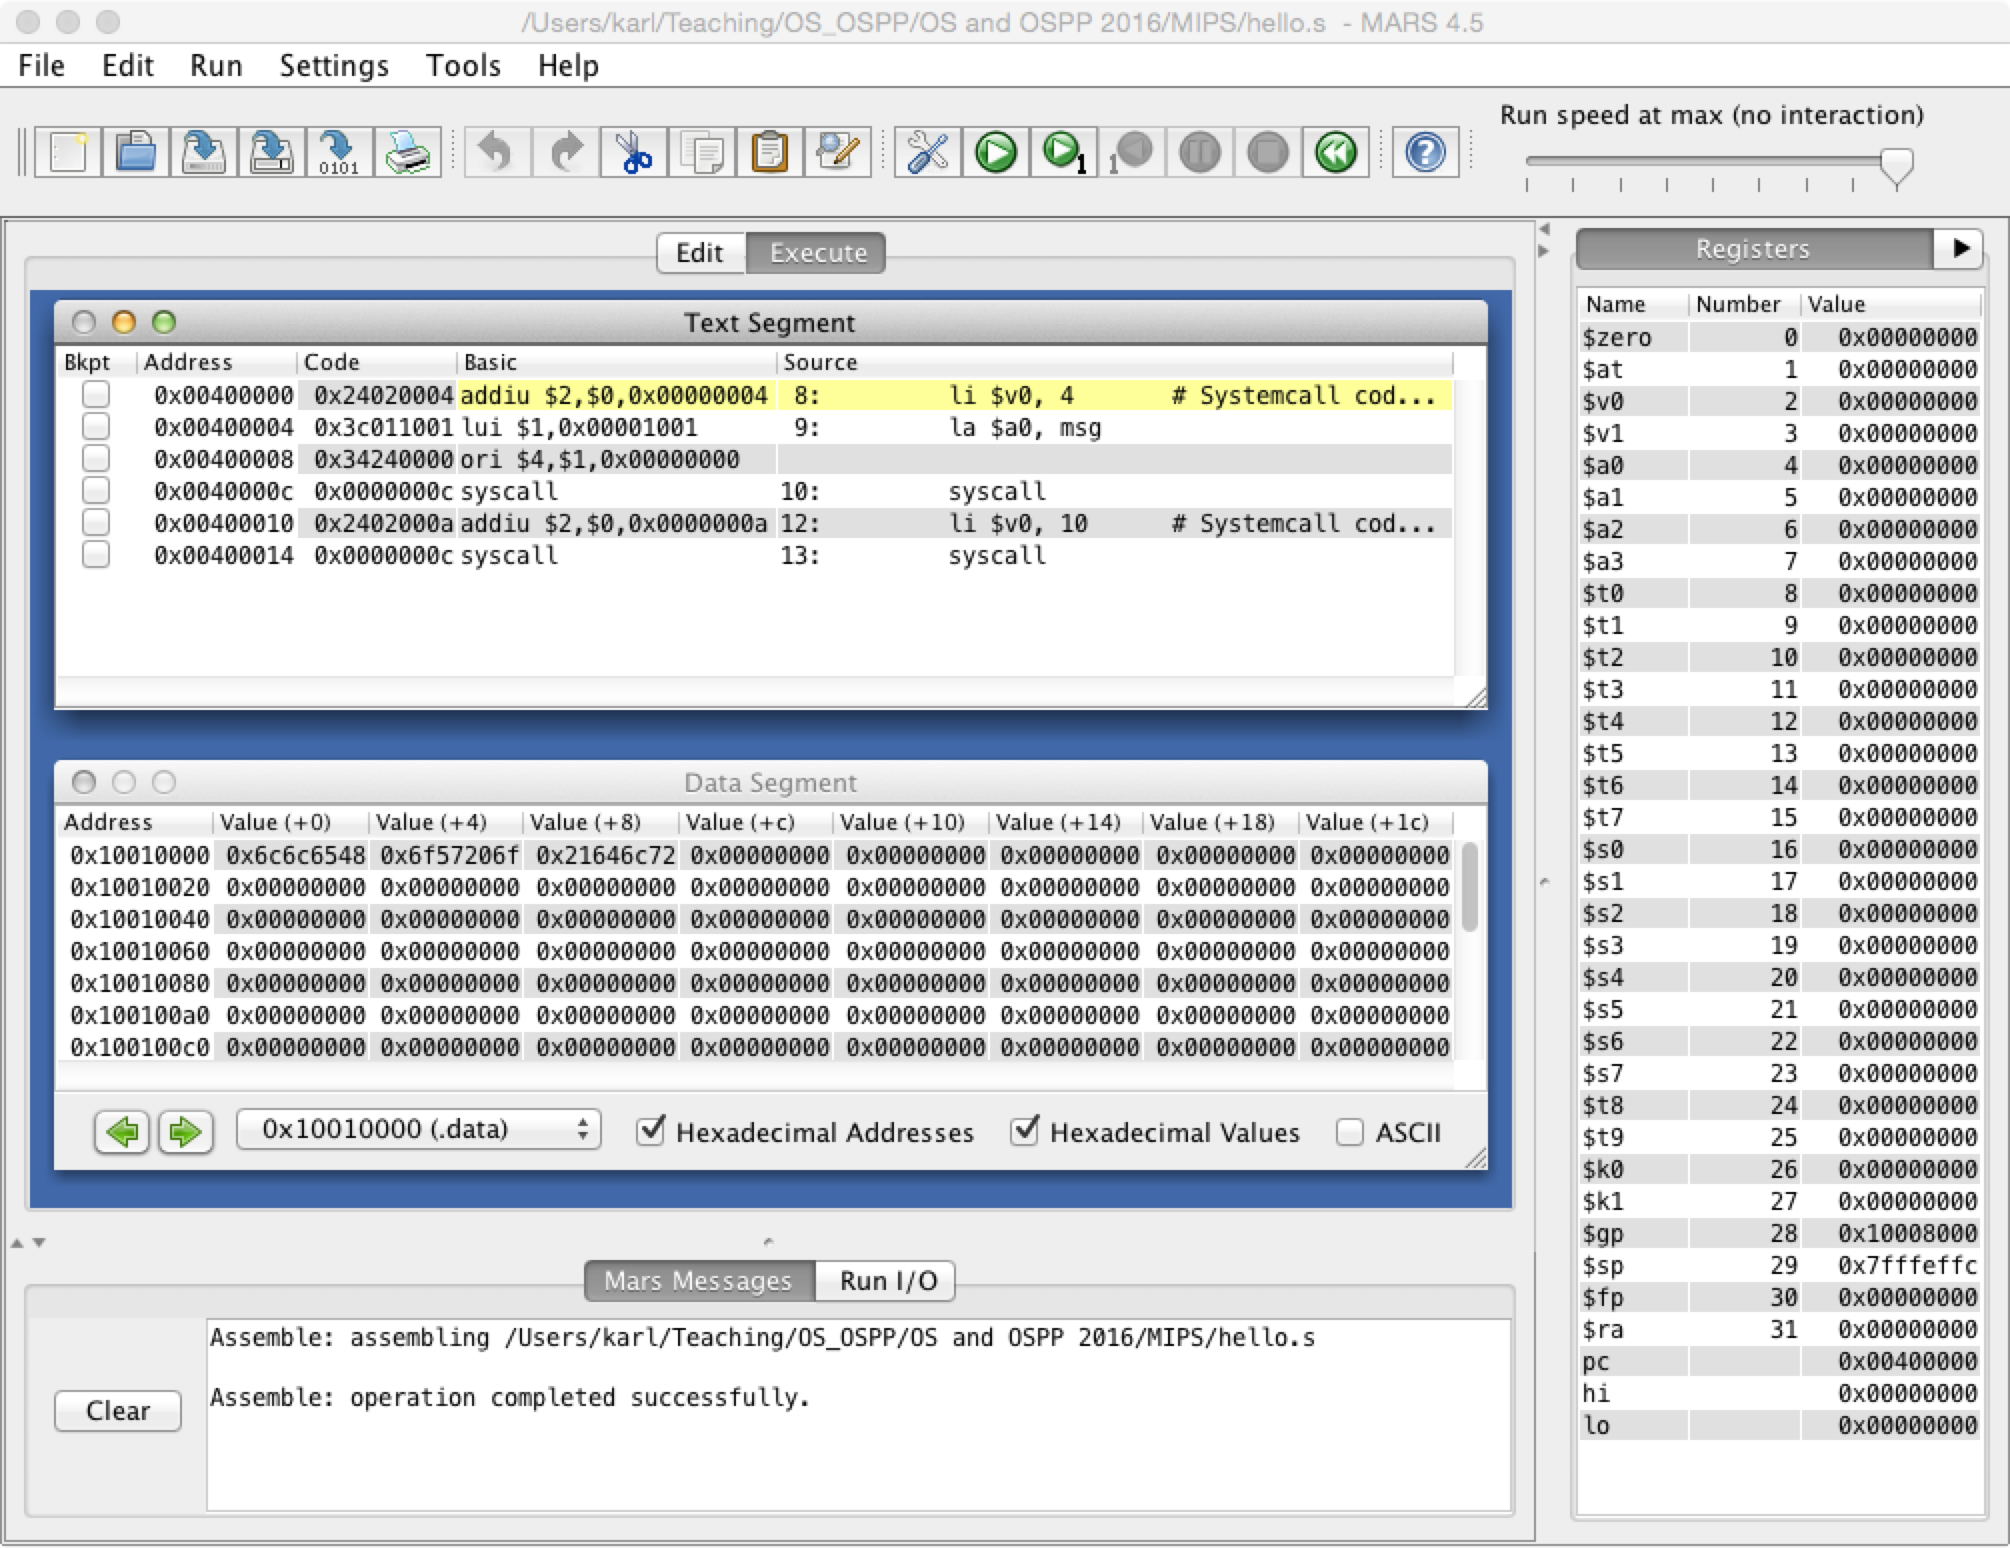
You should see something similar to the following in the Mars Messages display pane.
Assemble: assembling /path/to/file/hello.s

Assemble: operation completed successfully.After a successful assembly, the generated machine code instructions together with the source code instructions are shown in the Execute pane.
In the the Run I/O display window you should see the following output.
Hello World!
-- program is finished running --From the Settings menu, select Show Label Window (symbol table). Now, the following window should appear.
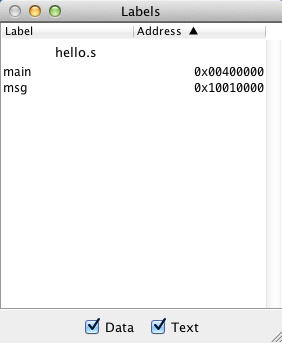
The symbol table shows the actual memory addresses of all labels. For example,
we see that the label main is a mnemonic for the memory address 0x00400000.
When you click on a label in the symbol table, the address of the label is
highlighted in the text or data segment.
In the symbol table, click on the label main.
Now the following row should be highlighted with a blue border in the Source
code column in the Text segment area in the Execute tab.
li $v0, 4 # Systemcall code print_strIf you look at the source code (press the Edit tab) you see that this is the
instruction following directly after the label main.
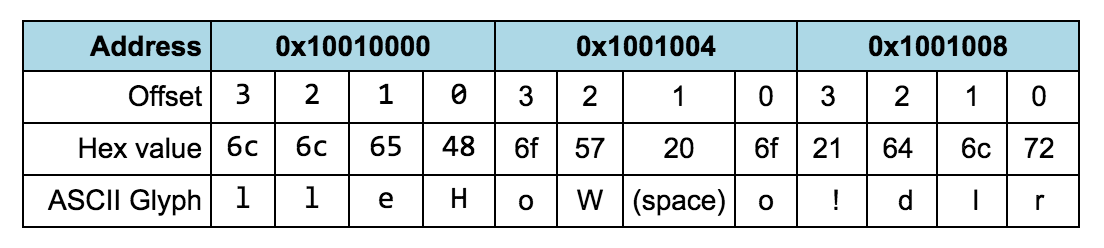
In the symbol table, click on the label msg.
Now address 0x10010000 should be highlighted with a blue border in the
Data Segment area in the Execute tab. The value store at this address is
0x6c6c6548.
If you study the data segment in detail you see that the string "Hello World!"
is stored byte for byte starting at address 0x10010000.
A very usefull feature of Mars is the ability to set breakpoints. Breakpoints together with single-stepping and backward single-stepping are very powerful when trying to understand or debugging a program.
Make sure to view the Execute tab. In the Text segment, click the Bkpt
(breakpoint) checkbox at address 0x00400000.

This will set a breakpoint on the syscall instruction.
The execution will now halt at the breakpoint (the syscall instruction).
You are now ready to continue and study the other example programs in the mips-examples repository.
To help you refresh your MIPS assembly skills you are strongly encouraged to study this small collection of example programs. Each program demonstrates a small collection of features of the MIPS assembly language.
Before you continue you should already have cloned the
mips-examples repository. If you have not done this already,
follow these instructions before you continue.
For each of the example files in the repository:
hello.s.data, .asciiz and .textli and la.print_string and exit.basics.s.data, .text, .space, .word and .asciiz.li, la, lw, add, addi, sw and move.print_string, print_int, print_char and exit.jump_and_branches.sif-then-else and infinite loop..data, .text, and .asciiz.j, blt and bge.arrays.ssubroutines.sjal (Jump And Link) and jr (Jump Register).$ra (Return Address)Mars - The Mips Assembler and Runtime Simulator
Assemblers, Linkers, and the SPIM Simulator
To study operating system concepts we will use the C programming language.
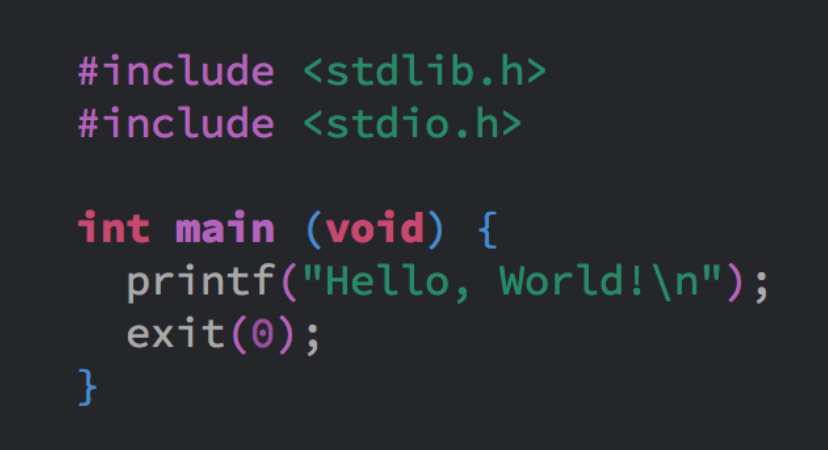
To study operating system concepts we will use the C programming language. To be able to understand the tutorials and solve the programming assignments you will need to be familiar with the following C programming concepts.
int and char.char).#define directive.printf() to print text to the terminal.if-then-else control structure.switch control structure.while loop.for loop.For the tutorials and programming assignments you will be required to use the C programming language. If you are new to C or need to refresh you knowledge there are plenty of resources available on the web. On this page you find a small collections of recommended links.
Before starting working on the tutorials and programming assignments you should make sure you are familiar with a few important C programming concepts. To test your C programming skills you are encouraged to solve the programming exercise described below.
Before you continue, you must clone the c-address-book repository. From the terminal, navigate to a directory where you want the cloned directory to be created and execute the following command.
git clone https://github.com/os-assignments/c-address-book.gitThe functions you need to implement are already declared in address_book.h.
You should also define the structures you will need in address_book.h. You are
free to create more functions if you want.
In the file address_book.c you should implement the functions declared in
adress_book.h.
The main() function, which is the entry point of your program will be in a
file called main.c.
Create a struct Person that will be used to represent a person. This struct should store:
It is up to you to choose the right datatypes for the fields of the structure.
Create a struct Address_book that will contain a pointer to an
array of struct Person, as well as the size of this array (the number
of persons in the address book).
Create a function print_person() that takes a pointer to a Person structure and
prints its details on the standard output.
A possible output for a person named John Doe, 42 years old, with the phone number +46712345678:
Name: John Doe
Age: 42
Phone number: +46712345678Create a function print_address_book() that takes a pointer to an address book
and prints its details on the standard output. Make use of the print_person()
function you just created.
A possible output for an address book containing two entries is:
==== Address book (2 entries) =====

Name: John Doe
Age: 42
Phone number: +46712345678

Name: Foo Bar
Age: 24
Phone number: +46787654321We will now read information from the user and store it into an address book.
Create a create_address_book() function. This function should:
Person of the correct size and store a pointer to it in the address book. You are not allowed to use Variable Length Arrays!Hints: Dynamic allocation is done with malloc(). Reading from the standard input can be done using scanf() or fgets().